
On my live Statamic production site, I was having trouble making MailGun work for sending emails.
Perhaps the extra steps I followed will help someone else who gets stuck, too.
My Statamic V3 set-up is as follows:
- PEAK (Statamic starter kit)
- MailGun
- Digital Ocean Droplet (referral link)
- Laravel Forge
- Git Hub repository
Mail settings are configured in Environment Files
In my case, the production site’s environment file (or .env file) is edited and accessed from logging into your account on https://forge.laravel.com. Select your site from the Sites drop-down and choose Environment.
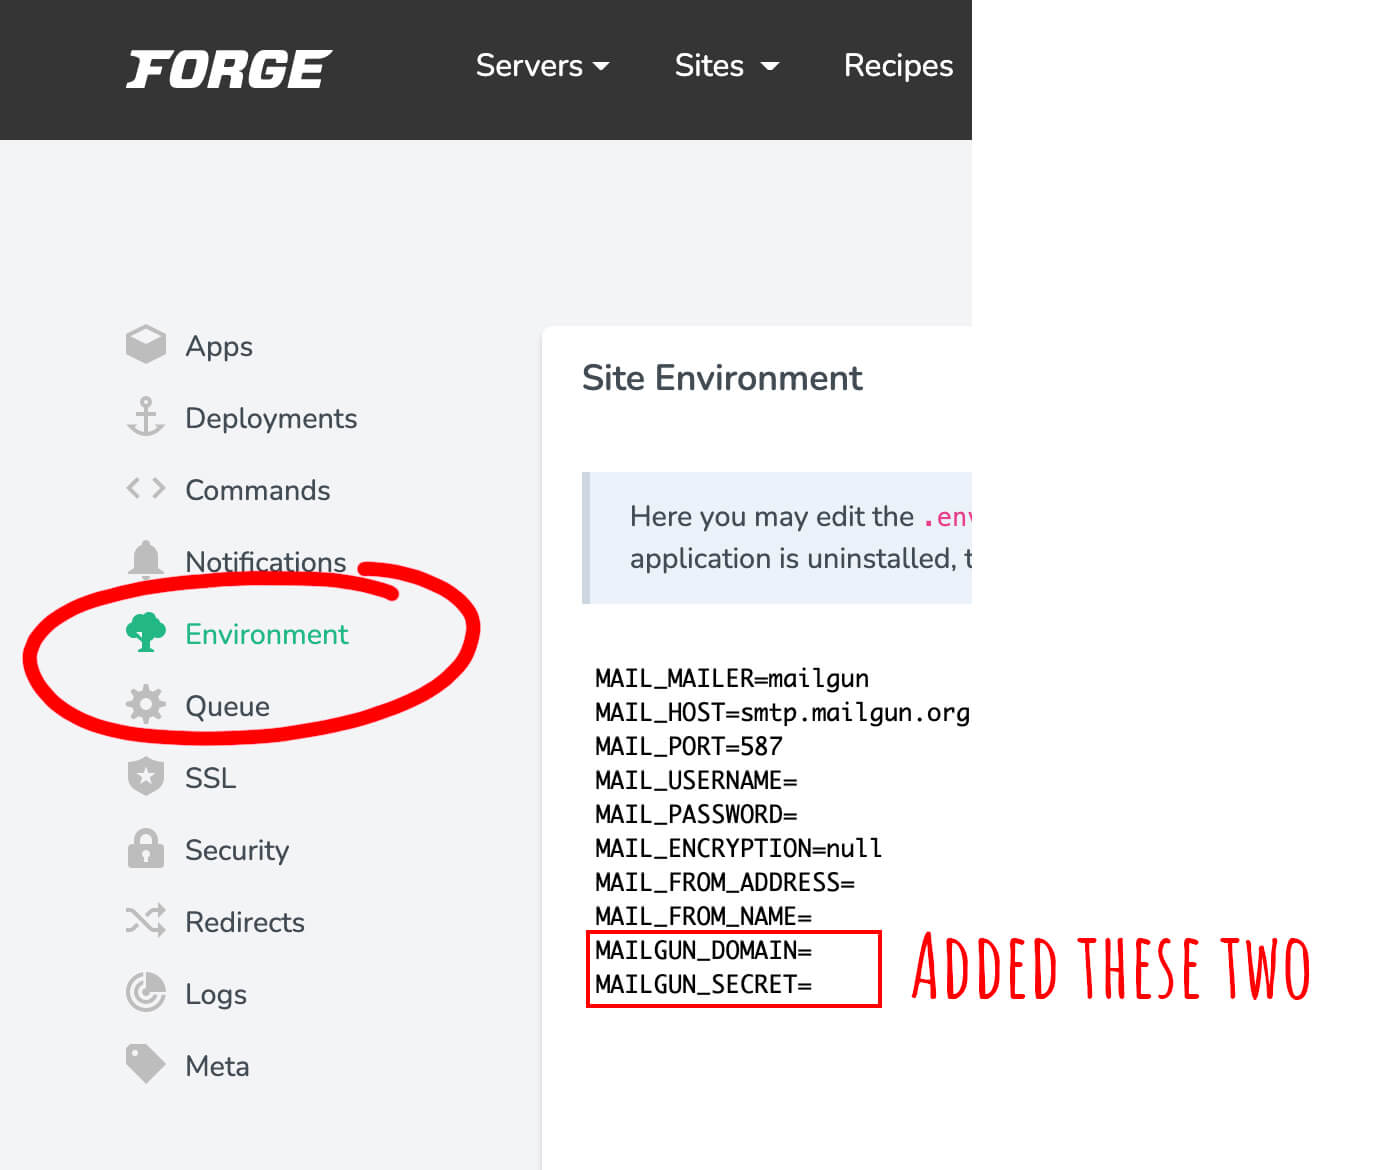
I had the first eight lines filled out correctly for MailGun, but I did not have the last two lines shown above in the red box included. After adding those two lines (Saved and Redeployed in Forge), my emails started working as expected.
- MAILGUN_DOMAIN=
- MAILGUN_SECRET=
The MAILGUN_SECRET is the Mailgun secret key and can be found by logging into MailGun and going to Settings -> API Keys -> API Security > Private API key (it is a lengthy key, use the eye icon to make it visible).
For Newbies: If you’re still new to .env files, one other thing to point out is that spaces can not be included in values. If you’re using a space, make sure to include quotes. For instance, in the MAIL_FROM_NAME, I made it:
MAIL_FROM_NAME='First Last'Other TroubleShooting
- You may want to check that you do not have your mail settings accidentally defined in duplicate.
- Double-check that Guzzler is added properly as a dependency via composer. Use the terminal command
composer require guzzlehttp/guzzleIf any of these three items are wrong, you may receive a 401 unauthorized error. You can read more about troubleshooting for this 401 error on this Laracasts forum post.
Additional Useful Docs for Configuring Mailgun in Statamic
Laravel.com’s Mail Driver PreRequisite Docs
Statamic Docs for Sending Mail
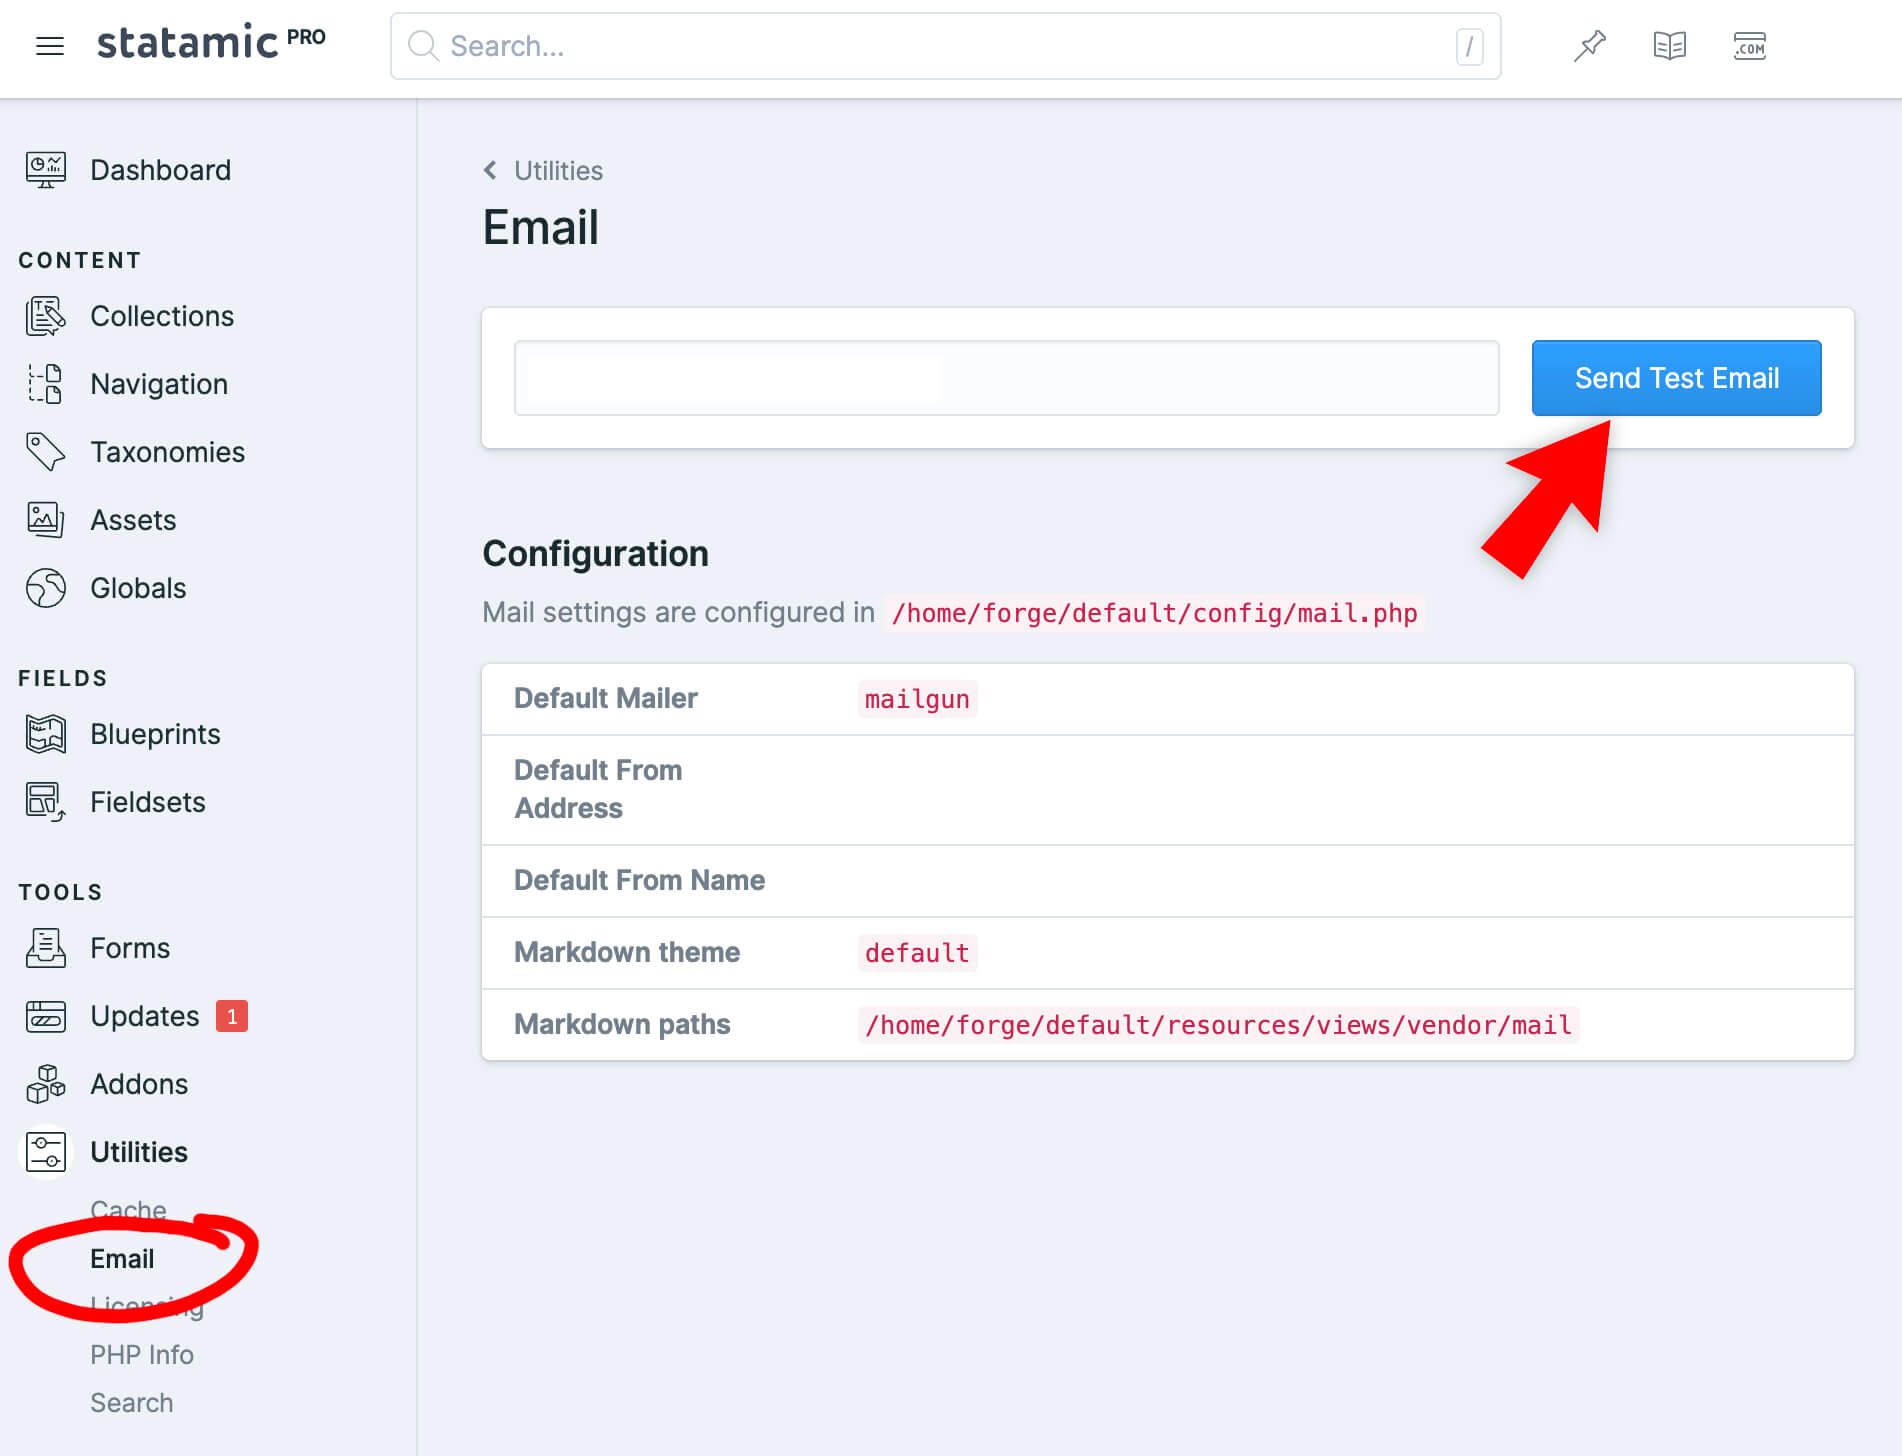
Don’t forget, Statamic has a great test feature for emails.
Within your Statamic Site’s Contol Panel, Go to Utilities -> Email and add your email address and click Send Test Email (blue button). Within seconds, you’ll receive an email from a correctly configured Mailgun/Statamic setup.
Looking for MailGun’s Free/Flex plan?
As of March 2022, the Flex plan is no longer advertised, but the Flex plan is still available, just a bit hidden. For new accounts, first, select the Free Trial. Then, before you free trial is over, select that you’d like to downgrade to remain on the Free/Flex plan option. Here are Mailgun’s details about the current Free and Flex Plan. Note: the Flex plan requires a credit card but bills a zero dollar invoice unless you go over the sending limit. This is an ideal plan for small clients; especially local clients using the Mailgun API for their transactional web site contact forms that receive minimal submissions a month.