Opening Adobe InDesign for the first time can feel incredibly overwhelming, but mastering the basics doesn’t have to be a headache. In this complete beginner’s guide, we use a work-in-progress poster layout to break down the essential workspace tools you actually need to know. From handling text boxes and styling fonts to perfectly scaling graphics without distorting them, these quick video walkthroughs will take you from confused beginner to confident designer in no time.
Explore the Basic Tools in InDesign
For InDesign beginners, here’s a video that explains how to use the basic tools you’ll need in your composition: text, shapes and graphics. The tutorial starts with an InDesign template that has a grid preconfigured. To follow-along, you can download the A4 12 Column Grid (zip file contains an .indd file).
A few more beginner tips for Designers in InDesign
In this step-by-step tutorial, we use a work-in-progress poster design to walk you through essential InDesign techniques that will instantly improve your layout workflow. You will learn how to easily adjust text box sizes—including how to spot that dreaded red plus sign (+) indicating overset text—and how to automatically adjust your frames using the “Fit frame to content” tool. We cover text styling secrets like setting up Character Styles, changing text colors via the Swatches panel, and using speed-clicking shortcuts to select words, lines, or entire paragraphs in seconds. On the graphic side, this video demonstrates the best ways to place photos and vector images, along with the precise shortcut (holding Command and Shift) to perfectly scale images from the corner without distorting them. Finally, we dive into workspace mastery by showing you how to navigate the Layers palette, find your active elements using the blue square indicator, change object order with the Arrange menu, lock layers to prevent accidental shifts, and use the zoom tool for flawless, high-precision designing.
The Beginner’s Quick-Start Checklist
Here are the 10 core skills covered in this video that you can practice on your very next project:
- Watch for the Red Plus (+): If a text box is too small, this tiny icon warns you that text is hidden.
- Fit Frame to Content: Use this shortcut button to instantly snap your text box to the exact size of your text.
- Speed Selection: Double-click to select a single word. Triple-click (or more) to grab the entire line or paragraph.
- Intro to Character Styles: Save time by saving your text formats so you can apply them across your document with a single click.
- Swatches Window: The safest, most professional place to reliably change and manage your document colors.
- The Blue Square: Look at your Layers palette—the blue square tells you exactly which layer your selected item lives on.
- Arrange Object Order: Use
Object > Arrange > Send to Back / Bring Forwardto stack your graphics correctly. - Locking Layers: Prevent items from accidentally shifting out of place while you work on background elements.
- Perfect Image Scaling: Never stretch your pictures! Always hold Command + Shift while dragging an image corner to keep it perfectly proportional.
- Zoom for Precision: Don’t guess alignment; zoom in close to ensure your layout lines up perfectly.
Bonus Guide: Why You Can’t Edit That! Master Pages & Links Explained
Answers to Common Questions New Designers Using InDesign Ask
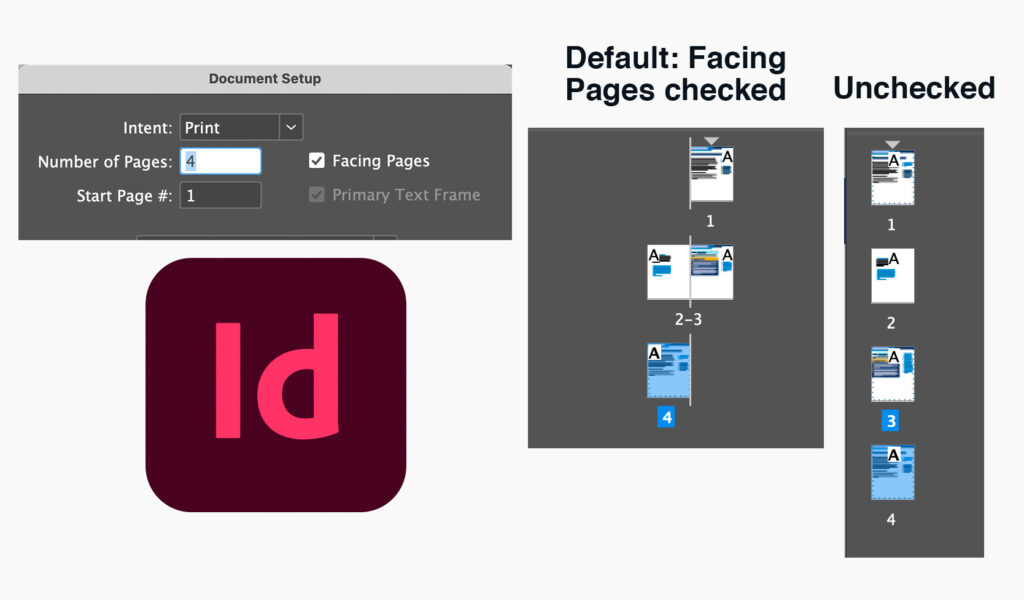
By default, InDesign’s new documents create facing-page spreads, meaning a cover and two pages next to each other. If you’re working on a multi-page single document, you can change your document set-ups to be single pages. Go to File > Document Setup and check or uncheck the “Facing Pages” option.