
Saving an Adobe Premiere video project to a movable folder is important when you want to share your video project with another team member or when you simply want to safely archive your project.
Losing connections between attached and link project assets is a common problem for designers working in Adobe Premiere. This is also a risk when sharing and archiving your Adobe Premiere video project. Premiere Pro’s built-in Project Manager tool helps you ensure your project assets are included in your savable and movable folder.
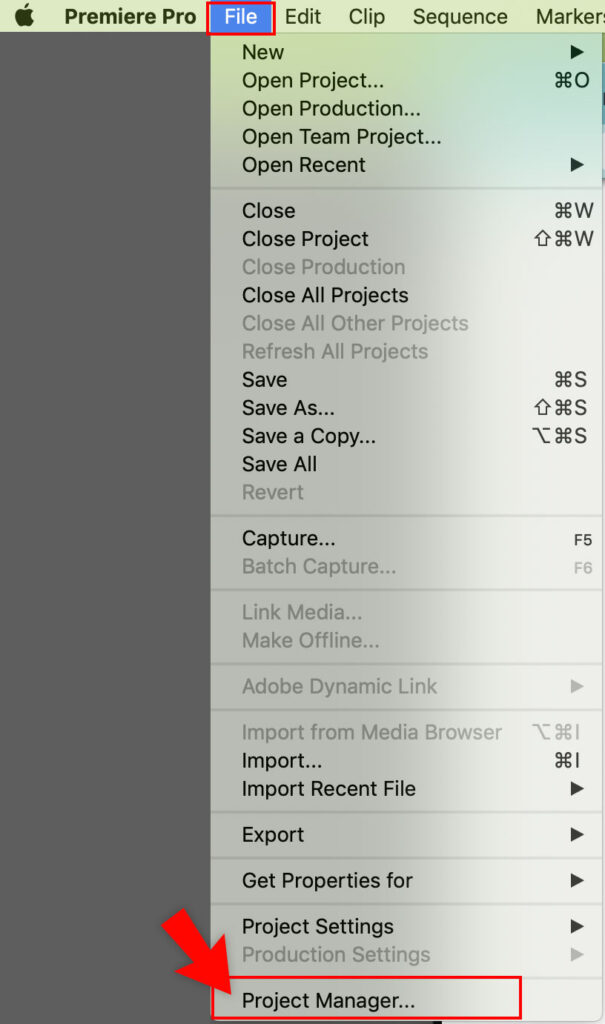
Access this tool in Premiere Pro via the File Menu Item called Project Manager.
The Project Manager will open and provide you options for collecting your project’s files.
- Select your project’s sequences
- Select the Destination Path location for where to save your new folder
- Under Resulting Project, choose Collect Files and Copy to New Location
- Under option, uncheck everything except Exclude Unused Clips and Include Audio Conform Files
- Finally, click the OK button

The result of clicking OK is the creation of a new folder in your selected destination. The name of your new folder will be your project’s name preceded by Copied_, so it reads as Copied_mycoolproject.
The files inside your new project folder will vary but should include:
- Adobe Premiere file (ends in extension .prproj)
- Your projects assets (video files, images, logos, etc)
- Asset metadata files (ends in extension .xmp)
- Media Cache folder
You can use this new COPIED folder to store/archive your recent video project (even deleting the original files from your computer or device) and as an easy way to share your project with others.
Tip: I recommend opening and testing your newly saved archive project folder before deleting the original.
I follow these steps often while working on a video project as an efficient way to move and organize my files onto my hard drive’s client folders and double-check that I’m not excluding or missing any essential assets or resources in my folders. Adobe Premiere’s Project Manager feature is similar to Adobe InDesign‘s Package functionality.
Tip: If you want to delete unused files before archiving, go to Edit > Remove Unused. This will clear out and simplify your project.
If you’re using Adobe Premiere for video editing, you may also like our other posts with tips, such as, How to get your grayed-out rulers to show up.
Happy Video Editing!
As a designer, archiving projects for future accessibility is crucial. If you work as a web designer or programmer, you may be interested in how I take archives of websites for before and after design documentation. There’s also this post that summarizes the ways I archive all types of design projects.