Have you ever seen a dynamic marketing email, like a promotional offer from a major retail brand, and wondered how they created that smooth, looping 3D overlap animation?
By combining simple layer masking techniques, vector tools, and Photoshop’s frame animation timeline, you can transform flat stock photography into high-converting animated assets.
Our copycat inspiration for the day?
A Dick’s Sporting Goods promotional rewards email.

https://designertofullstack.com/wp-content/uploads/2026/09/dicks-copycat-animated-gif.gif
Watch how to recreate this style and animated GIF
Rather read? Here is a step-by-step breakdown of how to create a 3D wrapping effect for a rectangle and a person, and turn it into an animated GIF in Photoshop.
Step 1: Inspect and Prepare Your Workspace
Start by downloading your reference graphics and opening them directly in Photoshop.
Sample/Demo Animated GIF, Baseball player, and Soccer player
- Analyze the Asset: Inspect the individual layers and frame delays to see how the original animation was constructed.
- Set Up Canvas & Rulers: Press Command + R (Mac) or Control + R (Windows) to pull up your rulers. Drag guide lines from the ruler to align your artwork.
- Import Stock Photography: Bring your subject image into the canvas. Scale down from the corner handles while holding Shift (or using the chain link icon) to avoid distorting proportions.
Step 2: Isolate the Subject with Layer Masks
To make vector shapes weave behind and in front of your subject, you need a clean separation between the subject and the background.
- Duplicate your base photo layer, so you have one layer dedicated to the isolated subject and another for the complete background.
- Select your top image layer and click Select > Subject. Photoshop will generate “marching ants” around your subject.
- Click the Add Layer Mask icon at the bottom of the Layers panel.
- Create a new temporary high-contrast solid-color fill layer beneath your masked subject layer to verify that your edges are clean.
Step 3: Draw and Position the Vector Frame
Use the Rectangle Tool to build the surrounding element:
- Set Fill to None (the red diagonal line) and select a high-visibility Stroke color with a thick pixel width.
- Pull the live corner widgets inward to apply rounded corners.
- Hover near a corner handle to activate the Transform Rotate Tool and angle the frame across your subject.
Step 4: Create the 3D Wrapping Effect
To make the frame look like it passes behind the subject’s head but in front of their body, manipulate the subject’s layer mask:
- Rasterize the Frame: Right-click the rectangle layer and select Rasterize Layer to load its pixel boundary.
- Load Selection: Hold Command / Control and click the thumbnail of the rasterized rectangle to load its exact pixel outline.
- Paint the Mask: Select the subject layer’s mask. Using a hard-edged Brush Tool set to Black, paint over the areas where the frame should pass behind the subject. Because black hides mask areas and your selection is active, you won’t accidentally paint outside the lines.
- Detailing with Lasso: Use the Magnetic Lasso Tool around smaller elements (like a ball or outstretched hand) and fill those areas with White on the layer mask to pull them back into the foreground.
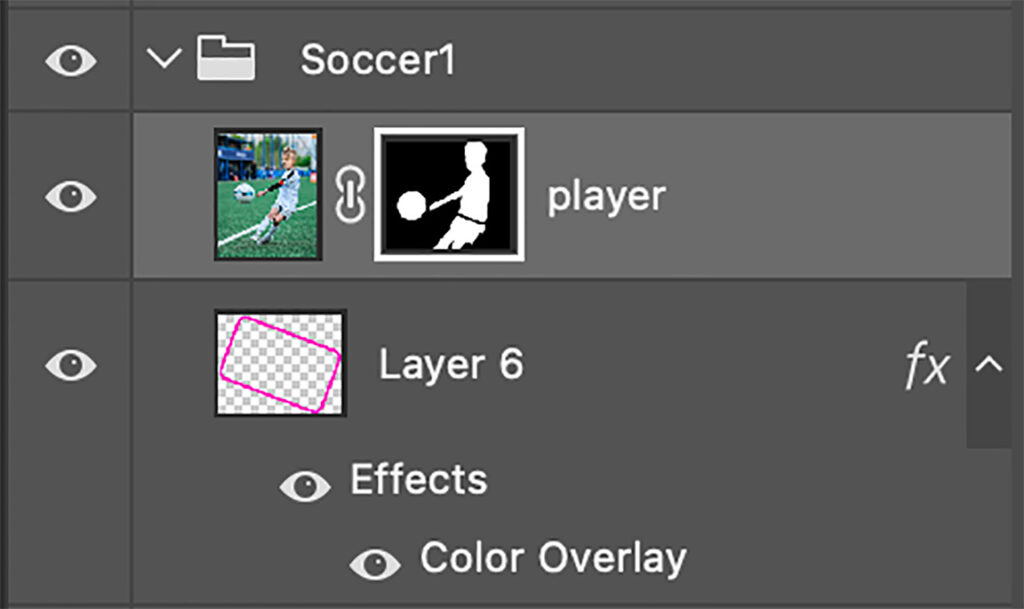
Step 5: Duplicate and Animate the Timeline
Once your first subject is set up inside the frame, repeat the masking workflow for your second subject to keep the vector frame consistent. When you have multiple subjects ready to go, move forward with the following:
- Group each complete subject into its own folder (e.g.,
Subject_01andSubject_02). - Open the Timeline window via Window > Timeline and click Create Frame Animation.
- Create Frame 1 and toggle visibility to show
Subject_01. - Create Frame 2 and toggle visibility to show
Subject_02. - Set the frame delay timing (e.g., 1.0 second) and change the looping option to Forever.
Step 6: Export for Web
Go to File > Export > Save for Web (Legacy). Choose GIF 128 Dithered, set your looping options to Forever, click Save, and test your file by dragging the finished .gif directly into any web browser window.