

Have you ever created a vector illustration or logo in Adobe Illustrator, went over to Adobe InDesign, selected File > Place, and realized half of your design was missing?
Even if you use InDesign’s Selection Tool to double-click and resize the frame, the rest of the image just isn’t there.
The good news? Your design isn’t lost. This is almost always an Artboard boundary issue in Illustrator. Here is how to fix it in under two minutes.
Summary Checklist
- Artwork cut off? Check the Artboard bounds in Illustrator.
- Adjust & Save: Use the Artboard Tool (
Shift + O) to cover all assets. - Update Link: Double-click the yellow modified link warning in InDesign to refresh.
Watch InDesign and Illustrator Video Tutorial
Step-by-Step Video Walkthrough
Here is a breakdown of what’s happening behind the scenes and how to resolve it in your workflow:
1. The Problem: Scaling the Frame Doesn’t Work
When you place an Illustrator (.ai) file into an InDesign rectangle frame, InDesign locks onto the bounds of the artboard, not the loose vector elements sitting outside of it. Even if you double-click the graphic in InDesign, scale it down, or attempt to expand the frame boundary, the missing parts of your image won’t show up.
2. Fix the Artboard Boundaries in Illustrator
To show the rest of your artwork, open the original file in Adobe Illustrator:
- Check the Artboard Bounds: Select the Artboard Tool (
Shift + O). You’ll see the active artboard boundary box, which is likely slicing right through your artwork. - Option A (Auto-Generate New Artboard): With the Artboard Tool active, click directly on the outer edge of your illustration. Illustrator will automatically generate a new artboard perfectly fitted to the entire object. Click and delete any extra artboards you no longer need.
- Option B (Manual Drag): Alternatively, deselect everything, select the Artboard Tool, and manually click and drag the boundary handles outward until every vector element sits comfortably inside.
Once your artwork is fully enclosed, save your file (Cmd + S / Ctrl + S).
3. Refresh the Link in InDesign
Switch back over to Adobe InDesign. Because InDesign links directly to the original file path on your computer (rather than embedding clipboard data), it will immediately flag that the file has changed:
- Look for the yellow exclamation mark / modified link warning icon on the frame in your layout or in the Links Panel.
- Double-click the warning icon to update the link.
InDesign will immediately reload the file, revealing the complete, uncropped artwork. You can now scale and frame your design proportionally!
How to Access InDesign’s “Show Import Options”
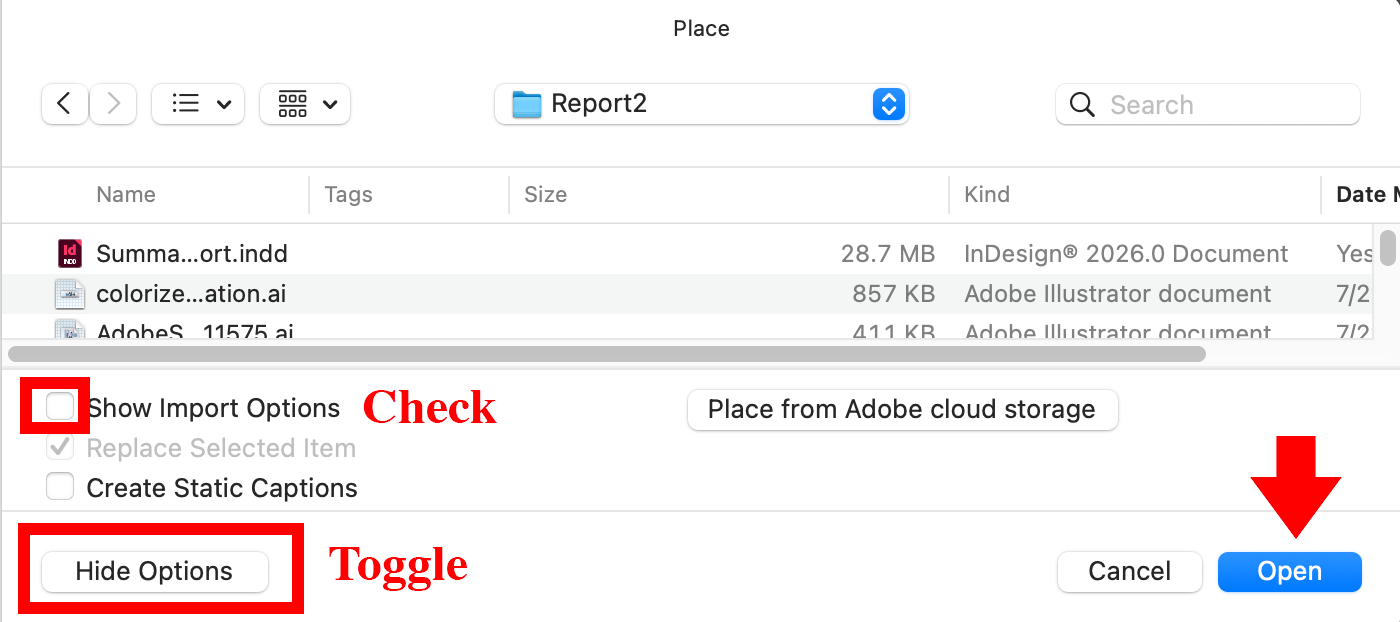
If you ever need to view page previews, select specific artboards, or adjust crop boundaries when importing a file, you can bring up the advanced import settings in InDesign:
- Go to File > Place (
Cmd + Don Mac /Ctrl + Don Windows). - Select your Illustrator (
.ai) file in the dialog window. - Check the Show Import Options box at the bottom left.
- Tip: You can also click the Options toggle button (or Show Options / Hide Options) in the file picker to expand these settings.
- Click Open.
Note: While the Place dialog allows you to change the Crop to: dropdown, remember that it will not uncover artwork extending past the artboard saved inside your
.aifile. If your vector art is trimmed at the artboard line, you’ll still need to update the artboard size in Illustrator directly.
FAQ & Troubleshooting Guide
When you import an .ai file into InDesign, InDesign defaults to placing the content defined by the Illustrator Artboard, not necessarily all the vector objects on your canvas. If parts of your design sit outside the artboard boundary, InDesign will crop them out.
To resize your artboard so it encloses your entire artwork:
- Open the file in Adobe Illustrator.
- Select the Artboard Tool (
Shift + O). - Option A (Auto-fit): Double-click or click directly on the outer edge of your artwork. Illustrator will automatically generate or snap a new artboard around the full bounds of the image. Delete any leftover extra artboards by clicking Delete on your keyboard.
- Option B (Manual Adjustment): Click and drag the handles/edges of your existing artboard outward until all elements sit inside its boundaries.
- Save your Illustrator file (
Cmd+S/Ctrl+S).
Since InDesign links directly to your original .ai file (unless you’ve set it to embed):
- Switch back to InDesign.
- Look at your Links Panel (or directly on the frame in your layout). You will see a yellow exclamation point / modified link warning icon.
- Double-click the warning icon to update the link.
- Your layout will instantly update to show the complete artwork! You can now scale and frame your design proportionally.
No. It doesn’t matter which option is selected under InDesign’s Crop to: import settings—including:
- Bounding Box (Visible Layers Only)
- Bounding Box (All Layers)
- Art
- Crop
- Trim
- Bleed
- Media
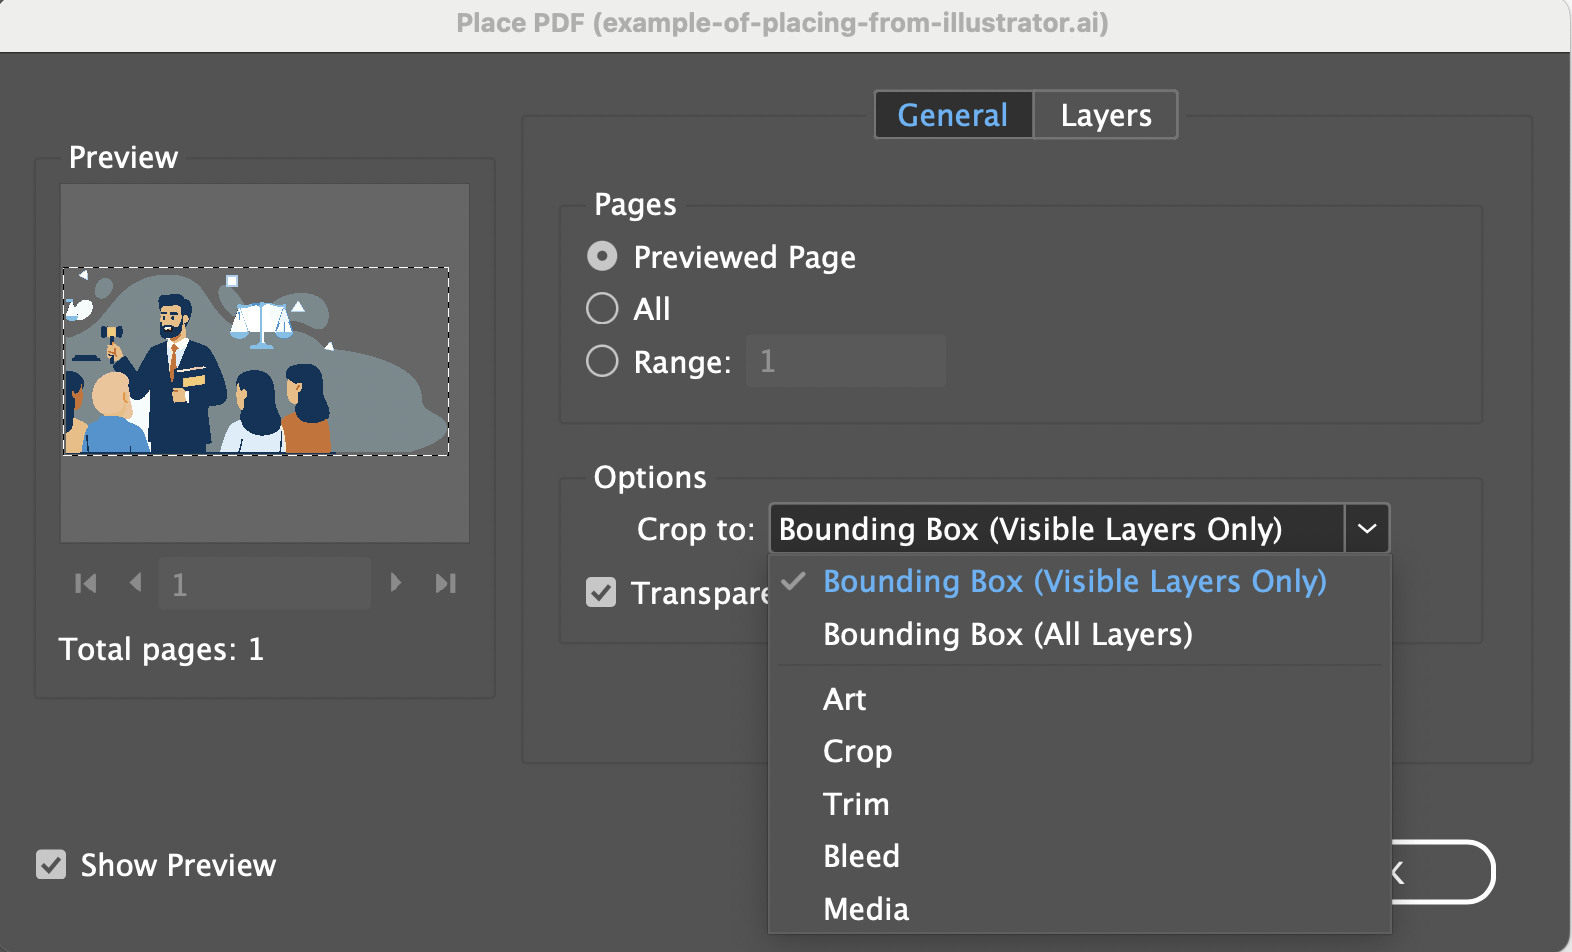
InDesign always references the artboard boundaries saved inside the .ai file. To reveal missing or cropped portions of your design, you must adjust and save the artboard directly inside Illustrator.


