

Digital design doesn’t have to feel flat, sterile, or algorithm-generated. An expressive way to add character to your visual work is to recreate the vibrant, imperfect aesthetic of traditional printmaking, such as Risograph and screen printing.
In this tutorial, we will take ordinary, free stock images and turn them into a textured, retro digital collage using smart objects, gradient maps, and layer blend modes. Best of all, this workflow is 100% non-destructive, meaning you can remix the same assets into completely new layouts in seconds.
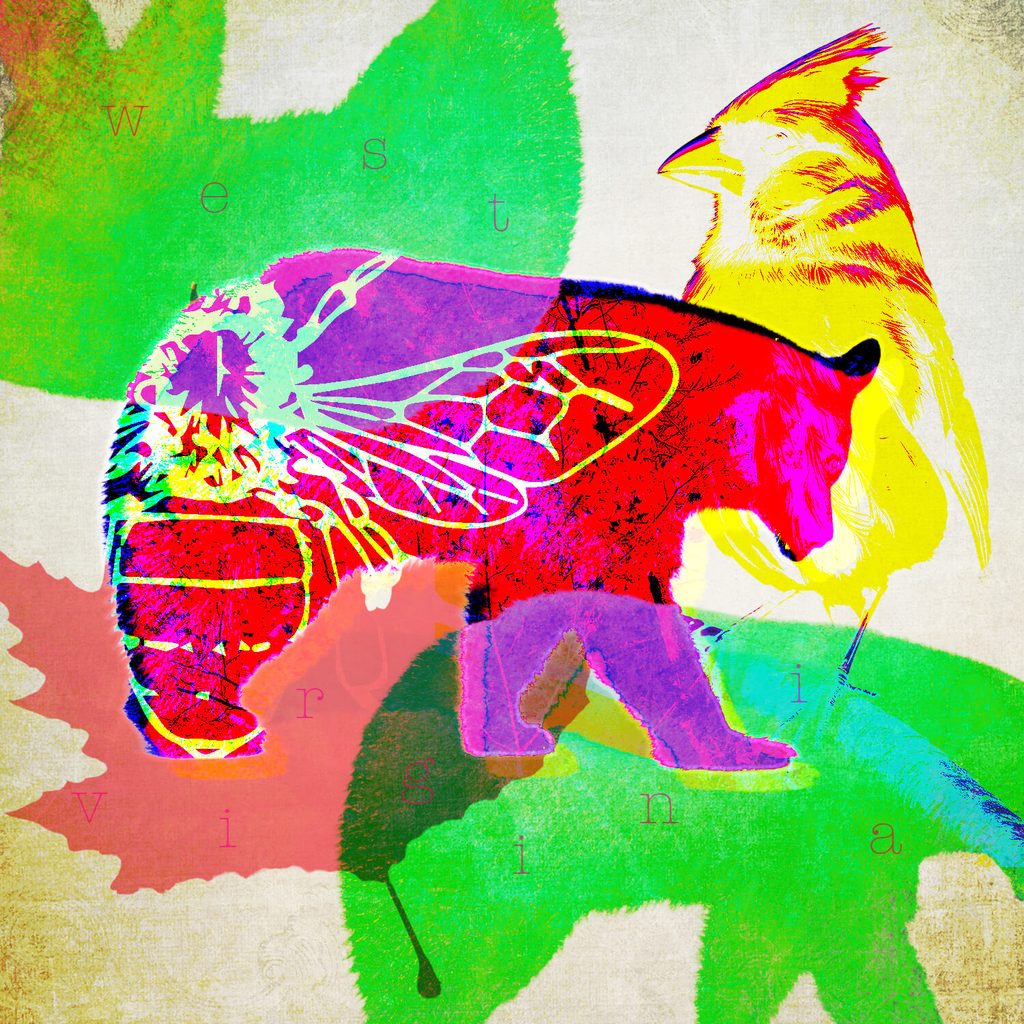
What is the Risotone Look?
Risograph printing uses physical ink drums (often limited to one or two colors per pass) to print spot colors onto textured paper. Because the inks are translucent, overlapping shapes produce rich secondary hues, subtle misregistrations, and grainy halftone transitions.
By choosing high-contrast values and applying Gradient Maps to overlapping layers, Photoshop can mimic the feel of screen-printed, physical ink…without requiring external plugins or actions.
1. Canvas Setup & Base Subject
- Set Up the Document: Start with a square format (e.g., 8.5×8.5 inches at 300 DPI for high-res print work).
- Place as a Smart Object: Bring in your primary subject (such as a black bear on a clean background). Placed images automatically import as Smart Objects, preserving the source resolution and allowing you to stack Smart Filters non-destructively.
- Punch Up the Contrast: Navigate to Image > Adjustments > Levels (or apply an adjustment layer). Push the shadow and highlight sliders closer together to establish a stark, dramatic tonal separation. Gradient maps read underlying brightness, so crisp blacks and bright whites yield the cleanest color separation later.
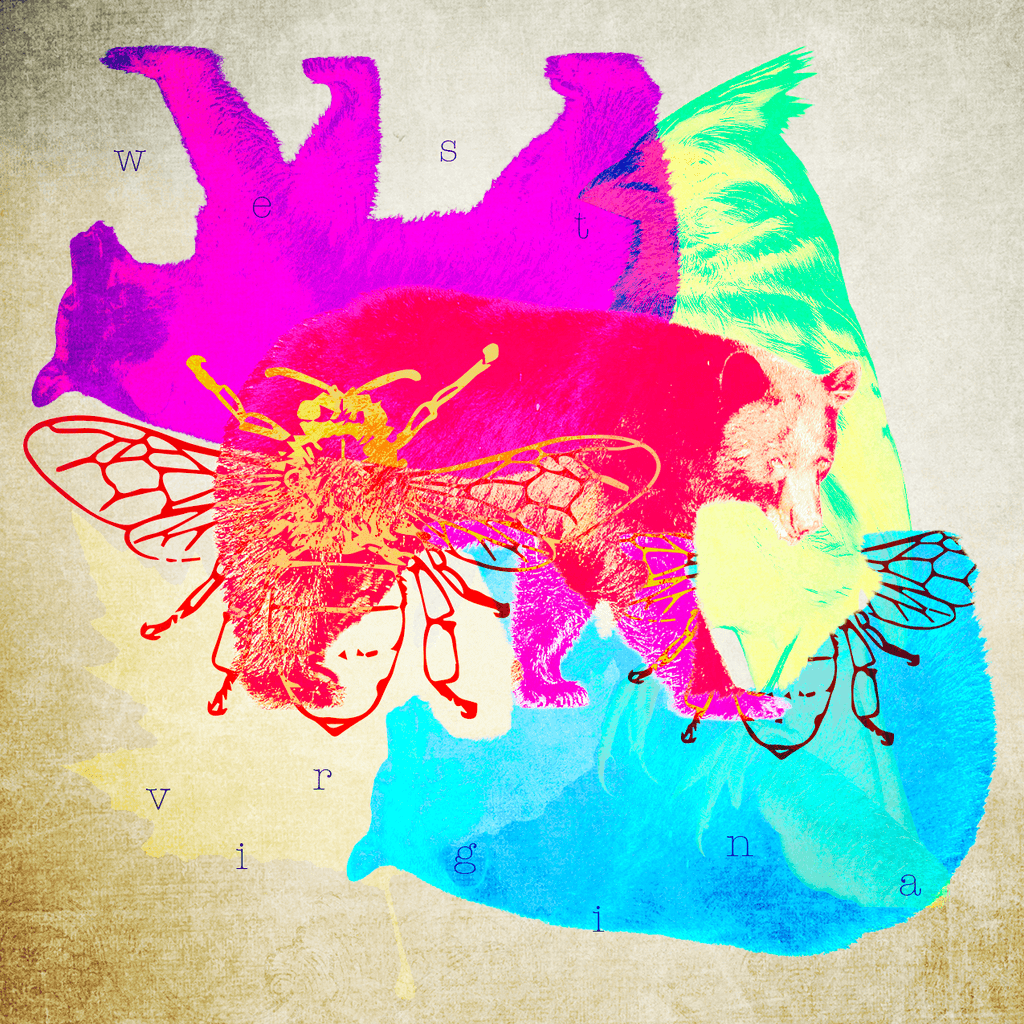
2. Inking with Gradient Maps & Duplicates
- Apply the Color Palette: Duplicate your subject layer and go to Image > Adjustments > Gradient Map. Choose a high-contrast two-tone gradient (e.g., electric teal-to-cream, or hot magenta-to-deep purple).
- Stack and Offset:
- Duplicate the layer again and assign a contrasting Gradient Map.
- Set the top layer’s blend mode to Linear Light, Screen, or Multiply.
- Offset the duplicated layer slightly to create the signature “misregistered print plate” look.
- Isolate with Layer Masks: Use Select > Subject on your source layer to isolate the subject from its white background, and apply a layer mask. Duplicate this mask across your colored layers by holding
Alt/Optionand dragging the mask thumbnail onto the other layers.
3. Adding Vintage Paper Textures
To break the digital crisp look, ground the entire composition with tactile old paper texture:
- Place a high-resolution vintage or distressed paper asset onto the canvas.
- Send one copy to the very bottom of the layer stack to serve as an off-white background.
- Duplicate the paper texture, move it to the very top of the stack, and set the blend mode to Overlay or Multiply, reducing the opacity to around 50–70%. This pulls subtle tooth, grain, and fiber through your ink layers.
4. Layering Botanical & Vector Accents
A strong collage relies on contrasting forms such as solid silhouettes against thinner line art:
- Fine Detail Vectors (e.g., Bumblebee): Bring in black-and-white graphic silhouettes. Apply a bright Gradient Map (like neon yellow or vermilion) and set the blend mode to Multiply or Linear Light.
- Constraining Elements with Masks: To trap an element inside a silhouette,
Cmd/Ctrl + Clickload the bear’s layer thumbnail to load its selection, then add a mask to the insect layer. Unlink the mask thumbnail from the layer thumbnail if you want to reposition the insect within the silhouette without shifting the mask boundaries. - Photographic Accents (e.g., Cardinal, Maple Leaf): Repeat the Select > Subject, Levels, and Gradient Map pipeline on additional flora and fauna elements to build out the composition.
5. Retro Typewriter Typography
To reinforce the archival, indie-poster look, introduce typewriter or monospaced lettering:
- Use a font like American Typewriter in lowercase.
- Rather than typing a standard paragraph block, type individual letters and scatter them deliberately along an invisible, slightly loose grid around the canvas edges (e.g., spelling out “w – e – s – t -v – i – r – g – i – n – i – a”).
- Group all text layers together, convert the group to a Smart Object, and apply a subtle Gradient Map or Blend Mode so the type reacts naturally with the artwork beneath it.
6. The One-Set Remix: Creating Layout Variations
Because every element relies on Smart Objects, masks, and adjustment layers, you don’t need to rebuild your canvas to produce multiple distinct designs:
- Select all your artwork layers (excluding the background texture), right-click, and select New Group from Layers (name it
Design 1). - Create Artistic Risotone Collage in Photoshop_1.mp4
- Hide
Design 1, openDesign 2, and begin experimenting:- Scale and rotate the core silhouette to create a new focal weight.
- Double-click any Gradient Map adjustment to swap the entire color scheme instantly.
- Reorder the stacking layers to bring different textures and colors to the surface.
Watch the Full Walkthrough
Prefer to follow along with the video? Watch the complete step-by-step breakdown on our YouTube channel, complete with timestamps for every step of the process:
👉 Watch the full video tutorial on YouTube
Assets used
Free stock photos from Pexels, high-resolution vintage paper overlay, and Adobe Photoshop.
Texture Paper: https://pixabay.com/illustrations/texture-background-paper-papyrus-2012078/
Stock Images:
https://pixabay.com/illustrations/ai-generated-bird-cardinal-wildlife-8715761/
https://pixabay.com/vectors/animal-bee-bi-bug-insect-1296921/
https://www.pexels.com/photo/close-up-of-autumn-maple-leaf-on-white-background-39585427/
https://www.pexels.com/photo/charcoal-bear-on-white-17120919/


