
A Web Designer’s Review
In August of 2023, I built my first WebFlow website. Here are some thoughts about what I learned, what I loved, what was challenging, what I disliked, and what I’d love WebFlow to build into future releases of their service.
WebFlow 101
As a web designer and developer who has been coding websites since the early 2000s, the WebFlow no-code builder took some time to get used to. I started preparing for my first WebFlow website by watching all the WebFlow 101 videos. They are chock full of detailed how-to instructions, are entertaining and some of the best resources I’ve watched that give an overview of how a website is built and what HTML, CSS and Javascript are. Seriously, they’re brilliant videos!
WebFlow Designer Tips
WebFlow is Desktop First
As of August 2023, WebFlow is not mobile first. This means that the WebFlow platform is configured so that you build your Desktop version of your website first. All your styles and layouts cascade DOWN to your mobile view. There are five views of your website. A change that you make on a view shown to the left (a larger screen size) cascades down to the smaller sizes.

My WebFlow Wish List: Build in the option to configure your project to either be Desktop First or Mobile First. Let this be a one-time configuration for each project chosen by the designer or developer. Once selected, change the UI so that the icons reflect the correct (chosen) cascading direction.
Image Clean Up
I deleted unused image assets once I was finished designing. This wasn’t intuitive to me, so I searched and found this WebFlow thread to walk me through “Deleting only assets that aren’t being used“.
If you’re looking to complete the same task, the answer is to Bulk Delete images from the Asset Manager. The process of expanding the Asset Manager, Selecting All and deleting worked. When I republished and refreshed my Asset Manager, I went from 111 Assets to just the 36 Assets my site was actually using.
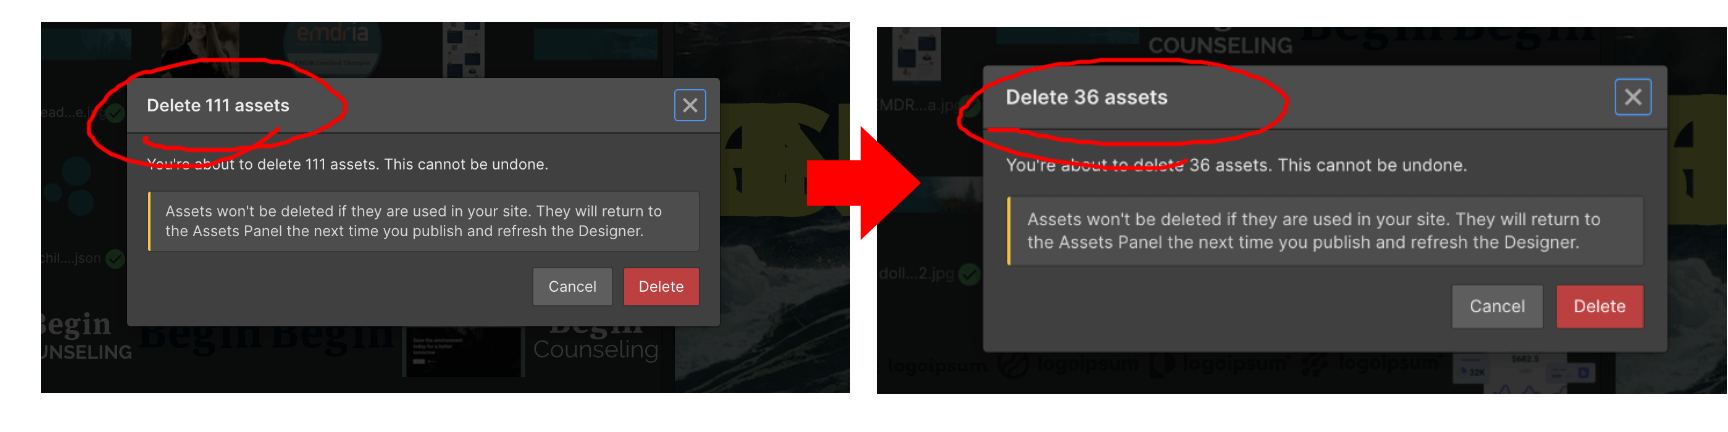
Possible Catch: This bulk delete image process worked, but my used Lottie Animations did not stay visible. The Lottie Animations were shown on the site still, but were not returned/visible in my Asset panel.
Use Client-First
I tried using Client-First in my first WebFlow website. I cloned a template as a starting point (https://webflow.com/made-in-webflow/website/fs-template-11) and tried to learn and follow the Client-first WebFlow style system, which includes naming conventions of classes. This system is the closest I could find to using a CSS framework such as Bootstrap or Tailwind CSS.
Learn more about Client-First by Finsweet.
Also this video is very helpful to orient yourself to WebFlow frameworks.
Lottie Animations
Integrating Lottie Animations was so easy. I really enjoyed creating, customizing and utilizing Lottie animations in my first WebFlow website; it was one of my favorite parts of building a website in WebFlow. I did find that you have to delete the last blank frame of your Lottie animation to loop correctly in WebFlow. I deleted the last frames manually in Adobe After Effects; here’s the step-by-step guide.
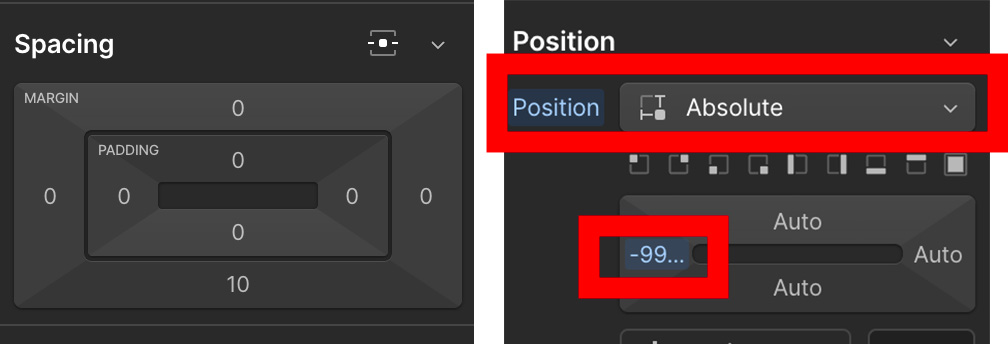
Make sure you put -99999 as position and not margin
Getting used to declaring CSS visually instead of writing it as code has a bit of a learning curve. I found myself accidentally putting the -9999 into the Spacing > Margin instead of the Position Left.
Working with Basic Forms in WebFlow
Forms – so easy! No installing Contact Form 7 plugins for WordPress. No configuring Mail for Statamic. Just pay for Webflow hosting and your basic contact forms work.
Advanced Forms
Including advanced logic in your WebFlow forms does require the addition of javascript and it can be tricky.
To add radio buttons with an Other field that triggers a text box, I followed the conditional form fields instructions outlined in the video below.
As reference, here’s the CodePen used in the video.
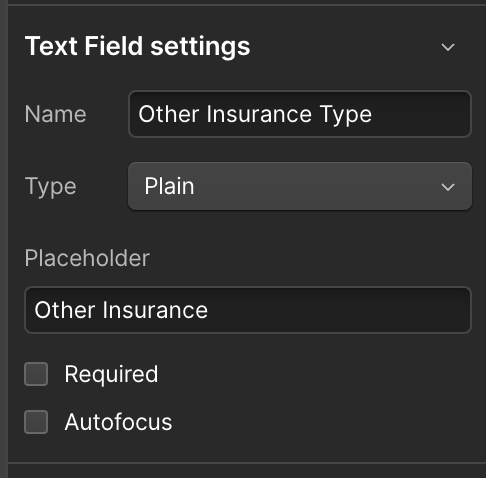
Notes that might help you implement this functionality include
Don’t forget that if you use jquery, you need to reference the jquery library first. Also, I used [name=] and the name field in Webflow is under Text Field Settings. Note that the bolded Other-Insurance-Type in this part of the code const $input = $('[name=Other-Insurance-Type]'); maps to the Name field under Text Field Settings.
I used the following code on my Contact page.
<script src="https://ajax.googleapis.com/ajax/libs/jquery/3.7.1/jquery.min.js"></script>

<script>
$(document).ready(function () {

const $input = $('[name=Other-Insurance-Type]');
const $radios = $('input[type=radio][name=Insurance]');


$radios.on('change', (e) => {
  const value = e.currentTarget.value;
  $input
    .toggleClass('show--input', value === 'Other')
    .attr('required', () => value === 'Other');

    //console.log(value)
});
});

</script>
Watch Video Demo of this Code in Action on a WebFlow Form with Advanced Logic
Don’t forget to adjust your form layout and likely grid for Desktop and Mobile views
Be prepared to rearrange and resize your form components for desktop and mobile viewing.
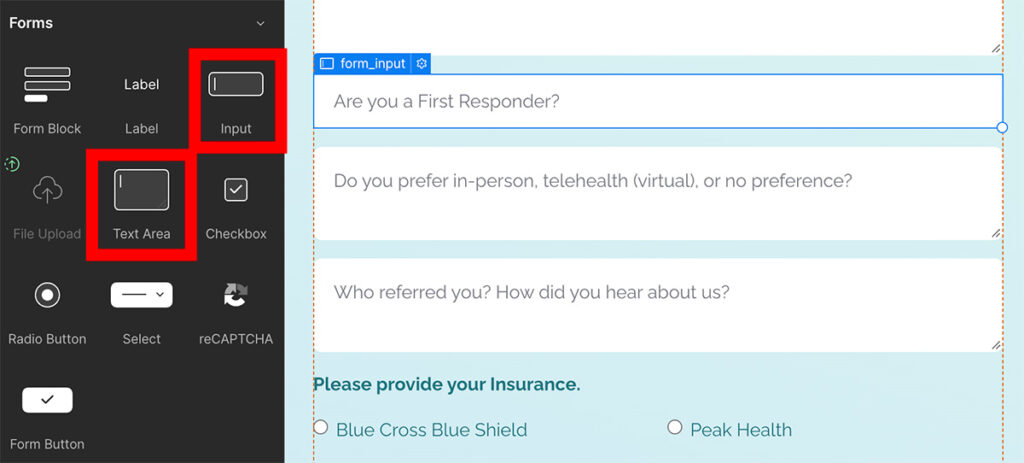
Choosing if you want to use Input or Text area in your Form.
Choosing the right one allows placeholder text to wrap. If you are using placeholder text and realize that the text is being cut off, then you may consider changing that Input field to a Text Area field. If you want the scalable lines in the bottom right, set overflow to Auto on your Text Area Form Input field.
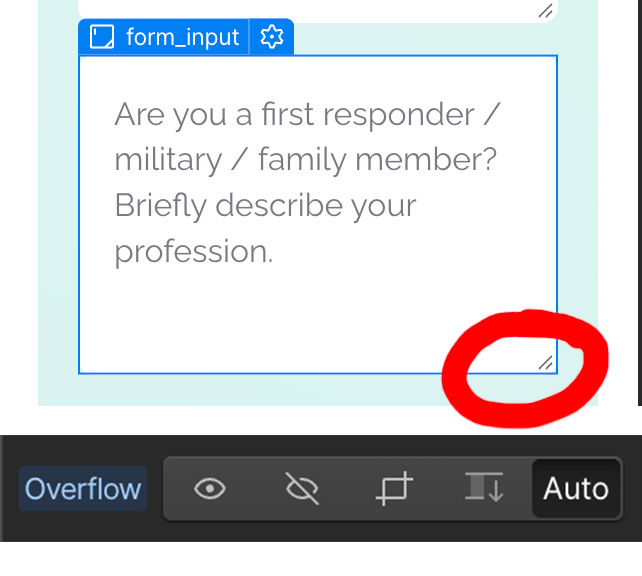
In the image below, “Are you a first Responder?” is an input field and a single line field, even in mobile view. Alternatively, the next two questions are text area fields and the placeholder text wraps in mobile views. This is an easy way to avoid using javascript to change the length of your CSS input::placeholder text in mobile views.
Frustrating Features
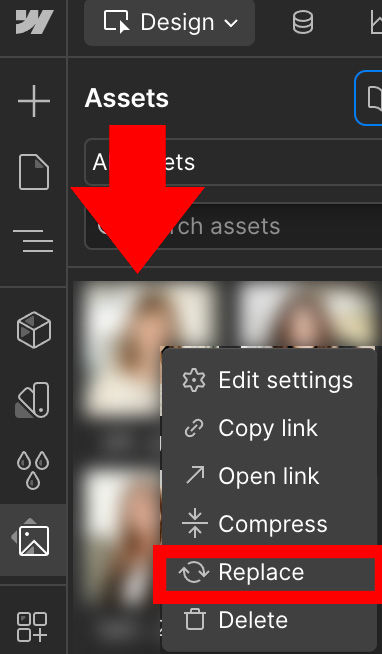
Lack of Image Replacement (Fixed!)
Initial Complaint: Here’s a thread on the lack of image replacement. As a developer/designer, this makes uploading and using the correct-sized image EXTREMELY important to do from the get go.
I like to use tinypng.com for optimizing images. Webflow does a good job of optimizing responsive images too, read more about them here. However, the process outlined in the article is not relevant to background images.
Current Functionality (June 2025 and after)
You can now replace images/media using the horizontal ellipse on an image in the Assets area. From the drop-down, select Replace.
Other Frustrations
- No 1024px width default media size.
- You can use templates that you Clone to WebFlow, but you have to have space in your plan. Cloning allows you copy and paste components or areas of other sites to your project. Cloning also allows you to explore how other projects were created.
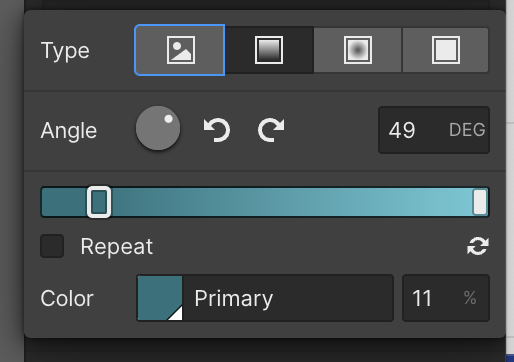
- Your style guide can include and access colors, like your Primary Color, but there isn’t a way to easily access a gradient. I wish there was an easy way to save and duplicate the gradients that you create.
- VS Code + Javascript + WebFlow: It’s pretty annoying developing on staging and publishing and testing, over and over, as you work on your javascript. The developer in the video below has a workaround using a plugin for VS Code. If you’re custom developing at any length on WebFlow, his set-up is likely an excellent choice.
Things I really liked about WebFlow
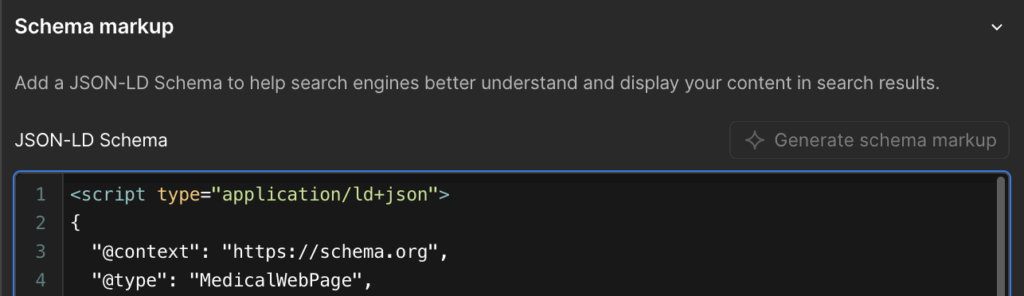
Schema AI Generator
In November of 2025, I tried the Schema AI generator in Webflow, and wow, I was impressed. It did a much better job than I expected.
Animations
In my opinion, the beauty of WebFlow was the ease of creating animations and transitions for my website. On the homepage, I integrated GreenSock (GSAP) animations, and on all pages elements are built from the left and right.
WebFlow Site Settings and Toggles > Publishing
There’s a toggle to turn on SSL (and it’s free with Webflow hosting). There are also toggles for Minifying CSS, HTML, and JS, and for secure frame headers. In WordPress, these are extra plugins and can be quite complicated.
Publishing is also where you add your 301 redirects. You do not edit the .htaccess file directly in a WebFlow website. You add a Redirect using two fields, ‘Old Path’ and ‘Redirect to path.’ Yocane noo create a redirect for a live page; first, delete oconvertrn a live pagtoto a draft paged then add your redirect. Redirects become active once your site is republished.

Questions I had while designing my first site in WebFlow.
No. If you like using CSS frameworks, a Webflow specific system called Client-First includes a Style Guide and some utilities.
I found this video really useful! I added a section to the Client First hidden page to save my Utility Animation Classes.
In general, you should create your CSS styles using the visual editor; however, you can copy and paste CSS and or write your own code in your page’s Custom Code area or there is a site-wide custom code area. As long as you wrap css in the <style></style> tag it will render.
There is no .htaccess file access with WebFlow hosting. Instead, you create redirects in your site settings area in the 301 Redirects section. The WebFlow knowledge base explains how to create redirects and how to bulk import them via CSV, too.
You can #ID sections, buttons and other elements just as you can in HTML and CSS. WebFlow University walks you through the visual interface to link to anchors/ids and how to make them.
Overview
Have other questions about my experience? Feel free to ask.
Overall, I enjoyed building with WebFlow and I’m glad I’ve had this specific experience with no-code design.
My first WebFlow project took me through a meaningful learning process, and although I don’t plan to go all-in on Webflow, I absolutely intend to use it again—for clients and projects where I need design flexibility and animations and CMS functionality without deep code. I’ll still work in SquareSpace, WordPress, Statamic, Shopify, WixStudio and other platforms).