Workflow: From PPT Pitch Deck to LinkedIn Carousel to Animated Video

W

Watch before you read

Have you ever designed something in PowerPoint for a client—like a pitch deck—and then thought this would actually make a great LinkedIn post or video? In today’s video, I’m showing you how I took one client pitch deck and turned it into a LinkedIn carousel and then into an animated video using tools you probably already have. Let’s start with the carousel. This is what I uploaded to LinkedIn: a seven-page PDF that users can click or swipe through. It’s a super engaging format, and you can even open it in full screen and arrow through it. This particular carousel got great engagement, so the next question was, can we repurpose this content further? I thought maybe turn it into a video and even ultimately an ad for LinkedIn. This all started in PowerPoint, which honestly, a lot of clients still love to use. You might know this, but maybe not—so you can change the page size in PowerPoint. For example, I use an 11 by 11-inch square format, and you find that under File > Page Setup on a Mac. This allowed me to convert my original PowerPoint, which was designed at widescreen. In PowerPoint, you can add transitions—that’s animations between pages—and you can also animate elements right inside PowerPoint. And PowerPoint gives you the option to export as an MP4 video. But I’ll be honest, while this really works, I find that PowerPoint is a little clunky. I look for something a little faster or more flexible, especially because I’m used to doing something like this in Adobe Animate. However, that’s pretty time-consuming, so I wanted to try something faster. So my next stop was Adobe Express. I assumed I could upload a PowerPoint directly, but that’s not an option. So I uploaded the PDF version instead. And while the interface looked really similar to Canva—and so did the animation tools—this version at this date got pretty buggy pretty quickly. Some slides imported with lots of locked layers and clipping masks. When I rendered and exported the video, the animations and transitions that I had included didn’t appear—I just got black screens of five seconds with none of the animation. So even after troubleshooting, trying to take my PDF into Illustrator, ungrouping, releasing masks, and cleaning up backgrounds so that they weren’t squares in PowerPoint but actual background fills, the exports just were not reliable enough. So I decided, let’s move on to the next tool. Then I tried Canva, and I was actually really impressed. First, you can upload PowerPoint files directly, and Canva kept almost everything intact—the backgrounds, the text, the layout, things came over really well. The interface allows you to grab each element and animate them individually with one-click options. You can also animate the entire page, which works great on simpler slides. There’s the option to add slide transitions—dissolves, slides, wipes—the kind of stuff that would take a lot longer to do in Adobe Animate with one click. One of the things I also loved about working in Canva is that you can easily add royalty-free music right to your timeline, and there are simple features that you need for free. Fade is always the thing that drives me crazy in YouTube—they don’t give you the option—but in Canva, you can fade in and fade out your music easily. With the paid Canva subscription, you can even sync the beats to your animation, which is really great. When you’re done, you can share and then download, which is essentially exporting your presentation as an MP4 video. You can do it at 1080×1080 pixels, which is square and perfect for social. My only issue was that the exported video looked a little soft—it wasn’t as crisp as what previewed in my browser. Here was my quick fix: I uploaded the MP4 to a free online video upscaler. This one had no watermark, no payment required, and it cleaned everything up beautifully. It’s open source, and the link is below. That final video from the upscaler is what I uploaded to LinkedIn. Remember, LinkedIn videos autoplay silently in the feed, which means that motion graphics really grab attention. So this is a great option for posting. What started as a PowerPoint pitch deck became a LinkedIn carousel and then an animated video—all with just a few simple steps and tools. This workflow is a great example of how to repurpose content across formats and platforms without starting from scratch each time. I hope this peek into my process helps you find faster and smarter ways to bring your designs to life. Please leave your questions and comments below, and of course, give some thought to what brought you joy today. Today, my children’s laughter brought me lots of joy. Here’s the next video that I think you’ll love—take a look.

The Experiment

I’ve been experimenting with a new, simple workflow that takes PowerPoint (PPT) files and converts them to PDFs for use as LinkedIn carousels. That part is easy enough: export your deck as a PDF, upload to LinkedIn, and voilà, you’ve got a swipeable, multi-page carousel post.

But what if you want to go a step further?
What if you want to animate your PowerPoint deck to create a video for LinkedIn advertising or autoplay posts?

Of course, I could open Adobe Animate and build everything manually (and I still love that option for more complex motion design work), and I could use PowerPoint’s clunky animation tools.
But I wanted to see if there was an easier, faster way using lightweight tools my clients could also access.

So, I ran a few tests, first in Adobe Express, and then in Canva, to see which handled this workflow better.


The Adobe Express Test

Let’s start with Adobe Express.

On paper, it seems ideal, after all, it’s part of the Adobe ecosystem, which I’ve used for 20+ years.

In reality, I ran into quite a few catches:

  • You can’t upload PowerPoint files directly.
  • PDF imports looked okay at first, but many slides had locked layers or clipping masks that prevented animations without a premium subscription..
  • Many exported MP4s were completely blank, displaying five seconds of black screen with no graphics.
  • Alternatively, I tried to upload SVGs exported from Illustrator for layouts, but file size limitations stopped me from using Illustrator exports to possibly fix the problem.

I did appreciate the interface (very Canva-like) and the ability to animate elements per slide. Still, between the bugs and the export issues, it just wasn’t stable enough for this workflow.


The Canva Test

Then I moved over to Canva, and honestly, it was a refreshing experience.

You can upload PowerPoint files directly, and Canva keeps most of the layout, text, and background formatting intact.

Once your slides are in, you can animate per element (or the whole page) with simple one-click presets, add slide transitions, and export directly as an MP4 video at 1080×1080 (perfect for social media).

And while Canva clearly nudges you toward its premium plan, I still found the free version totally workable for testing and creating engaging motion graphics.


Things I Loved About the Canva Workflow

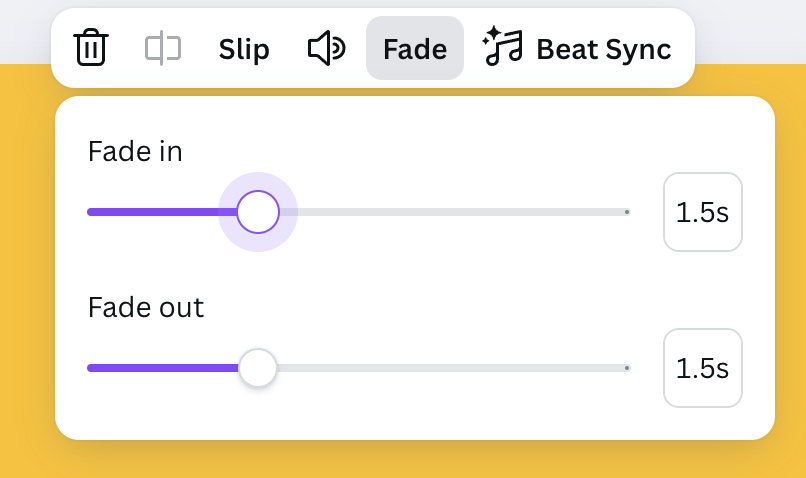
  • Fading Audio for Start and End
    Canva lets you add royalty-free audio and fade it in and out, something that’s surprisingly still not available on YouTube.
  • Smooth Animation Tools
    With just a few clicks, you can animate text and graphics individually or apply page-level transitions that feel polished and professional.
  • Quick MP4 Export
    The export process is fast and reliable, and perfect for square video formats for LinkedIn.
Fade in and Fade out controls in Canva for audio
Fade in and out royalty free audio in Canva for videos

What to Watch Out For in Canva

Canva does gate some essential features behind its premium plan:

  • Resizing your artboard is a paid feature.
  • Exporting higher-resolution videos also requires a pro account.

My workaround: start with a larger artboard size than you think you’ll need, then downscale if necessary.

If you forget (or don’t want to upgrade), there’s a great free solution I’ve been using to upscale videos after export:
👉 https://free.upscaler.video/

No logins. No fees. No watermarks. I found it on a Reddit thread, and the code is open source.
It simply reprocesses your lower-resolution Canva export and gives you a crisp video ready for LinkedIn.


The Final Workflow

Here’s what this end-to-end workflow looks like:

  1. Start in PowerPoint
    Design your content, change the page setup to a square format (I use 11×11 inches), and export both a PDF and a PPTX file.
  2. Upload to Canva
    Import the PowerPoint directly into Canva and make quick adjustments as needed.
  3. Animate and Add Audio
    Use Canva’s simple animation and fade-in/out tools to add motion and sound.
  4. Export as MP4
    Download your video, upscale it if needed, and it’s ready to upload to LinkedIn as a video. Upload the PDF to make a LinkedIn carousel post.

The Takeaway

What started as a PowerPoint pitch deck can now become both a LinkedIn carousel and an animated video, all without needing heavy Adobe software or advanced animation skills.

It’s a fast, accessible workflow that designers, marketers, and clients can all use to repurpose presentations into scroll-stopping motion content.


Watch the Full Workflow Video

👉 YouTube: From PowerPoint to LinkedIn Carousel to Animated Video

About the author

Kelly Barkhurst

Designer to Fullstack is my place to geek out and share tech solutions from my day-to-day as a graphic designer, programmer, and business owner (portfolio). I also write on Arts and Bricks, a parenting blog and decal shop that embraces my family’s love of Art and LEGO bricks!

By Kelly Barkhurst

Recent Posts

Archives

Categories