
The process I’m describing below was inspired by this helpful tutorial for recording audio from a website, directly, on your Mac.
Record audio directly using the BlackHole Audio Driver
In this scenario, I needed to record a virtual meeting that had a physical phone number call-in and a Teams login for sharing the presentation. To get a clear, crisp recording, I logged in to Teams from my computer and used Google Voice to also call in from my computer.
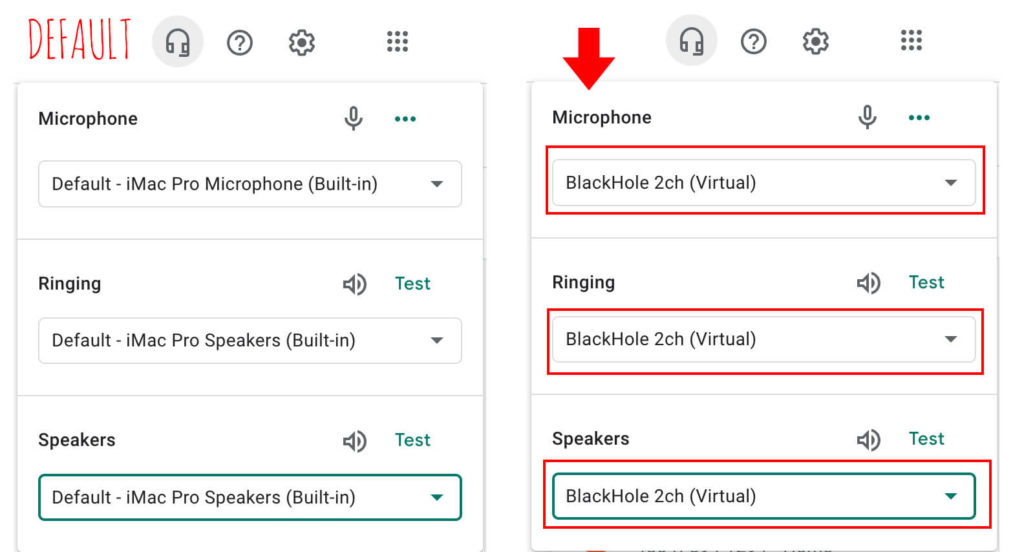
Step 1: Google Voice Call In and Configurations
In Google Voice, instead of using the default built-in microphone and speakers, I changed all my audio settings to BlackHole. This means that the call thought my microphone was off or muted and didn’t pick up any ambient noise or me talking in the room. It also means that the phone conversation didn’t play out loud in my office. The conversation and presentation sound stayed internally within my computer.
Step 2: Team Settings
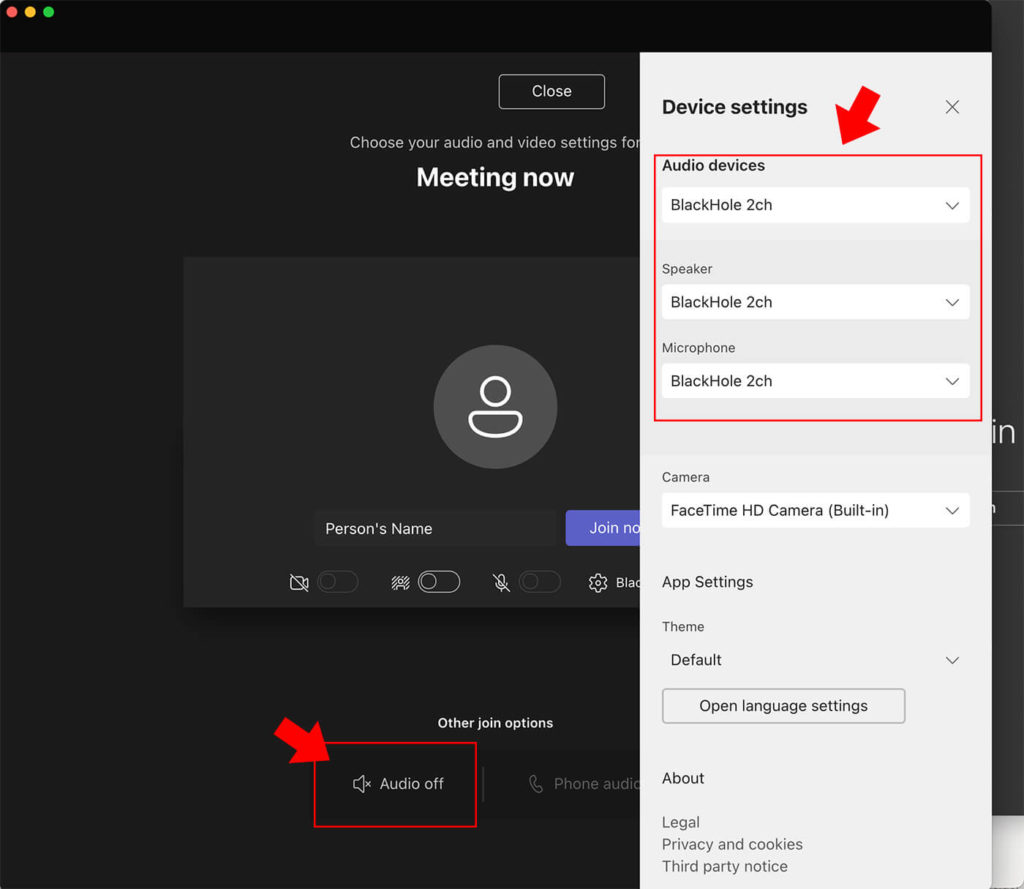
In Teams, when you join the meeting, you’ll want to click on the Settings gear and adjust your microphone and speakers to BlackHole.
Alternatively, you could select “Audio Off” from “Other join options.” The catch is that if you accidentally get unmuted, your audio will default to your current settings. So, as a fail-safe, I change the speaker and microphone to BlackHole on Teams, too.
Step 3: Record with QuickTime
Now that you have audio streaming into your computer (via Google Voice) and the live presentation (via Teams), you’re ready to record. I use QuickTime.
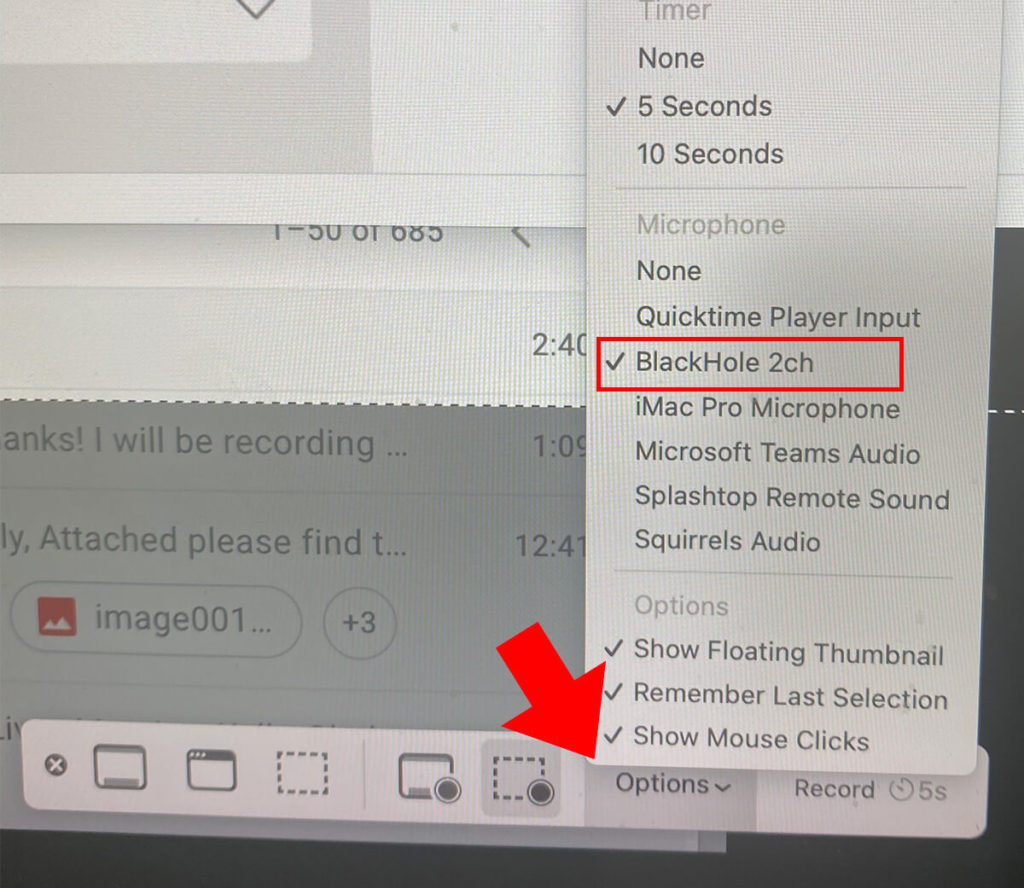
I open QuickTime and select File > New Screen Recording. This trigger a floating settings bar. From Options, I change the Microphone to BlackHole. This means that QuickTime will record the audio internal to the computer that is coming in via Google Voice because I changed Google Voice’s setting to use BlackHole. During the recording, I do not hear the presentation, and just as importantly, the recording does not hear me. This frees me up to be loud during the call or to call in via another phone and participate in the call without having ambient noise, feedback, or otherwise affecting my Quicktime video recording.
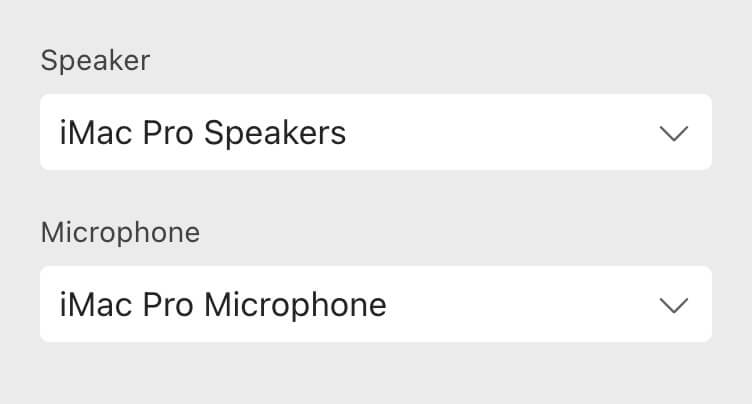
Final Step: Return settings to default
Don’t forget, when you’re done recording, to change your settings on Google Voice, Microsoft Teams, and Quicktime to your default microphone and speakers. You don’t want to keep BlackHole as the setting accidentally.
I hope you found this method helpful in recording high-quality audio of a web presentation, especially when you’re required to call in and can not use just Teams (or Zoom etc.) for both audio and presentation/video.
Have you ever wondered how to loop your video playback in Quicktime? It’s easy – just a button click!