
This post is intended as a quick overview for avid PhotoShop users on how to quickly use Adobe Lightroom to adjust lighting for a set of photos.
After 20 years of using PhotoShop regularly, it’s my preferred go-to tool for much of my day-to-day graphic design work. However, sometimes, it’s simply not the best program for the task at hand. Batch editing lighting effects for a set of photos is one of those cases. Instead, Adobe LightRoom is a better tool.
Color Correction in Adobe Lightroom
What’s a scenario when a graphic designer uses Adobe Lightroom to edit photos?
The two scenarios I’ve personally run into:
- A client provides me a folder of images that need adjusting before I can post them to social media or use them in a design. Lightroom is especially helpful when the image folder is from a single photoshoot and the images all require similar lighting adjustments.
- I take a photoshoot for a blog or website and need to bulk edit the lighting for the folder of images.
Bulk Add Photos to a Lightroom Folder
- Create a new Album or Folder
- Click the blue botton that reads ADD PHOTOS
- Select all the photos that need adjusted and then click ADD # PHOTOS (the # will be replaced with the number of photos you’re attempting to add)
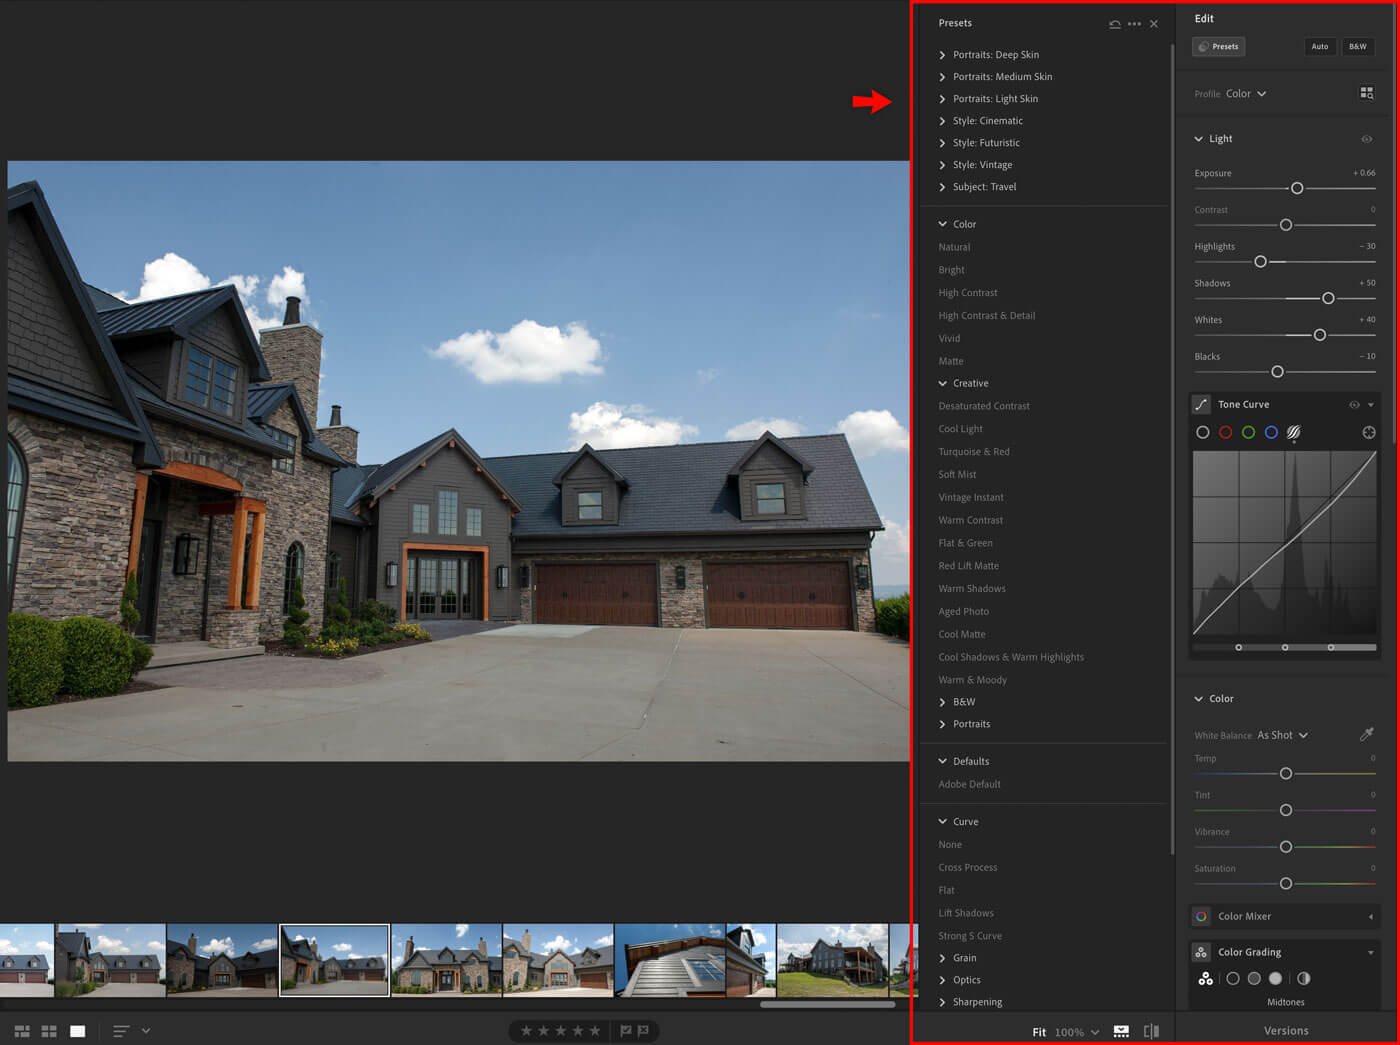
Adjust Lighting Settings in Lightroom
You can use presets, defaults, curves, light, color, and more to adjust the tone and look of your photograph in Adobe Lightroom
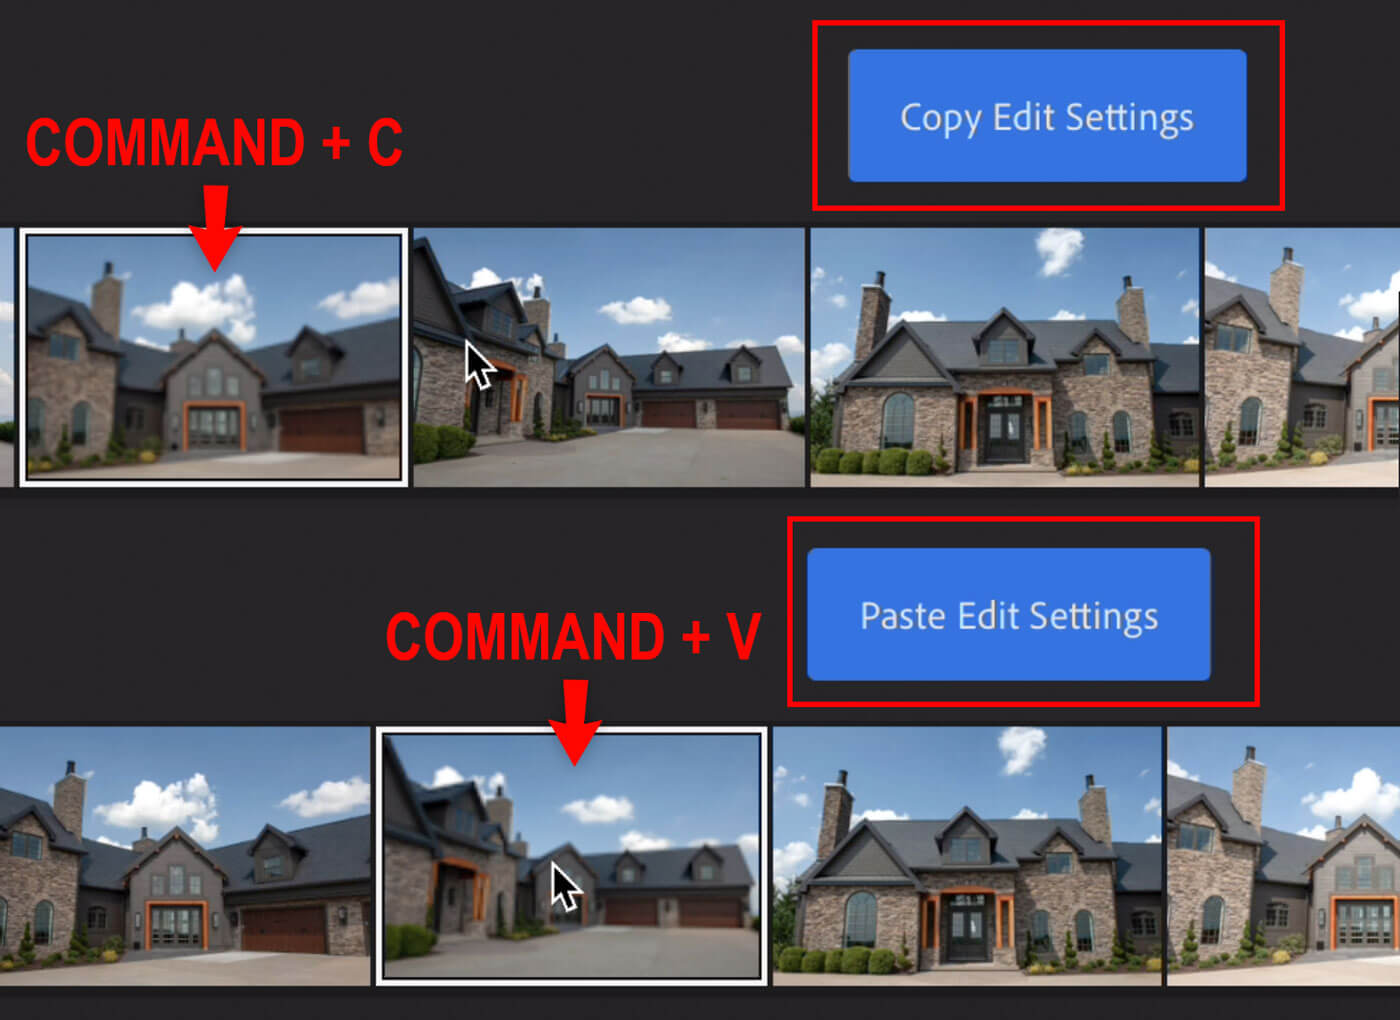
To copy the settings that you’ve made in Lightroom, select the thumbnail and use your keyboard to copy and paste.
- On a Mac, type Command + C. You’ll see a blue alert that says Copy Edit Settings.
- Click to the next image thumbnail that you want to adjust and on your Mac type Command + V to paste. You’ll see a blue alert that says Paste Edit Settings.
Export instead of save in LightRoom
One big difference between how Photoshop and Lightroom behave is how you get photos out of these Adobe Programs. In Photoshop, you’re saving to your file directory and use the Save or Save As function. In Lightroom, you’re exporting your folder or selected images to a folder on your computer and using the Export function.
Have questions?
We’d love to hear them. Please, ask in the comments below.