

I’ve been using Gmail / Google Workspace since 2006, when I got married, and stopped using my high-school-created Yahoo address (which was an unprofessional email address, and I later learned likely kept me from a college internship opportunity…true story!).
Beyond My Own Inbox
Over the years, managing email hasn’t just been personal; it’s often part of my client work, too. As a consultant, a huge chunk of what I do involves getting under the hood of a business’s tech structure.
Sometimes this includes helping clients untangle years of email chaos, and setting up filters so they stop feeling overwhelmed by their own inboxes. If you want to tame your inbox like a pro, here are a few settings I use for myself and my clients.
Struggling with Email Deliverability? (SPF, DKIM & DMARC)
If your clients are missing your emails or your messages keep landing in spam folders, your domain’s DNS authentication records are likely misconfigured.
As part of my tech consulting, I help business owners run full email diagnostics, lock down their SPF, DKIM, and DMARC records, and clean up domain reputation. Get in touch here if you’d like me to run a diagnostic on your domain and get it set up right!
So, what’s the best productivity tip I can give you for using Google Workspace’s Gmail? That’s simple: set up filters for your emails!
Here’s how.
How to Set Up Filters in Gmail (Step-by-Step)
Setting up filters takes less than two minutes, and once you do, Gmail handles the repetitive sorting for you automatically. There are two easy ways to create a filter depending on where you are in your inbox.
Option 1: Create a Filter Directly from an Open Email (Fastest)
If you’re reading a notification email or a client thread in Gmail that you want to organize right now:
- Open the email you want to create a filter for.
- Click the three vertical dots (More options) icon in the top toolbar above the email subject line.
- Select Filter messages like these.
- Gmail will automatically populate the filter criteria (usually the sender’s email address). Click Create filter at the bottom of the popup.
- Choose what happens to matching emails: Check the boxes for the actions you want Gmail to take automatically:
- Skip the Inbox (Archive it) — Keeps clutter out of your primary view.
- Apply the label — Categorizes it (e.g.,
GitHub AlertsorClient X). - Never send it to Spam — Ensures crucial emails always get through.
- Check the box that says “Also apply filter to matching conversations” if you want to clean up existing emails in your inbox right now.
- Click Create filter. Done!
Option 2: Build a Custom Filter from the Search Bar (Best for Advanced Rules)
If you want to filter emails based on specific keywords, domain names, or attachments:
- Click the Show search options icon (the slider icon) on the far right side of the main Gmail search bar at the top of your screen.
- Enter your criteria:
- From: Filter an entire domain (e.g.,
@figma.comor@github.com). - Has the words: Target specific subject lines or notification text (e.g.,
[PR Review Required]orNew Submission). - Has attachment: Isolate emails carrying files.
- From: Filter an entire domain (e.g.,
- Instead of clicking Search, click Create filter at the bottom of the window.
- Select your preferred actions (Apply label, Mark as read, Skip Inbox, etc.).
- Check “Also apply filter to matching conversations” to organize past emails.
- Click Create filter.
Pro Tip for Devs & Designers: Pair your filters with Labels to automatically tag incoming pull requests, Figma comments, or client intake forms, so your main inbox stays reserved for direct human communication!
Looking for the syntax of Operators in the search fields? Here’s Google’s doc for how to refine searches.
Other tips that I can’t live without?
1) Schedule Sends: Protecting Your Boundaries (and Your Sleep)
Scheduling email send times is a very close second to automatic filtering. Before Gmail built scheduling natively into the product, I used a third-party tool called Boomerang. Now, I rely on Gmail’s native scheduled sends almost every single day.
Why is this a non-negotiable for designers and developers?
1. It establishes strict client boundaries.
As creatives and devs, it’s easy to find ourselves in the flow state late at night. But if you reply to a client’s email at 2:00 AM, you’re unintentionally teaching them that you’re reachable 24/7. Suddenly, they expect text-message-level response times at all hours. Scheduling your late-night replies to land in their inbox at 8:30 AM sets clear, professional boundaries without interrupting your productive midnight coding or design sprints. Along those lines, if your clients text you, don’t forget to take advantage of scheduling text responses too. I use Apple (iOS) and this option is now built in.
2. It makes you look remarkably consistent.
Hey, no one needs to know when you were actually burning the midnight oil! A scheduled 7:30 AM email makes you look incredibly organized and ready for the day, even if you’re actually sleeping in.
Pro Tip: Beyond client boundaries, scheduling is a lifesaver when working across different time zones or lining up project handoffs to drop right when your client’s workday begins.
2) Add a Send Delay – so you can Undo
I use the UNDO option for my emails daily.
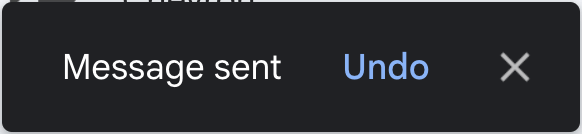
In my Settings > General, I have my Undo Send set to 30 seconds. This gives me 30 seconds after I push Send to re-read my email and to click Undo if I want to rewrite something, delete something, fix something, etc.
It’s a lifesaver. I can’t stress enough how much I use Gmail’s Undo functionality.

3) Create Contact Groups (Labels) for Quick Group Emails
If you find yourself repeatedly typing out the same list of email addresses—whether it’s for a client’s core team, a group of project stakeholders, or your internal team—stop doing it manually.
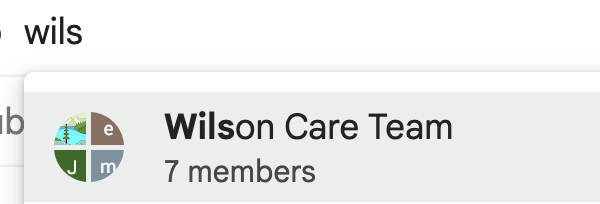
Instead, create a Contact Group (Google calls these “Labels”). Once it’s set up, you simply type the group’s name into the To, Cc, or Bcc field, and Gmail automatically populates every email address in the list.
How to set it up:
- Access Contacts: From Gmail, Open Google Contacts: Click the App Launcher (the 9-dot grid icon in the top right of Gmail) and select Contacts (or go to contacts.google.com).
- Create a Label: In the left sidebar, click the
+icon next to Labels, name your group (e.g., Client X – Team or Dev Team), and click Save. - Add Contacts:
- Check the boxes next to the contacts you want to add to the group.
- Click the Manage labels icon at the top of the list.
- Check your new Label and click Apply.
- Send the Email: Next time you draft an email in Gmail, just start typing the name of your Label in the To, Cc, or Bcc field and press Enter. Gmail will instantly fill in everyone’s email!
Pro Tip: Using Contact Groups in the Bcc field is also a great way to send quick project updates to multiple vendors or outside contributors without sharing everyone’s email address with the whole group.
Take Control of Your Inbox
Your email setup shouldn’t be a chaotic distraction; it should be an automated system that protects your focus, maintains your boundaries, and keeps your communication looking polished. Whether you’re stopping bot spam before it hits your inbox or simply taking advantage of a 30-second Undo window, small tweaks to your workflow compound into massive time savings over a career.
What’s your single favorite Gmail hack or filter trick? Drop a comment below—I’m always looking for new ways to optimize my daily tech stack!
🚀 Looking for Google Workspace Setup or Email Help?
If you haven’t made the switch to a custom business domain yet, grab a custom email address with Google Workspace (referral link).
Save 10% on Google Workspace Business Starter: QA3CCQXA3HJJNP6 or Google Workspace Business Standard: DA7LJVMGREJV9VE.
Struggling with SPF, DKIM, or DMARC DNS records? If your business emails are hitting spam folders or landing in promotions tabs, your domain authentication is likely misconfigured. Reach out to Kelly for an email diagnostic audit & setup!


