
Recently I created an interactive animation in Adobe Animate. The Adobe Animate part was relatively straightforward, but embedding the exported code into my WordPress website was tricky. This blog post shares what I learned and additional resources I found helpful.
Videos worth watching
If you’re relatively new to iframes or Adobe Animate (or it’s been a long time because you used to develop in Flash), these videos are helpful for background.
VIDEO 1: Adobe Animate HTML5 Canvas- adding to WordPress Self-hosted site (2023)
Except for one caveat, to add your Adobe Animate animation to WordPress, follow the instructions in the following video. Specifically, please pay attention to where Seazen Studio shares his screen as he exports an Adobe Animate HTML/JS folder, uploads the files via his hosting provider, and adds the iframe to a new WordPress page.
In the Spring of 2023, everything worked the same, except I ran into a cross-domain policy problem with my iframe in WordPress. I moved my animation folder into the WordPress uploads folder to fix this issue. So, the final directory was example.com/wp-content/uploads/myfolder. Once my animation was in uploads, the iframe appeared immediately on all browsers, and there was no longer a cross-domain issue. (I’m grateful for the active discussion on this Adobe Forum post, which helped solve this issue.)
Video 2: Fully responsive HTML5 from Adobe Animate to WordPress
As presented in the video below, I used CyberDuck to upload my files to my WordPress server. Video 2 also shares custom CSS to keep your iframe responsive on your website. Here’s the CSS to include in your project.
.animate-container {
position:relative;
margin-bottom: 10px;
}
.animate-container iframe {
position:absolute;
top:0;
left:0;
width: 100%;
height:100%;
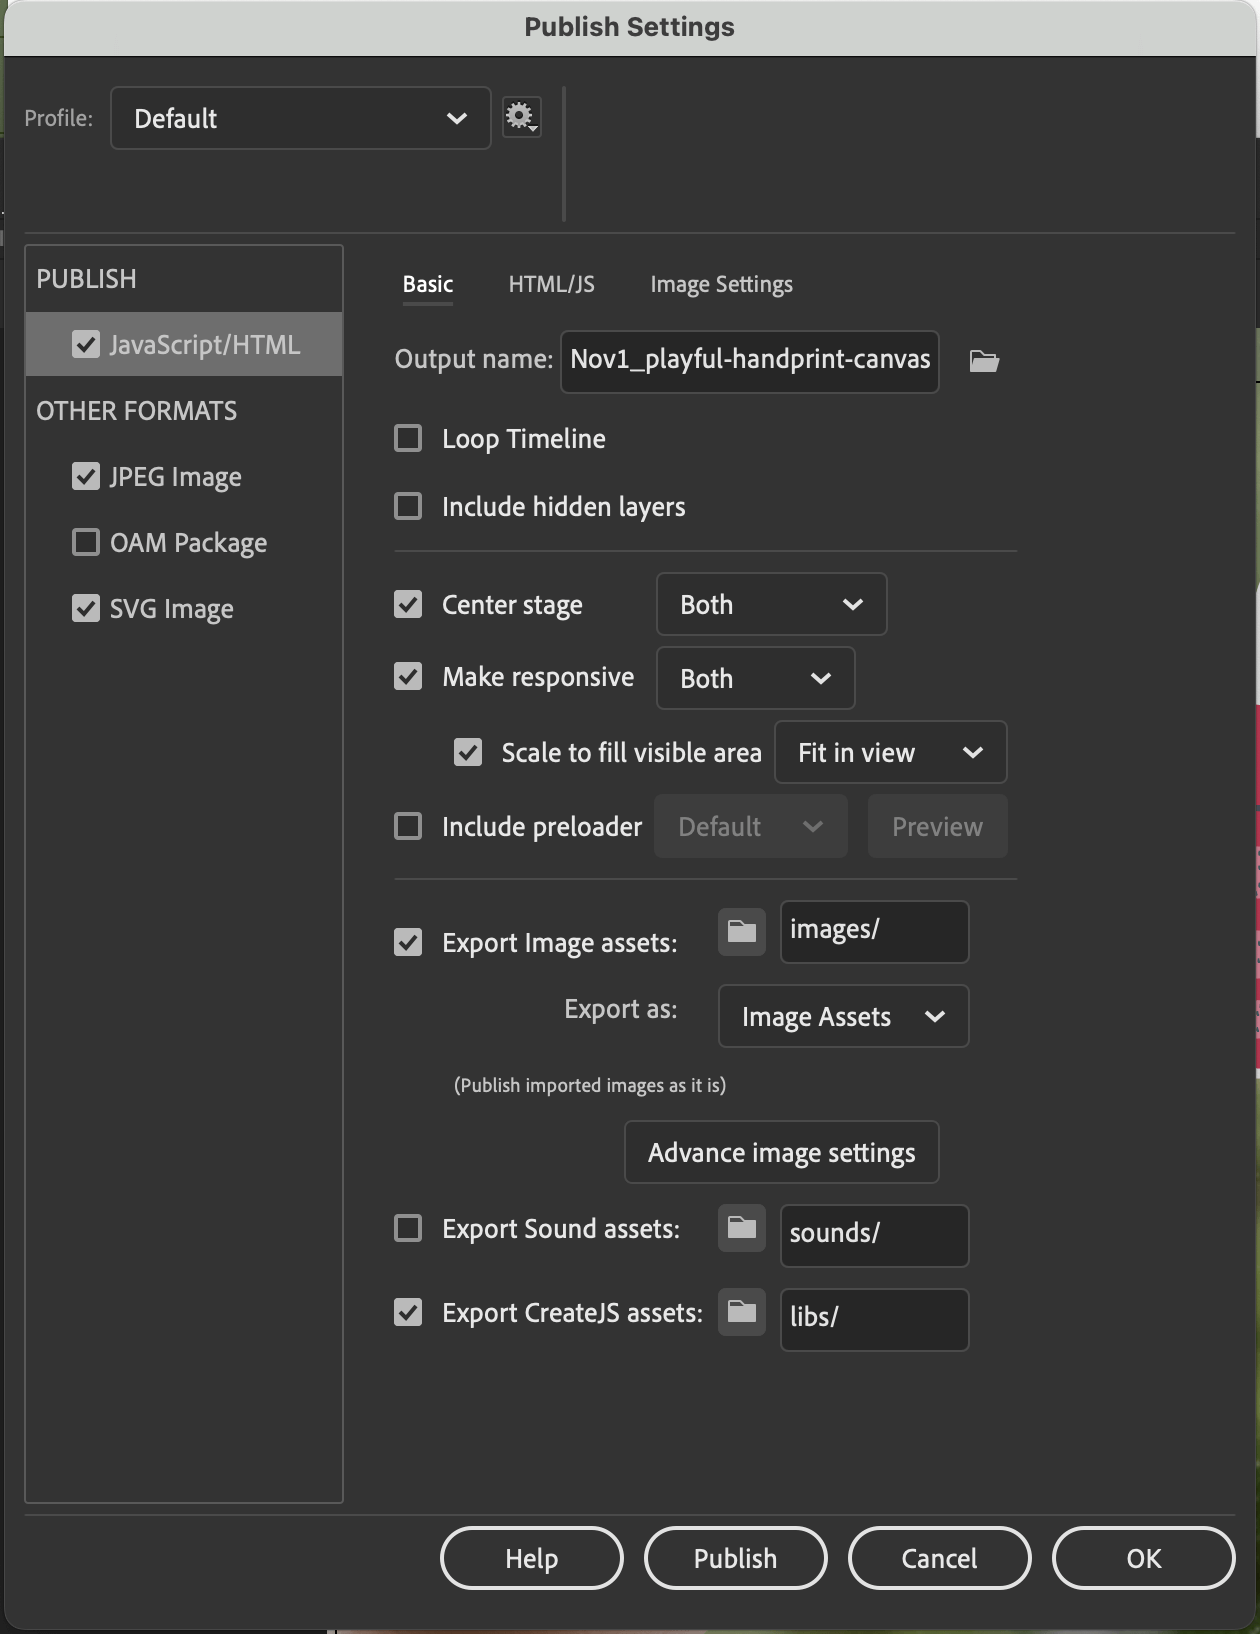
}Publish Settings for HTML5 Canvas
Below is an example of recommended publish settings for a responsive HTML5 Canvas export from Adobe Animate.
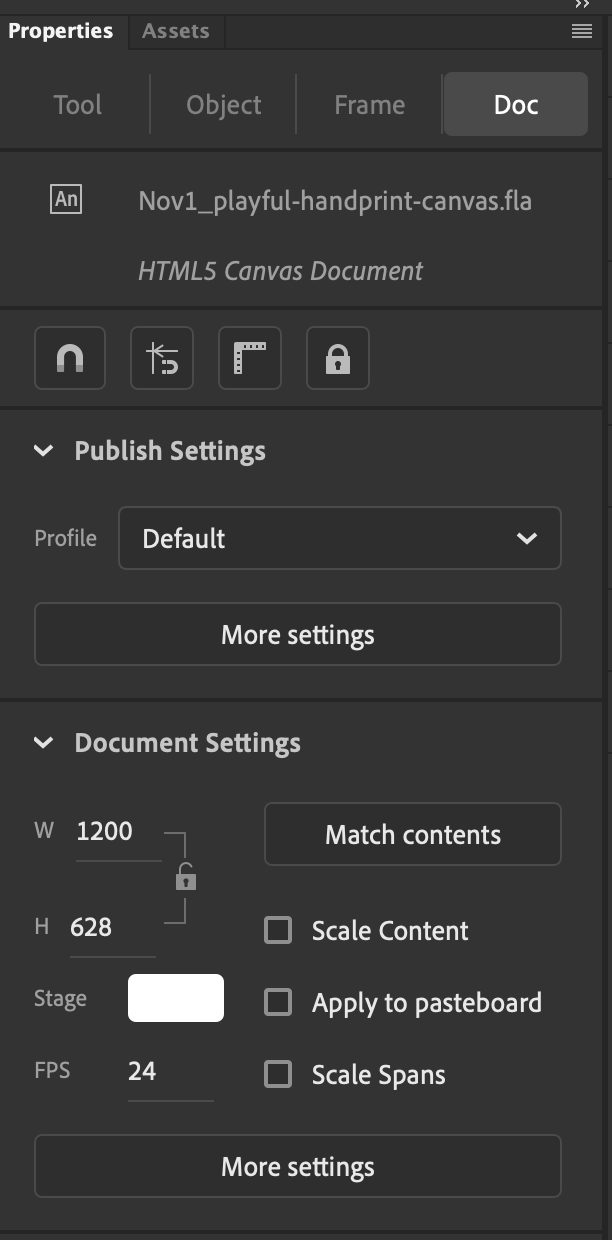
To find your canvas dimensions in Adobe Animate, go to Window > Properties and then look for Document Settings.
Add your Iframe
In Gutenberg blocks, select + Custom HTML to add your iframe code.
<iframe src="https://artsandbricks.com/wp-content/uploads/playful-hand-window-clings-touch-friendly/" width="1200" height="628" style="border:0;"></iframe>

/**to center your canvas, you could add:**/

<div style="text-align: center;"><iframe src="https://artsandbricks.com/wp-content/uploads/playful-hand-window-clings-touch-friendly/" width="1200" height="628" style="border:0;"></iframe></div>

/** I used the following responsive iframe code **/
<style>
.animate-container {
overflow: hidden;
  /* custom aspect ratio */
  padding-top:52.3%;
  position: relative;
margin-bottom:3%;
}
.animate-container iframe {
 height: 100%;
   left: 0;
   position: absolute;
   top: 0;
}
</style>

<div class="animate-container"><iframe src="https://artsandbricks.com/wp-content/uploads/playful-hand-window-clings-touch-friendly/" loading="lazy" width="720" height="380" style="border:0;"></iframe></div>
Check out Ben Marshall’s post for more information/tips on responsive iframes.
Here’s a working example. You can purchase these adorable personalized Spring Window Clings from Arts and Bricks.
Thank you for posting this! I went through at least ten attempts (including some of those mentioned here) but this was what I needed to successfully embed my html5 interactive graphic into a business wordpress site.
I’m so glad this technical write-up helped!