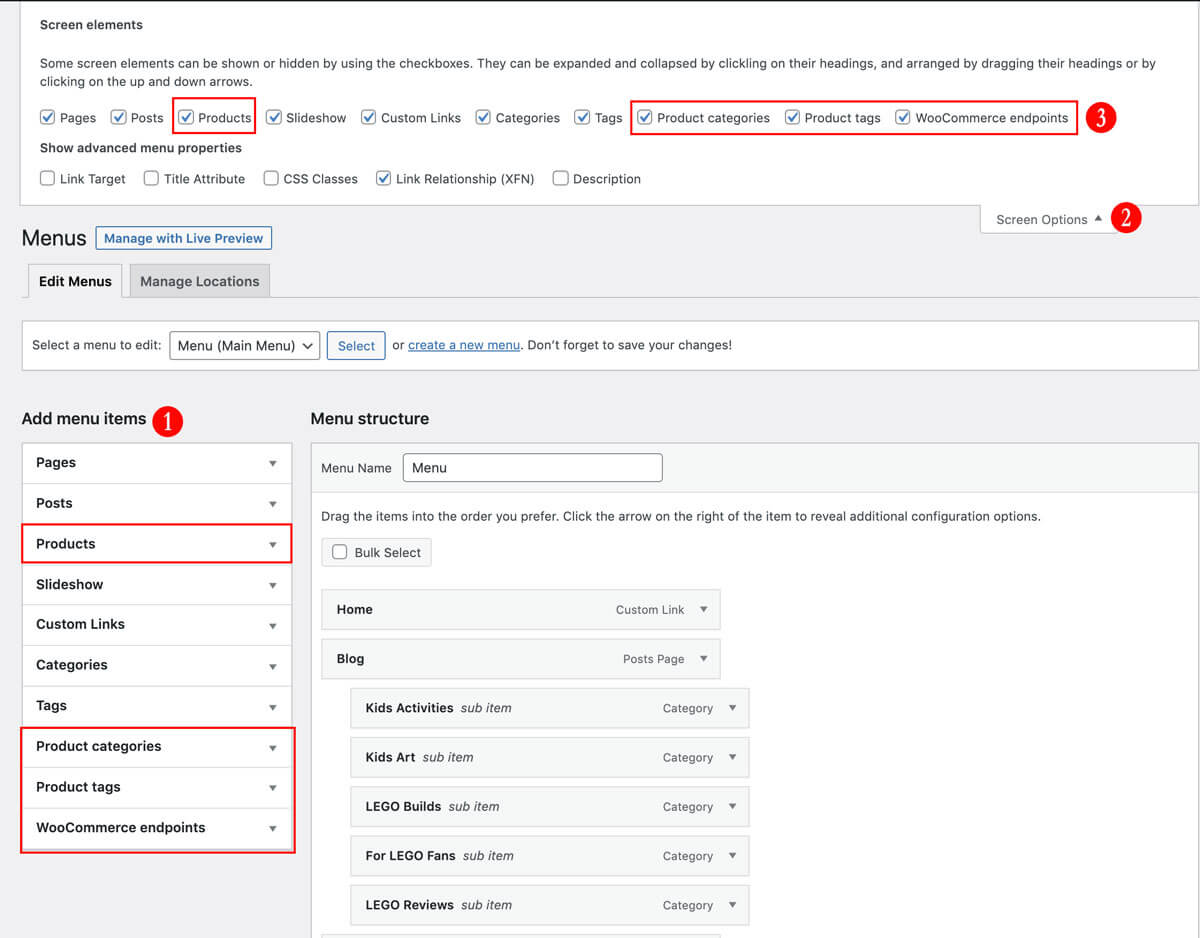
Woocommerce Menu Settings in WordPress
Where are Woocommerce Menu items in my WordPress menu accordion?
If you manage a WordPress site that is running a Woocommerce store, then there may come a time when you want to add a specific Woocommerce product page, Woocommerce product category, Woocommerce product tag, or Woocommerce endpoint to your WordPress global menus and navigation.
Although you can always add any link (internal or external to your site) to your WordPress menus using the Custom Links area found in “Add Menu Items”; there’s an easier way to access the links to Woocommerce product-relevant links, but the option is hidden by default.
To view the built-in Woocommerce menu options, you’ll need to click specific checkboxes to “ON.”
Instructions for making Woocommerce menu settings visible
- From the WP Admin’s left nav, go to Appearance > Menu. Our goal is to add Woocommerce options to the “Add menu items” accordion. (#1 in figure)
- Look at the top right of the page, click the “Screen Options” arrow button (#2 in figure)
- This opens an array of options that all include checkboxes.
- You’ll see a list of options that include, Products, Product Categories, Product Tags, and Woocommerce Endpoints. If an option is checked, then that option is shown below in the “Add menu items” accordion.
- Click to check “ON” the menu items that you want to see displayed. (#3 in figure)

Watch a video showing how to add additional menu item options by using WordPress’s Screen Options settings.
Now, you should have an easy way to add a specific Woocommerce product, a shop category or shop-specific tag, or even your checkout, cart, or another shop page to any WordPress Menu active in your theme.
Have additional questions or thoughts?
Please share in the comments below.

