
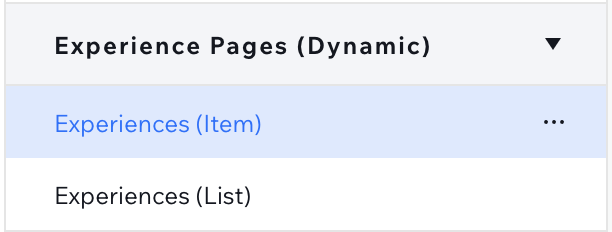
Does your breadcrumb still say (Item)? Yep, not very helpful!
To make your breadcrumbs display the dynamic item’s actual name, you’ll need to add custom Velo code to your dynamic item page in Wix Studio. This post shares a generic script and explains step by step how to customize it for your specific use case.
General Example for Custom Breadcrumbs on Dynamic Page Items
In the generic example below, you’ll need to customize seven items (bolded in the code) to match your site’s content structure.
$w.onReady(function () {

  $w("#dynamicDataset").onReady(() => {
    const currentItem = $w("#dynamicDataset").getCurrentItem();
    const currentItemLabel = currentItem.title;
    const currentItemLink = currentItem["link-category-title"];

	 $w("#breadcrumbs").items = [
    {
      label: "Home",
      link: "/"
    },
    {
      label: "Category Title",
      link: "/category-title"
    },
    {
      label: currentItemLabel,
      link: currentItemLink
    }
  ]

  })
});
Before and After Example: Breadcrumbs on Dynamic Item Pages
Default Wix Breadcrumb:
Home > Experiences (Item)
After Custom Code:
Home > Experiences > Experience Name
How to customize this Velo script
1. Find Your Dataset ID
First, you’ll be working on the Dynamic content’s Item page (mine is called “Experience”).
In edit mode, on this dynamic (Item page, you need to identify which dataset is already connected.
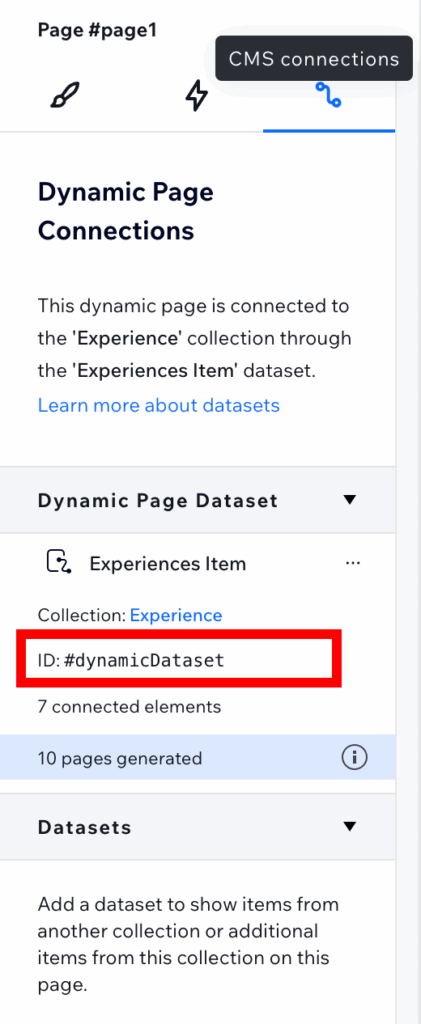
In Wix Studio, the CMS panel is on the right, and that’s where you’ll found your dataset’s ID. Mine was named #dynamicDataset, which is the default in many cases, but yours might be different — so it’s important to confirm.
Once you’ve located your dataset ID, you’ll need to use it in two spots in the Velo code. Both are highlighted below.
$w("#dynamicDataset").onReady(() => {
    const currentItem = $w("#dynamicDataset").getCurrentItem();
Here’s what to do:
- Open your Dynamic Item Page in Wix Studio.
- In the right-hand CMS panel, find the connected dataset.
- Note the Dataset ID (e.g.,
#dynamicDataset). - Use that ID to replace the two Dataset IDs in the provided code.
2. Locate the Field ID for the Collection’s Title or Name
Next, you’ll grab the Field ID from your Collection. This is the content you want to show as the final breadcrumb (for example, the Experience’s name).
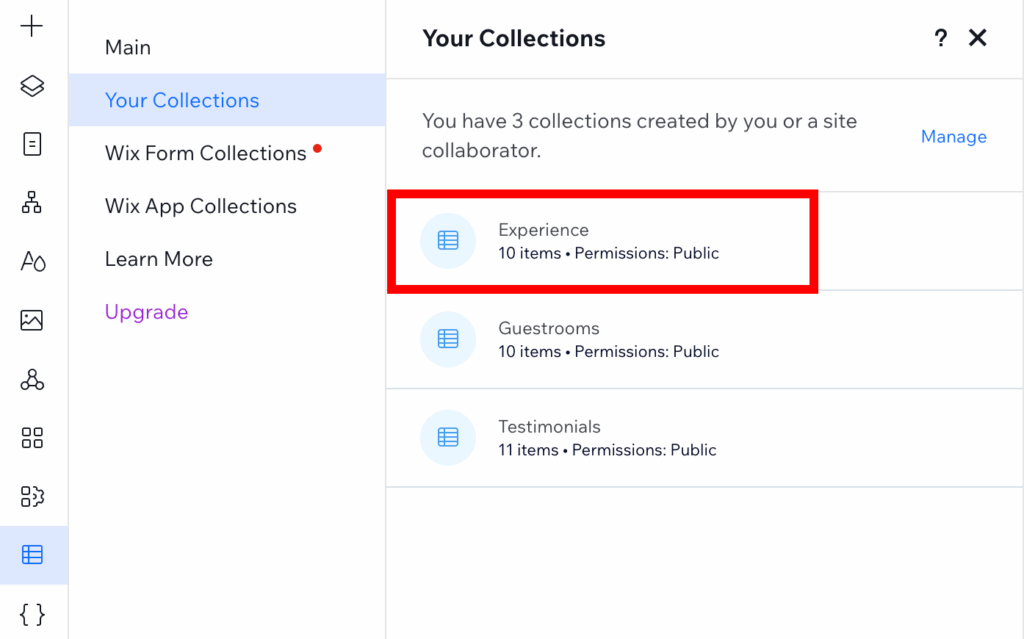
In Wix Studio, go to CMS > Your Collections and open the Collection powering your dynamic page. Mine is called “Experience.”
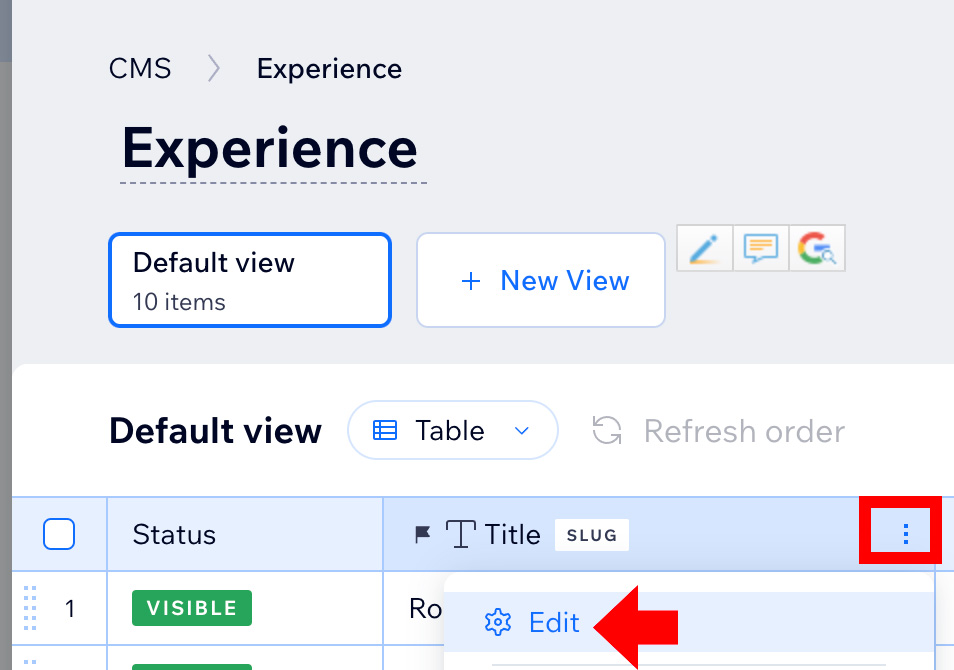
Once in your CMS Edit view, look for the field that holds the item’s name or title. In most cases, this will simply be called Title. Click the three-dot menu (horizontal ellipsis) next to that field and select Edit.
A modal window will open with a label called Field ID. This is the value you’ll use in the Velo code.
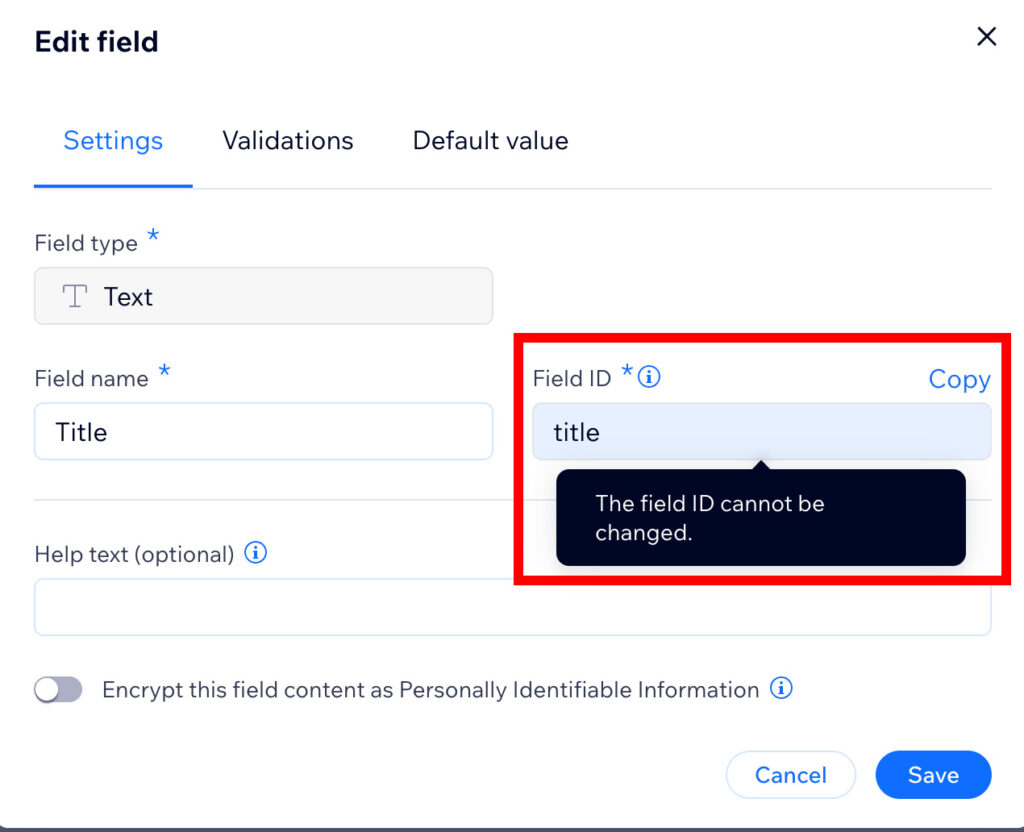
You’ll replace title in this line of code with your Field ID.
const currentItemLabel = currentItem.title;Here’s what to do:
- In the CMS panel, open your Collection.
- Click the three-dot menu next to the field you want to use as the item’s name (likely Title).
- Choose Edit to open the Field ID modal.
- Copy the Field ID.
- Use that ID to replace
titlein the code.
3 Find the Field ID for the Slug (URL) of the Item
Now let’s update the breadcrumb so that the link goes to the correct item page. For that, you’ll need the Field ID for the item’s slug, which is typically auto-generated by Wix Studio and often labeled with something like link-[collection-name]-title.
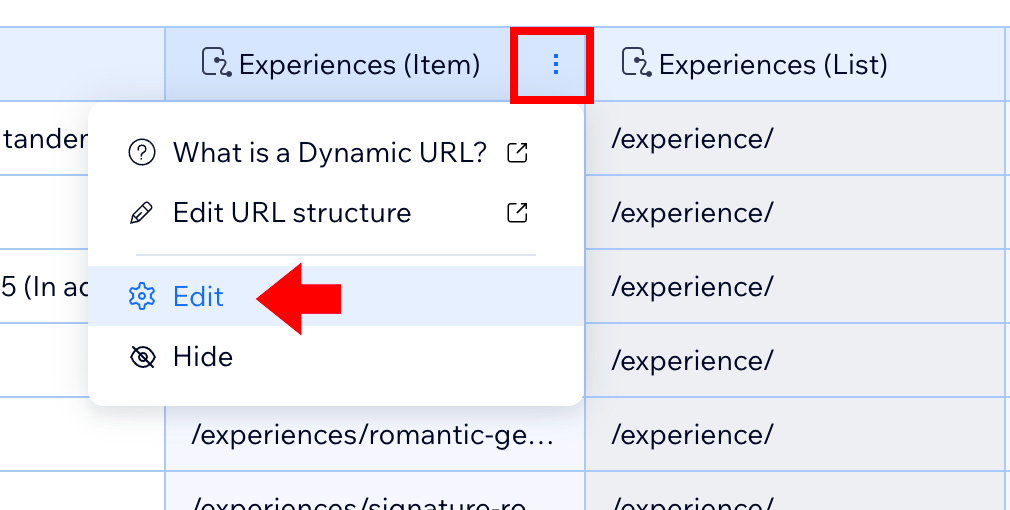
To find it, go back to the Collection that powers your Dynamic Item Page (mine is “Experience”). Look for the field that represents the (Item) or Slug/URL.
Just like before, click the three-dot menu next to that field and choose Edit.
In the modal that opens, copy the Field ID. If your Field ID includes dashes (like link-experiences-title), you’ll need to use brackets and quotes in the Velo code.
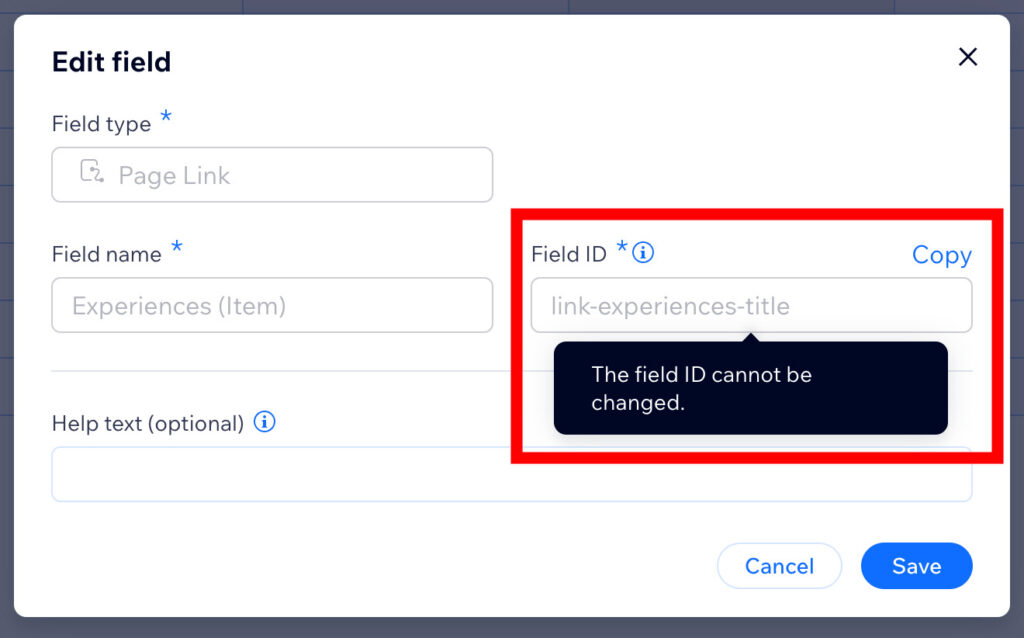
.You’ll include this Field ID in this piece of the Velo code.
change
const currentItemLink = currentItem["link-category-title"];
to
const currentItemLink = currentItem["link-experiences-title"];
Here’s what to do:
- Open your Collection in the CMS.
- Find the Slug/Item field — the one that links to the item’s dynamic page.
- Click the three-dot menu and select Edit.
- Copy the Field ID shown in the modal.
- If the Field ID includes dashes, use brackets and quotes when inserting it into the code.
- Replace the original Field ID in the code with your new one.
4. Locate the ID of Your Breadcrumbs Element
Now that the Velo code knows what to display and where to link, we need to tell it where to insert this custom breadcrumb.
That’s where the Breadcrumbs element ID comes in.
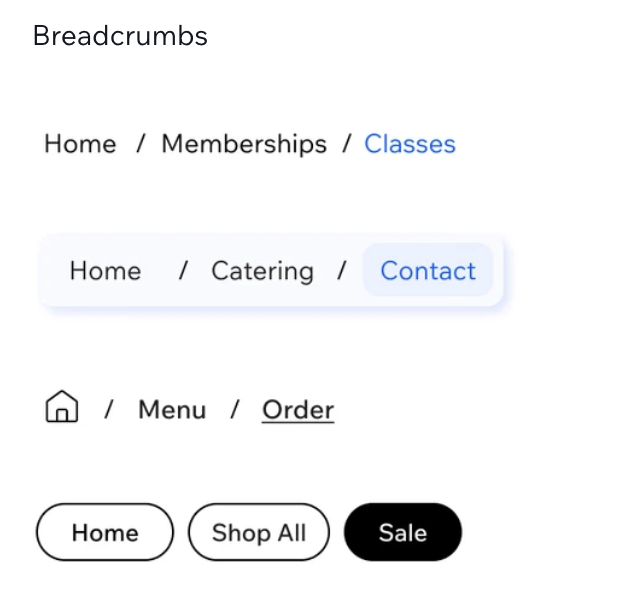
If you haven’t already added a breadcrumbs element to your Dynamic Item page, go ahead and do that now. In 2025, Wix Studio offers four design styles for breadcrumbs. Choose the one that fits your site’s look and feel.
Once the breadcrumbs element is added to your page, select it in the Layers panel or directly on the canvas. Then, look in the left-hand Layers panel to find its ID. It starts with a hashtag (e.g., #breadcrumbs1). You’ll need this exact ID to update the code so it applies to your specific element. (You can also see the #ID by selecting the item in the preview area.)
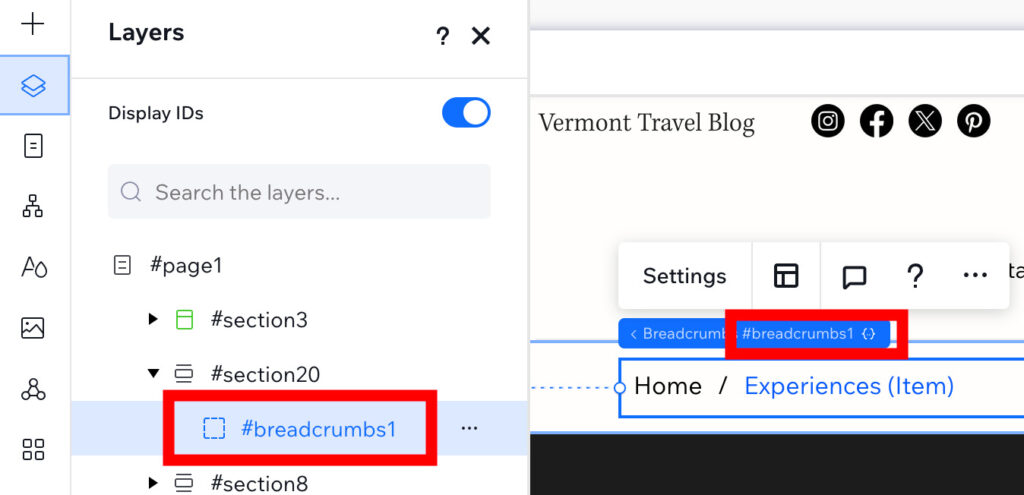
By default, the provided code snippet uses #breadcrumbs, but yours may be different. You’ll want to replace it with your actual breadcrumbs ID. In my case, the ID is #breadcrumbs1. I put that ID name into the following line of Velo Code.
$w("#breadcrumbs").items = [
change to
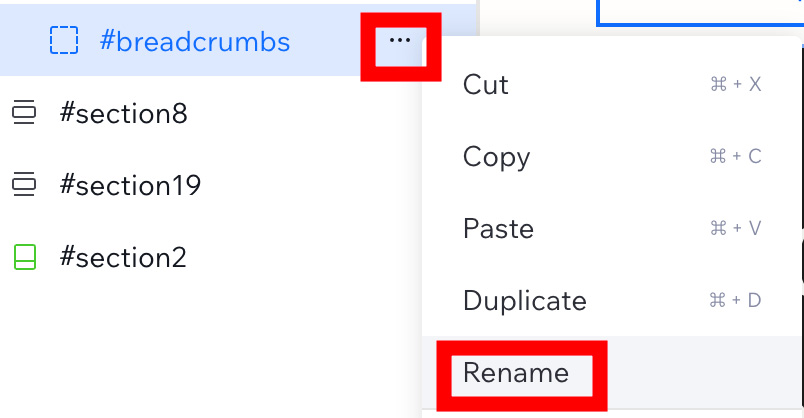
$w("#breadcrumbs1").items = [If you’d like to change the breadcrumb element ID, click the three-dot menu (horizontal ellipse) and select Rename. Now, simply type in a new desired ID name.
Here’s what to do:
- Add a breadcrumbs element to your Dynamic Item page (if not already added).
- Select the breadcrumbs element in the Layers panel.
- Locate and copy the element ID (it’ll start with
#). - Replace the default ID in your Velo code with your specific breadcrumbs ID.
- (Optional) Rename the element for clarity — use the three-dot menu in the Layers panel to rename it.
Customize your Slug and Title for the Custom Category Breadcrumbs
Next you’re adding your Collection’s name that you want to see as the Item List page. For this example, I’ll use Experiences. My Slug for Experiences /experiences.
{
      label: "Category Title",
      link: "/category-title"
    },

change to

{
      label: "Experiences",
      link: "/experiences"
    },
Results
On the live or preview site for the dynamic page item, the breadcrumb now shows as: Home > Experiences > Experience Title.
For example, it looks like this:

To keep in mind, on the Edit page for Dynamic (Item) the breadcrumb will still have (Item) in the title. For example, mine looks like this.

Frequently Asked Questions
The code area is minimized and maximized from the bottom of your screen. To learn more about the Code Editor (IDE) check out Wix Studio documentation.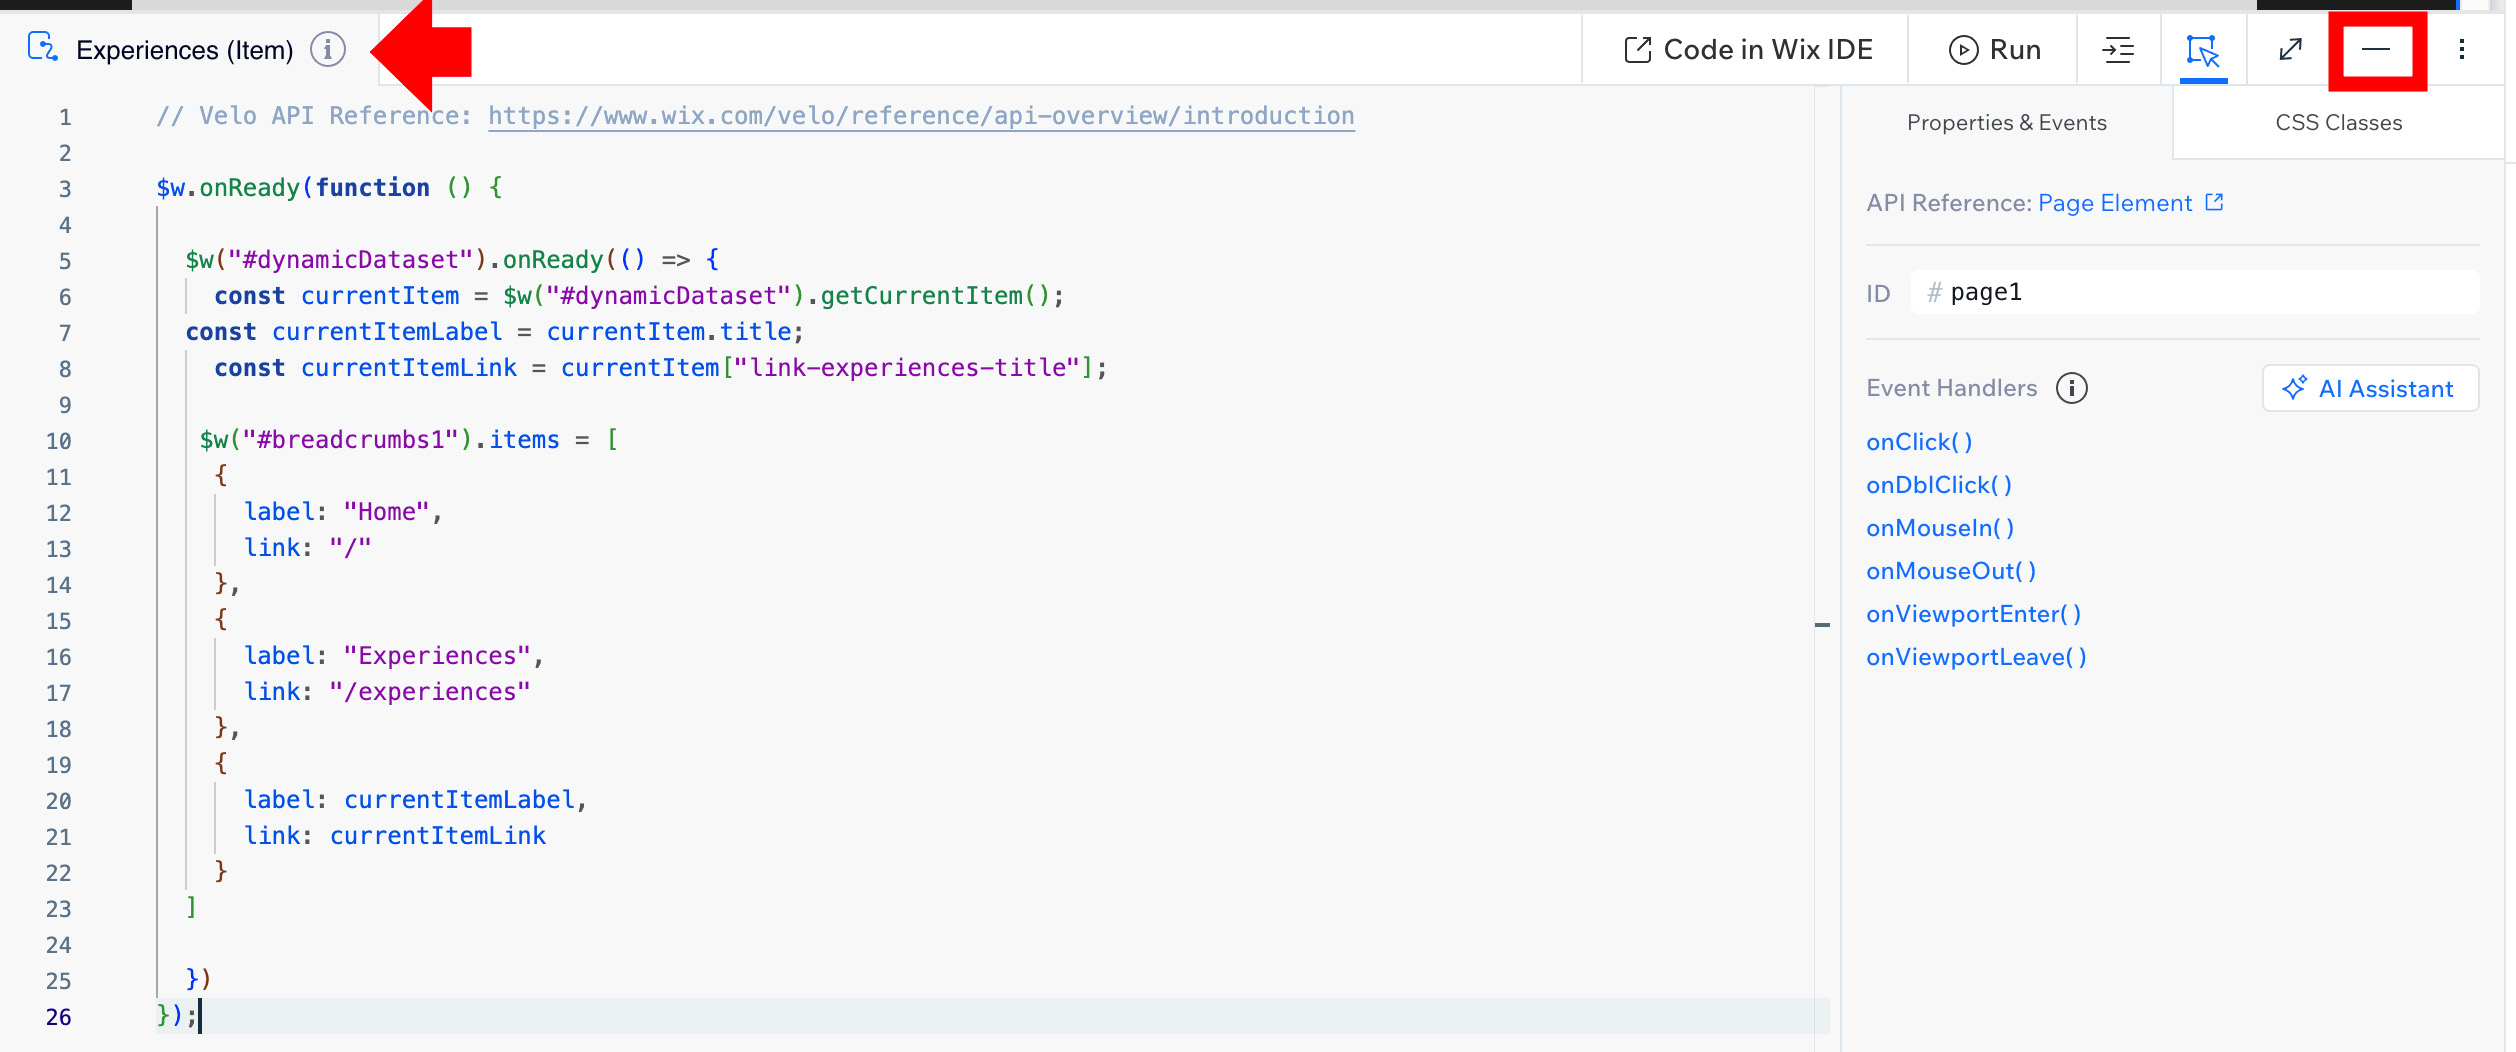
Related Posts
How to Set a Max Width in Wix Studio (And Why You’ll Actually Want To)
Max-width settings can improve content readability. Combine this with customized breadcrumbs for a polished, user-friendly design.