
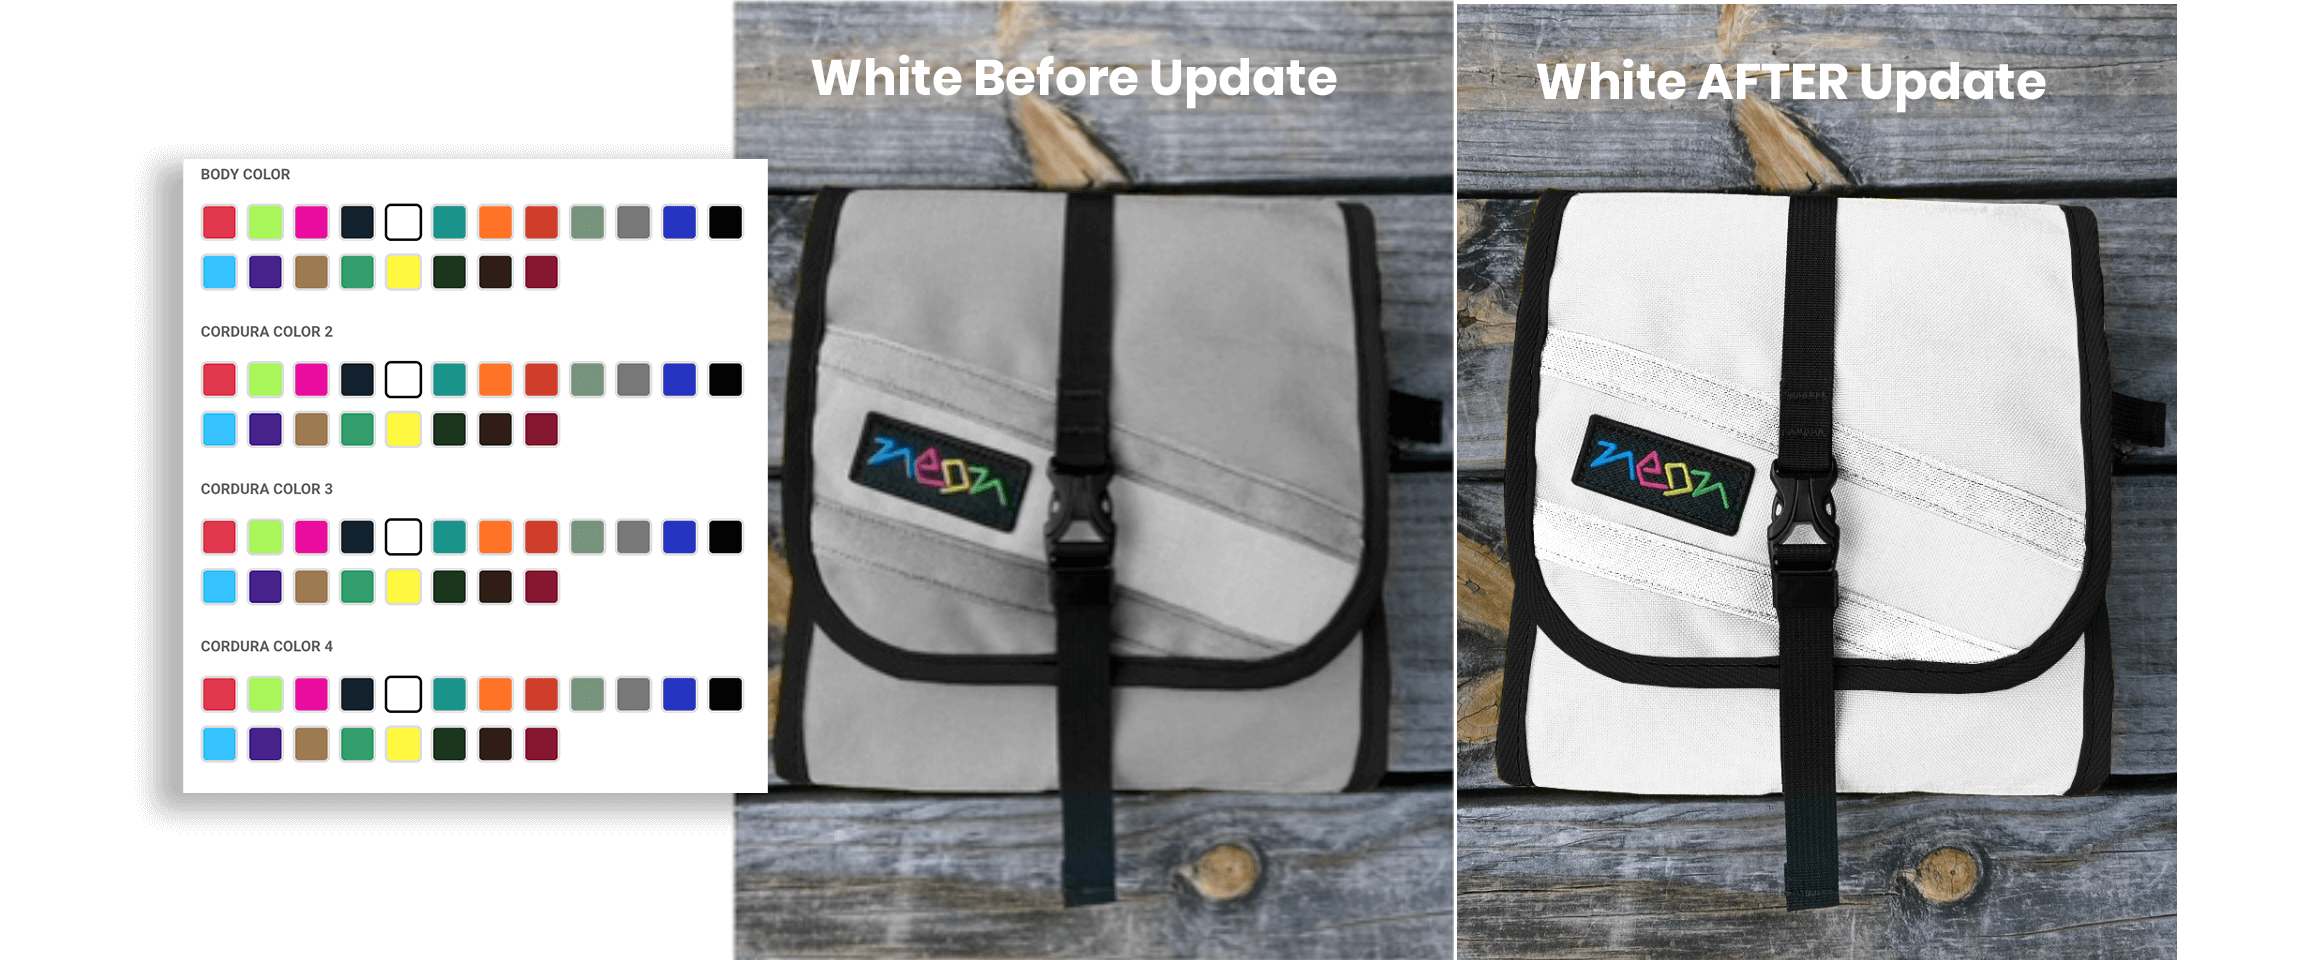
If you’ve ever built a product personalizer in Shopify—whether you’re using Zepto, HulkApps, or custom CSS—you’ve likely hit the “Muddy White” wall.
You set your product image to mix-blend-mode: multiply, and while the dark colors like Navy and Black look premium and realistic, the White option looks gray. In this guide, I’m walking you through the professional DesignerToFullstack workflow to fix your colors by perfecting your transparent PNGs; they need to be brighter white!
Watch the Full Tutorial
The Core Problem: The “Multiply” Trap
Most e-commerce customizers use the Multiply blend mode to overlay colors onto a product photo. Mathematically, “Multiply” takes the color of your swatch and multiplies it by the brightness of the base image.
The Issue: If your base product photo has any shadows or mid-tones (which it needs for texture), those tones “multiply” with your white color overlay. Since white is effectively “1” in math terms, it doesn’t lighten anything; it just lets the underlying gray shadows bleed through.
Step 1: The “Split-Out” Strategy
A realistic customizer isn’t just one flat image; it’s an architectural stack of layers. Before you can fix the colors, you must deconstruct the product. My video starts in Step 2: Perfecting the Base Image in Photoshop, assuming Step 1 is completed.
1. Isolate Every Colorable Area
In the video, I show how I’ve already broken down a bag into separate colorable components:
- The Top Bar
- The Main Body
- The Straps and Accents
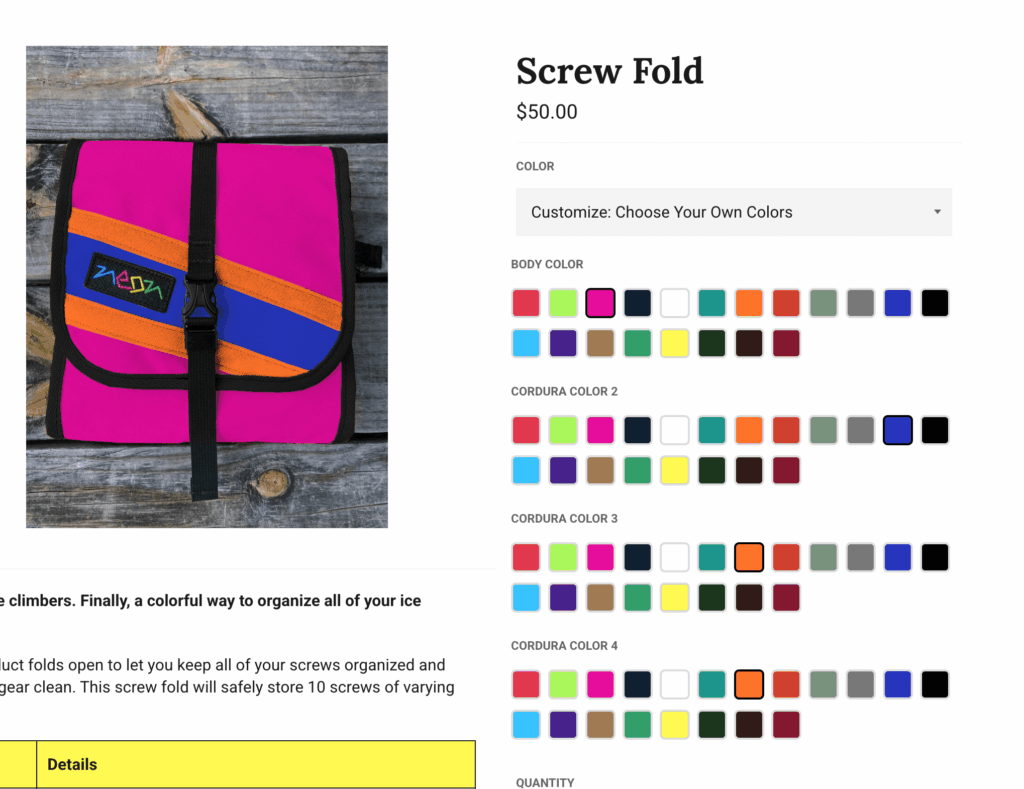
2. Create Transparent PNGs
By isolating these into their own transparent layers, I can apply unique color rules to each section without affecting constant elements like metal hardware, zippers, or the background.
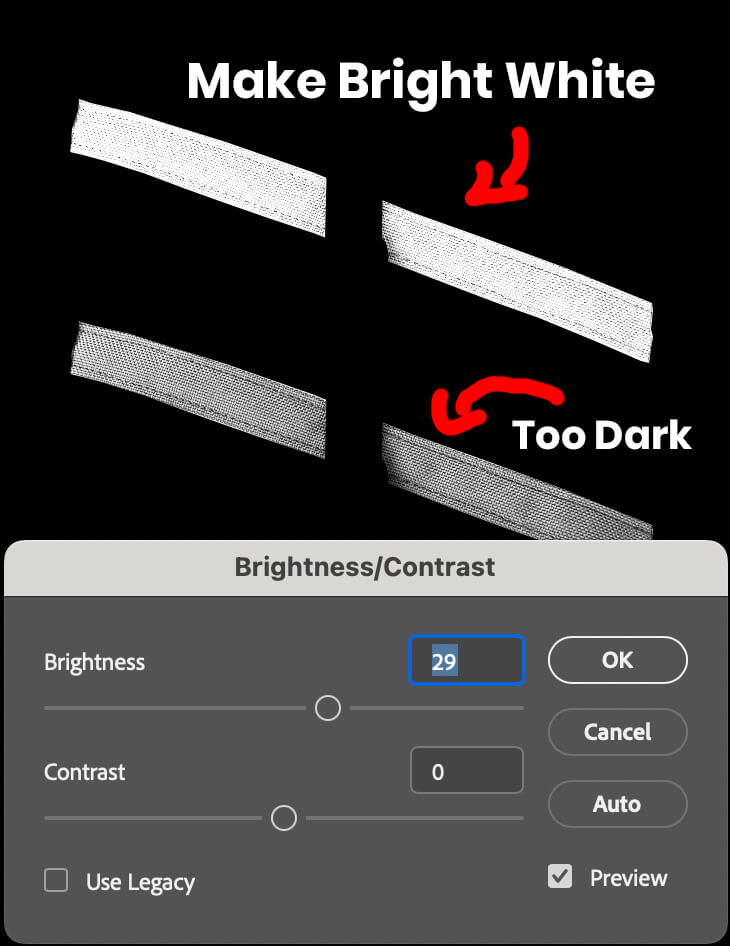
Step 2: Perfecting the Base Image in Photoshop
How to fix muddy colors in Shopify customizer (especially white)
Once your layers are isolated, it’s time to prep them for the “White” test.
- Desaturate: Remove any existing color cast to ensure a pure grayscale base.
- Brightness & Contrast: This is the secret. You need to push the image to be as “High-Key” as possible.
- The Goal: Turn those light grays into Pure White (255, 255, 255 RGB or #FFF) while keeping just enough detail in the “valleys” (the deep shadows) to maintain texture.
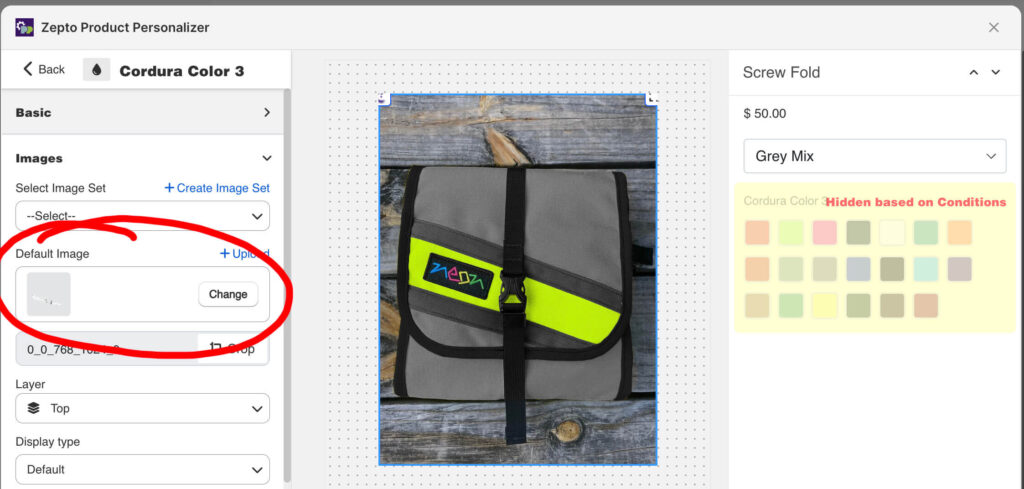
Export Cleanly: Save as transparent PNGs. Pro-Tip: Avoid filenames with parentheses or spaces like image (1).png. Name them cleanly (e.g., main-body-white.png) for better SEO and organized assets.
Step 3: Optimize Images for Site Speed
Optimizing product overlays for speed and SEO
Product customizers often require 10+ layers. To prevent your Shopify store from slowing down, use a service like TinyPNG. In my workflow, this often cuts file sizes by 50% or more without sacrificing the crisp highlights we just built.

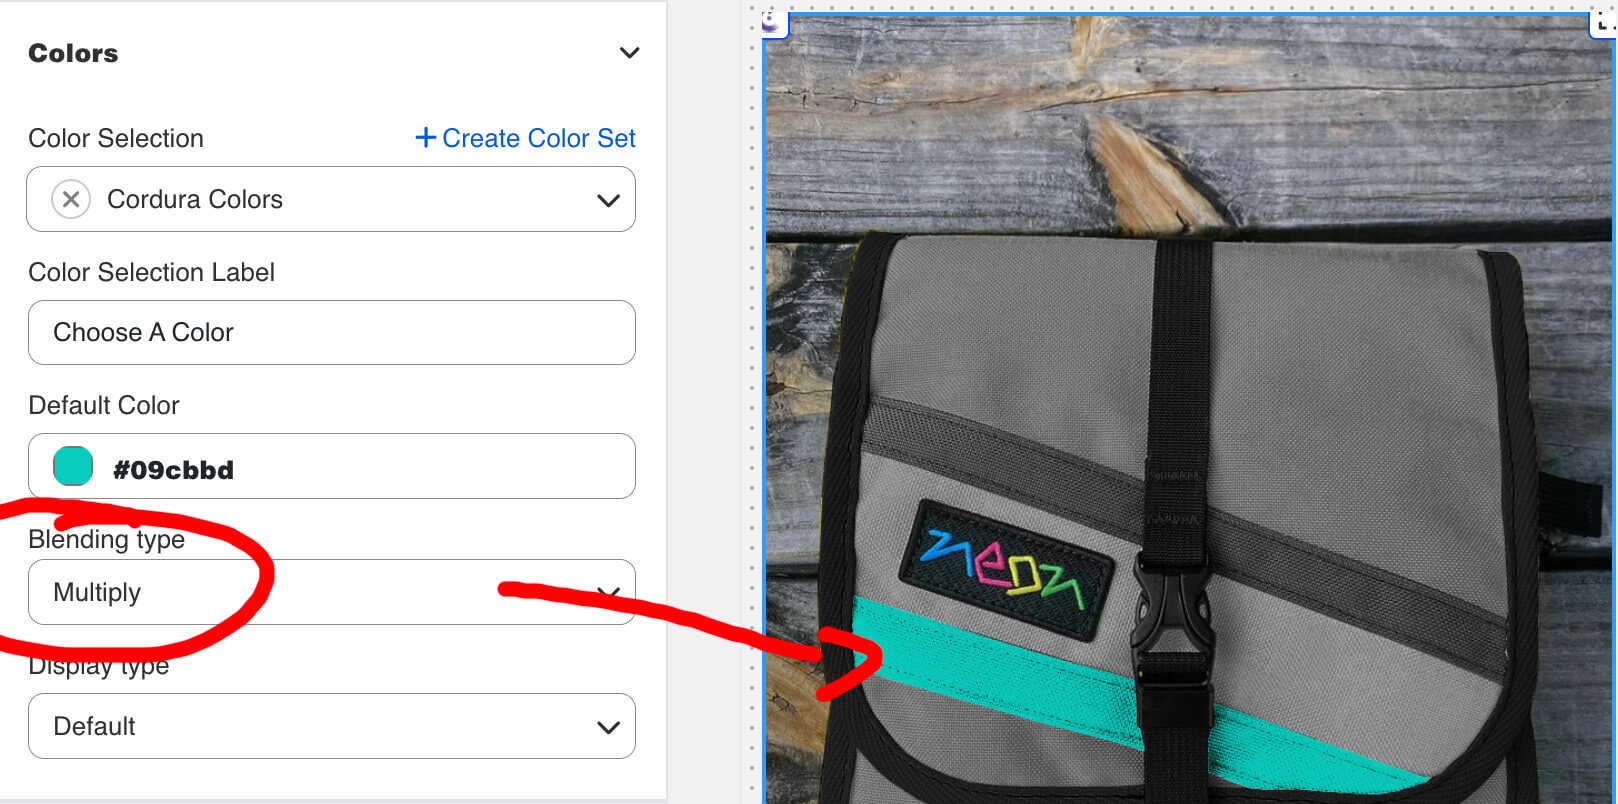
Step 4: Implementation in Shopify (Zepto Example)
Shopify Zepto product personalizer tutorial
Inside your product personalizer (like Zepto Product Personalizer):
- Upload your new, “Ultra-Bright” transparent PNGs.
- Apply your color swatches using the blend mode of your choice, often
Multiplybut sometimesLightenblend mode, too. Remember, by default, most customizers apply a single blend mode to all color swatches. - The Result: Your white swatch selection will now look crisp and bright, while your black and navy swatches remain deep and realistic because they still have the underlying shadow structure to grab onto.
FAQ: Mastering Product Customization
No. By creating one perfectly brightened, transparent grayscale PNG for each section, you can use CSS to “tint” that one image into dozens of different colors.
As long as you maintain the core shadow depth in the wrinkles and folds of the product, the black will still look rich. Black is achieved through the transparency of the multiply layer.
Splitting allows for “Multi-Zone Customization.” This lets your customers choose a Navy body with a Pink top bar, giving them a truly personalized experience that increases conversion rates.
Most customizers work-best using mix-blend-mode: multiply. Since “Multiply” works by multiplying pixel values, any shadow or mid-tone in your base image will darken the white overlay. To fix this, you must brighten the base image highlights to near-white.
Yes, you can use a color swatch or image per color. In my case, I’m sharing a color palette asset across many products so I was looking for a flexibile way to display white; however, for products without shared color palettes, you can upload a white version of the product via image too.