
Today, I did a bit of rework on a HubSpot blog template. The goal was to clarify the comment area, as it was simply a form at the bottom of the blog post without a title.
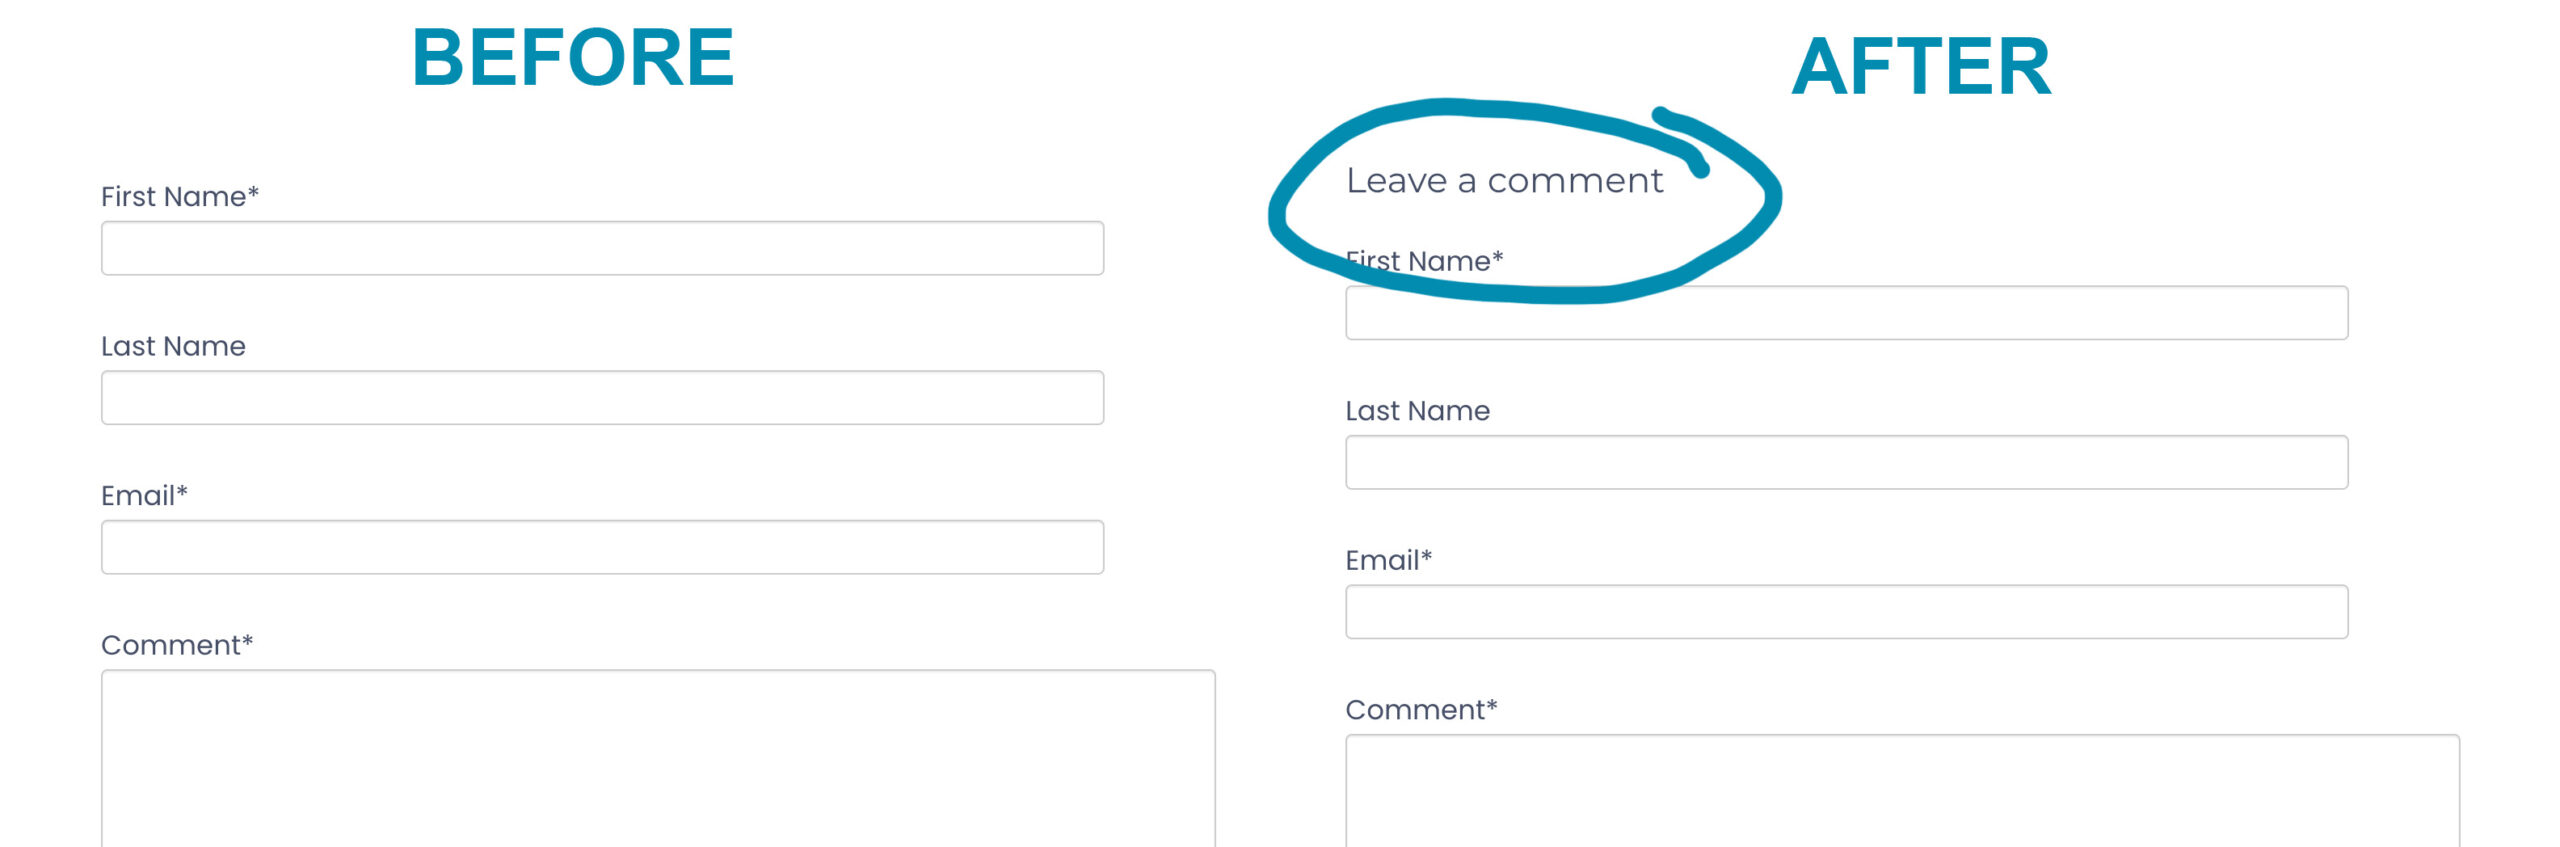
Add a heading to your Leave a Comment form in HubSpot
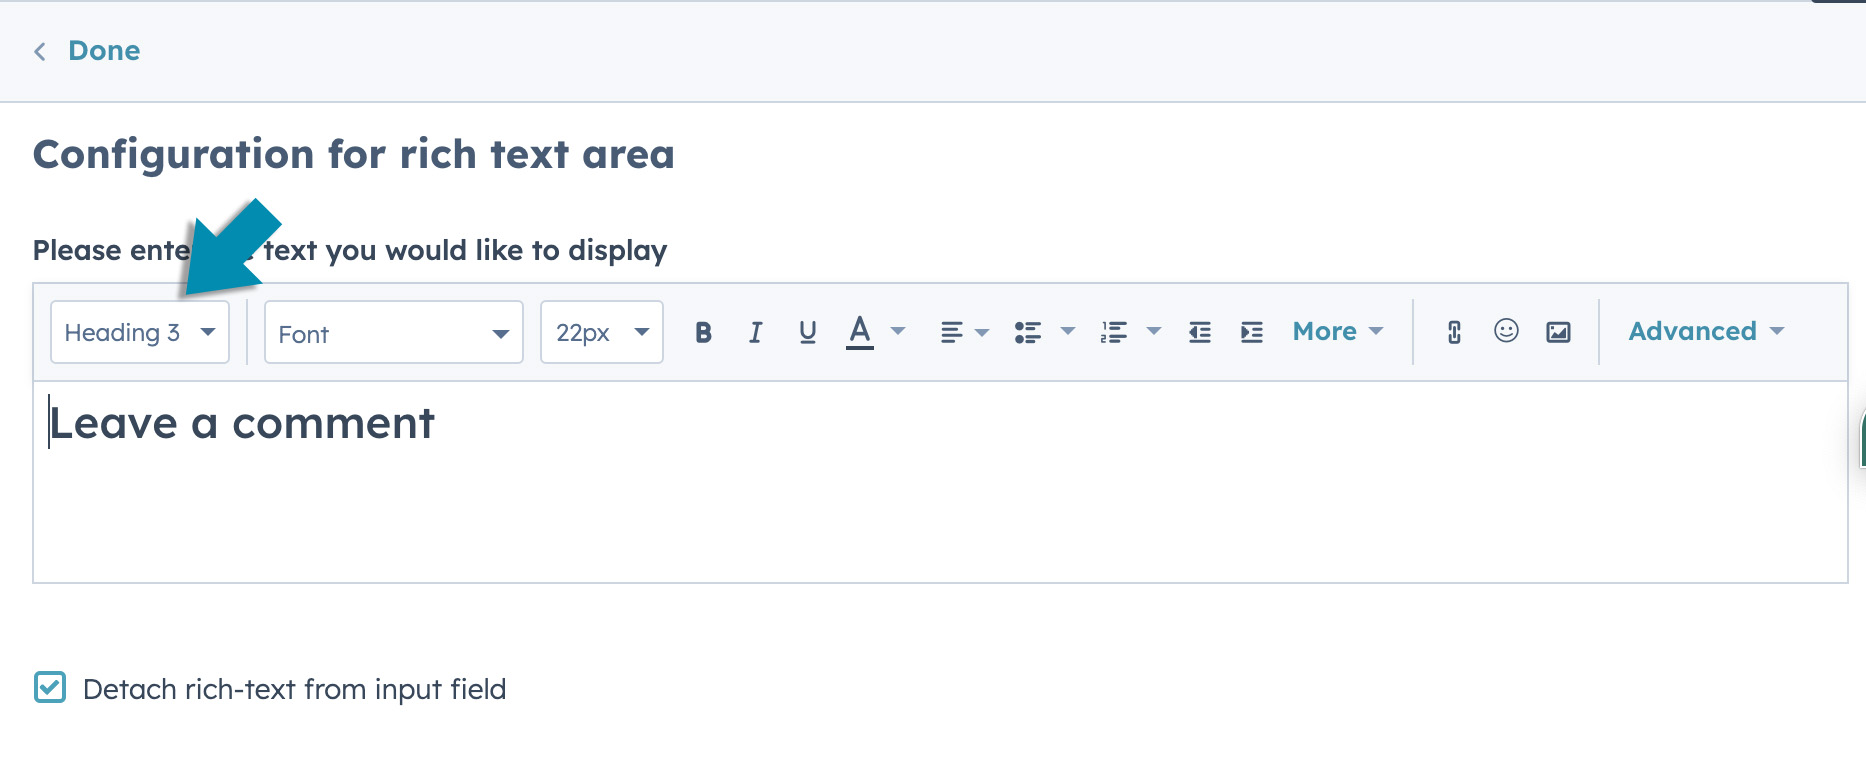
Many areas of your HubSpot Comment Widget are not editable as of 2024; however, there is a way to add or change an existing title or heading for your comment form. First, navigate to Forms and select your comments form. You will likely see just input fields. To add a title, go to the “Create New” tab and choose “Header Text.” Drag the “Header Text” to the top of your form. Now type your form name, such as Leave a Comment. Select your text and choose the appropriate heading level. For our form, Heading 3 was the correct heading level. Click, “Update” and now your comment’s heading should be visible across every Blog post.
Create new Header Text in Hubspot
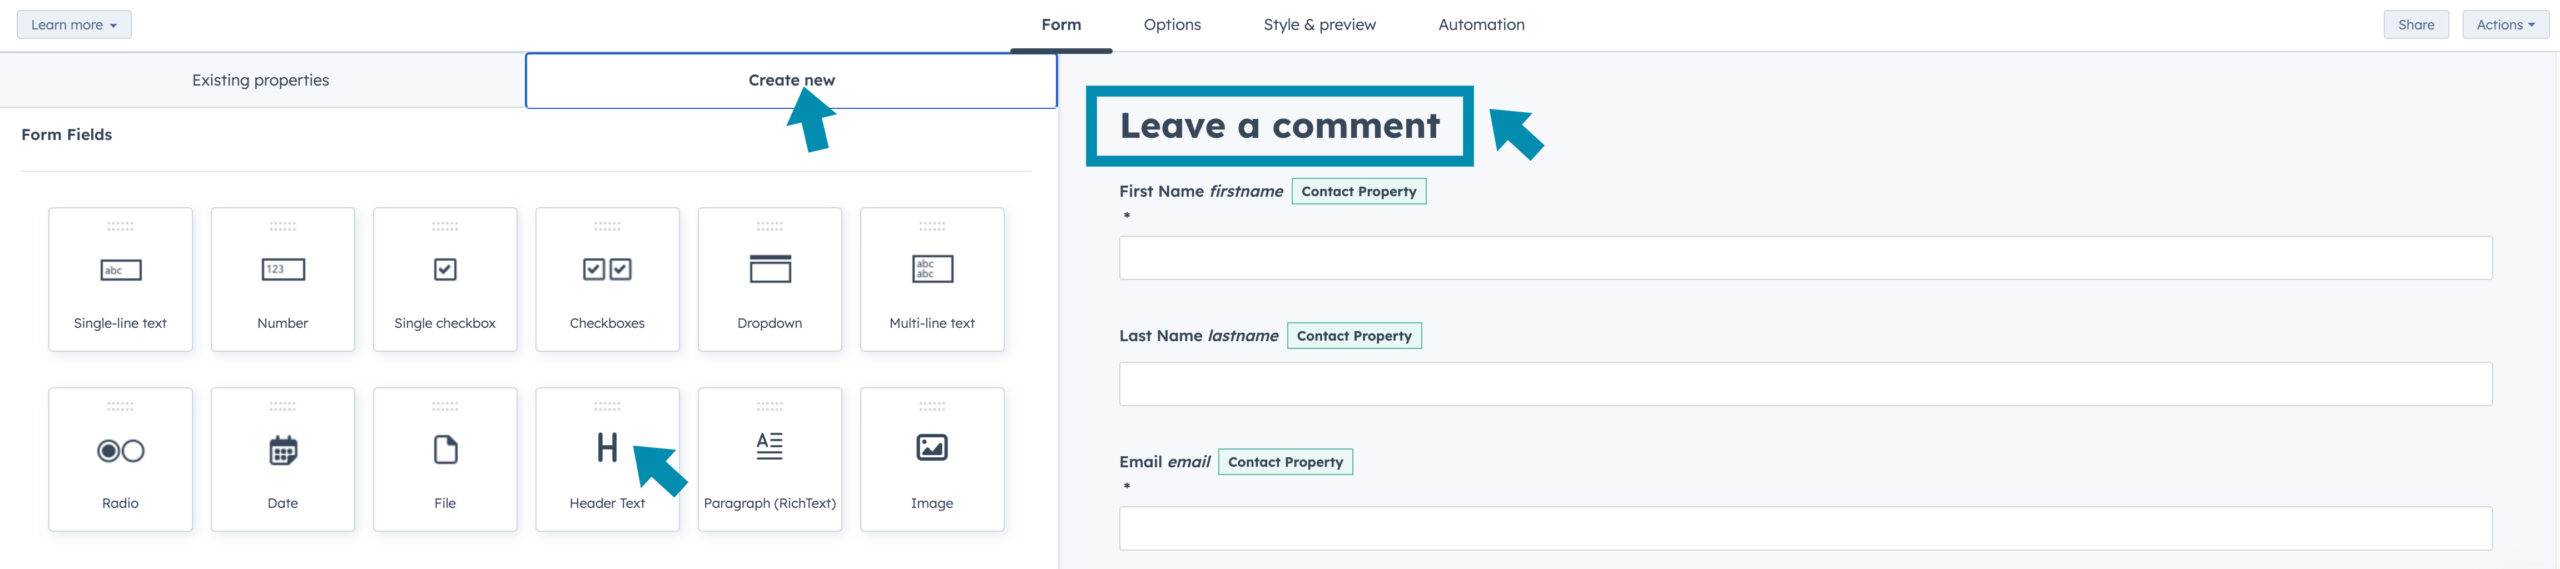
Choose your heading for your Comments Form Title
Add a heading to your entire Comments Area in HubSpot
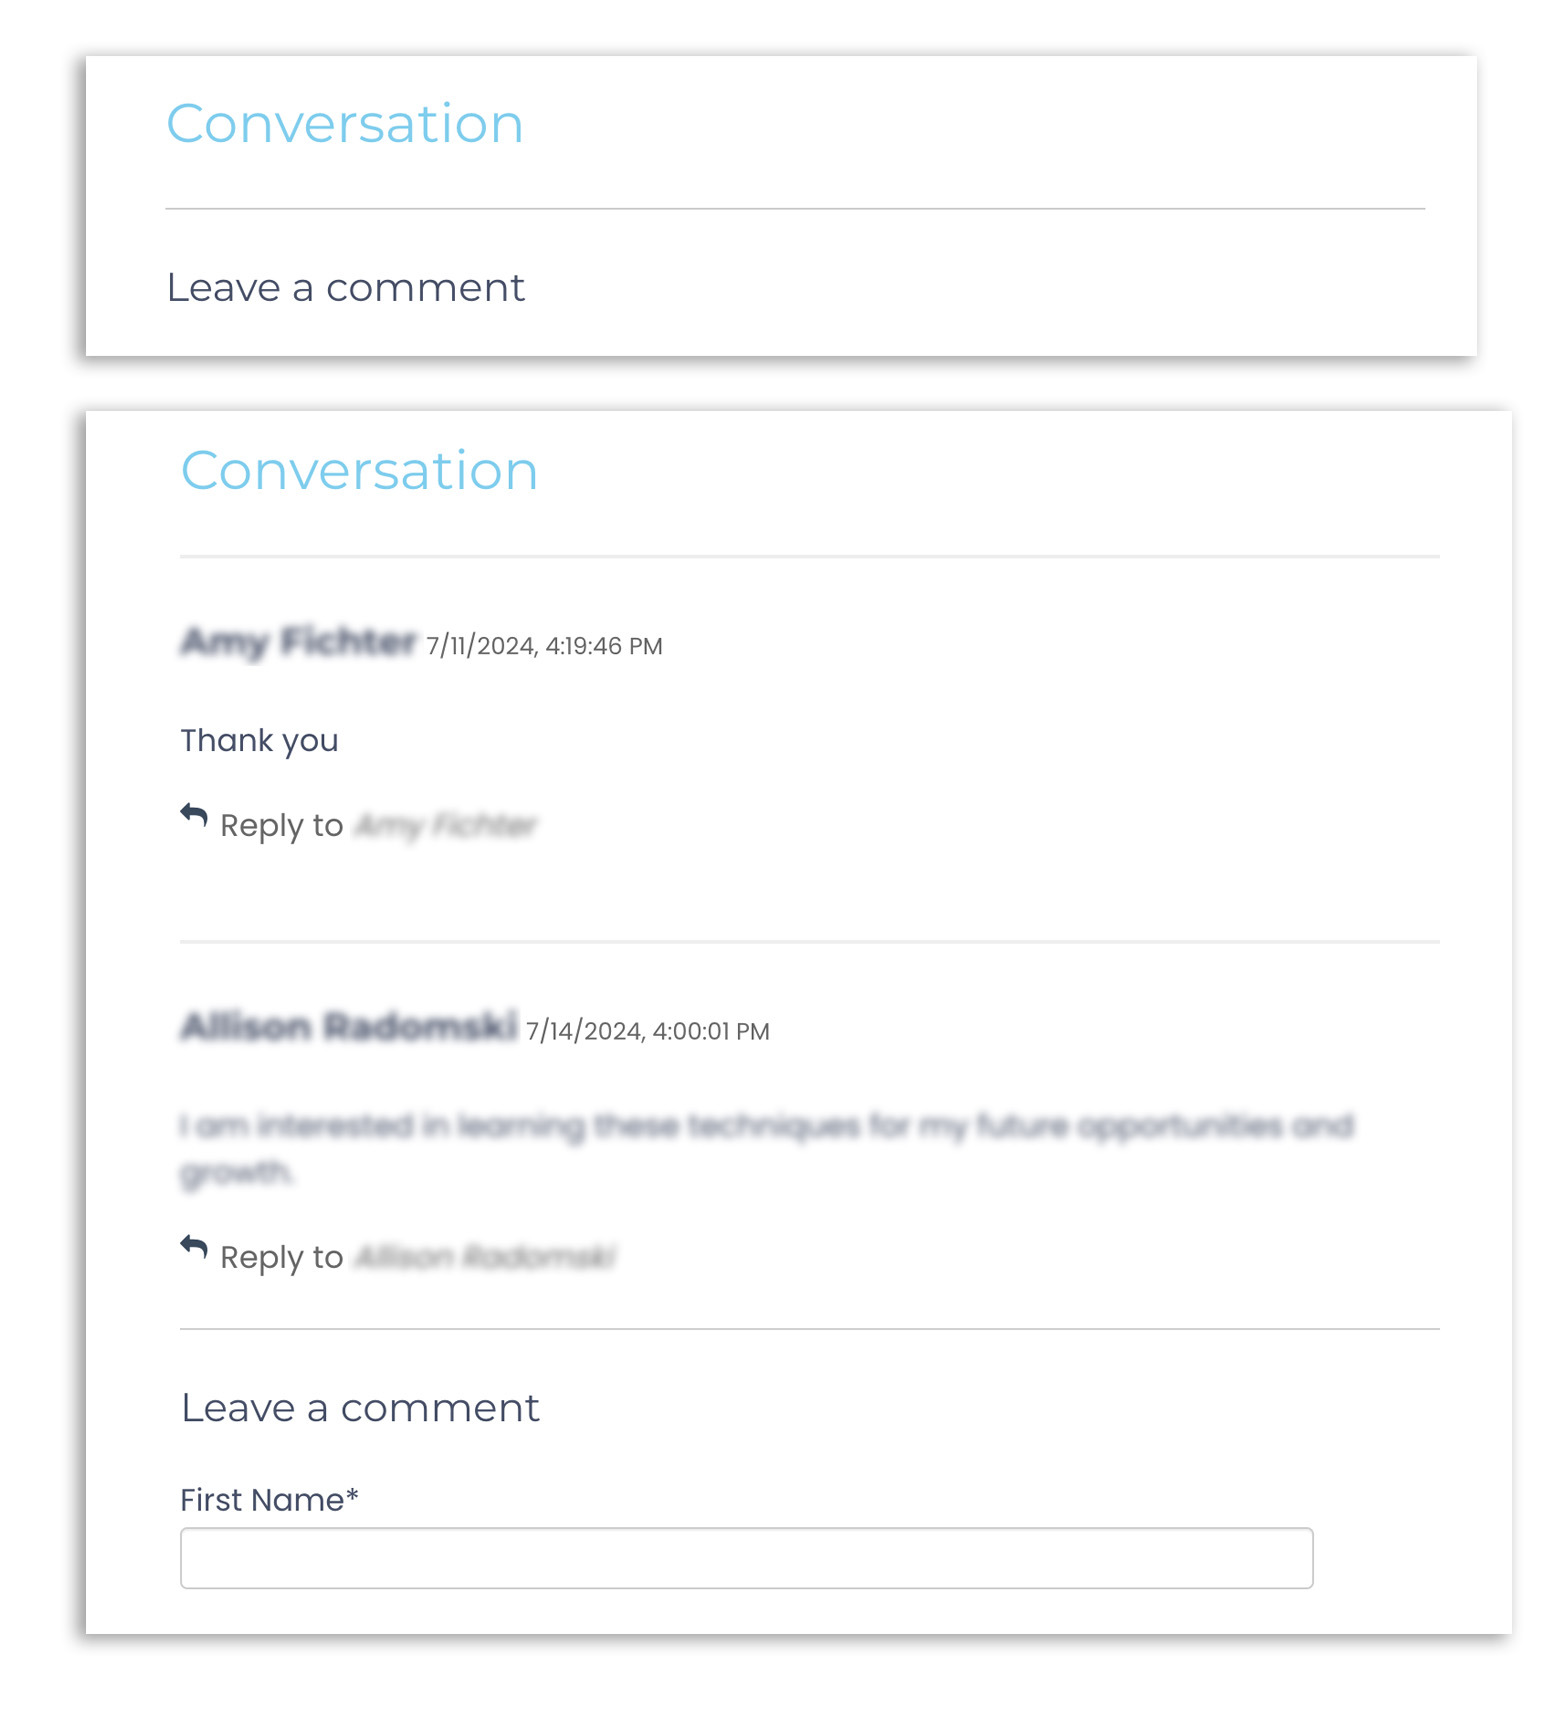
Adding a header to your Comments area was completed on my site but editing the Blog Template html file (blog.html).
Search for the class widget-type-blog_comments, that’s the comments section of your blog template. Before this line of code {% blog_comments "blog_comments" overrideable=false, label='Blog Comments' %}, I added a Heading 3 with my selected title. I added the following code, <h3>Conversation</h3>.
The results are the blue h3 heading below that reads “Conversation”. When there is conversation, comments are listed first and then the “Leave a Comment” form.
Need to style your Headings further?
I provided additional styling in my site’s CSS style sheet. For instance, for my H3s I used the following CSS body.blog .blog-content .widget-type-blog_comments h3.
Other Resources
No two HubSpot blogs are set up exactly the same, so if this didn’t help you, I recommend searching for other tutorials and resources. Here are a few to get you started.
- https://community.hubspot.com/t5/Blog-Website-Page-Publishing/Help-I-don-t-know-how-to-edit-my-blog-comment-form-title/td-p/1001266
- https://knowledge.hubspot.com/blog/set-up-and-moderate-your-blog-comments