
Sometimes you want visitors to easily share a page…especially for blog posts, landing pages, or promotions. A simple Copy Link button makes that frictionless.
In this tutorial, I’ll show you how to build a copy-to-clipboard button in Webflow using vanilla JavaScript (no jQuery required), while keeping your button icons and styling intact.
Watch First
There Are Many Ways to Build a Copy Link Button in Webflow
There are quite a few ways to implement a copy-to-clipboard button in Webflow. Some developers use custom JavaScript or jQuery snippets, while others prefer no-code approaches such as the attributes and components published by Finsweet. Those solutions can work well, especially for copying predefined text or values stored directly in the Designer.
However, in practice, I ran into a consistent limitation across many of these methods: getting the fully qualified URL of the current page—including dynamic CMS paths—wasn’t always straightforward.
Many tutorials rely on workarounds such as:
- Creating a hidden text field that contains the full URL
- Storing links in custom attributes
- Manually constructing URLs
- Or copying from elements that already display the link on the page
These approaches can work, but they introduce maintenance issues. If a slug changes, a domain changes, or content is reused across templates, those hard-coded or hidden URLs can easily become outdated.
This becomes even more noticeable on CMS-driven blog pages, where the final URL is assembled dynamically by Webflow using the collection slug and item slug. In those cases, there often isn’t a clean, no-code way to access the complete, canonical page URL without some kind of workaround.
Using Vanilla JavaScript
Because of that, I ended up using a simple vanilla JavaScript approach that reads the browser’s current location directly. This guarantees the copied link always matches the exact page the visitor is viewing—no hidden fields, no manual updates, and no risk of mismatched URLs.
A Simpler Approach: Let the Browser Tell Us the URL
After trying a few different methods, I realized there was a much simpler way to solve the problem: instead of trying to reconstruct or store the page URL, why not just read it directly from the browser?
Copy the Full Page URL in Webflow—No Hacks Needed
Every page already knows its own full address, including the domain, folder structure, CMS collection path, and slug. By using JavaScript to access window.location.href, we can reliably capture the exact URL the visitor is viewing—no hidden fields, no manual updates, and no dependence on CMS structure.
This approach has a few advantages:
- It always returns the fully qualified domain name
- It works on static pages and CMS pages the same way
- It eliminates the need for workarounds or hard-coded values
- It’s lightweight and easy to reuse anywhere in a Webflow project
With that in mind, here’s the implementation I landed on.
What We’re Building
When a user clicks a button:
- The current page URL is copied to the clipboard
- The button text changes to Copied
- After 2 seconds, the text resets to Copy Link
This approach:
- Works with multiple buttons
- Doesn’t break icons or interactions
- Uses modern browser APIs
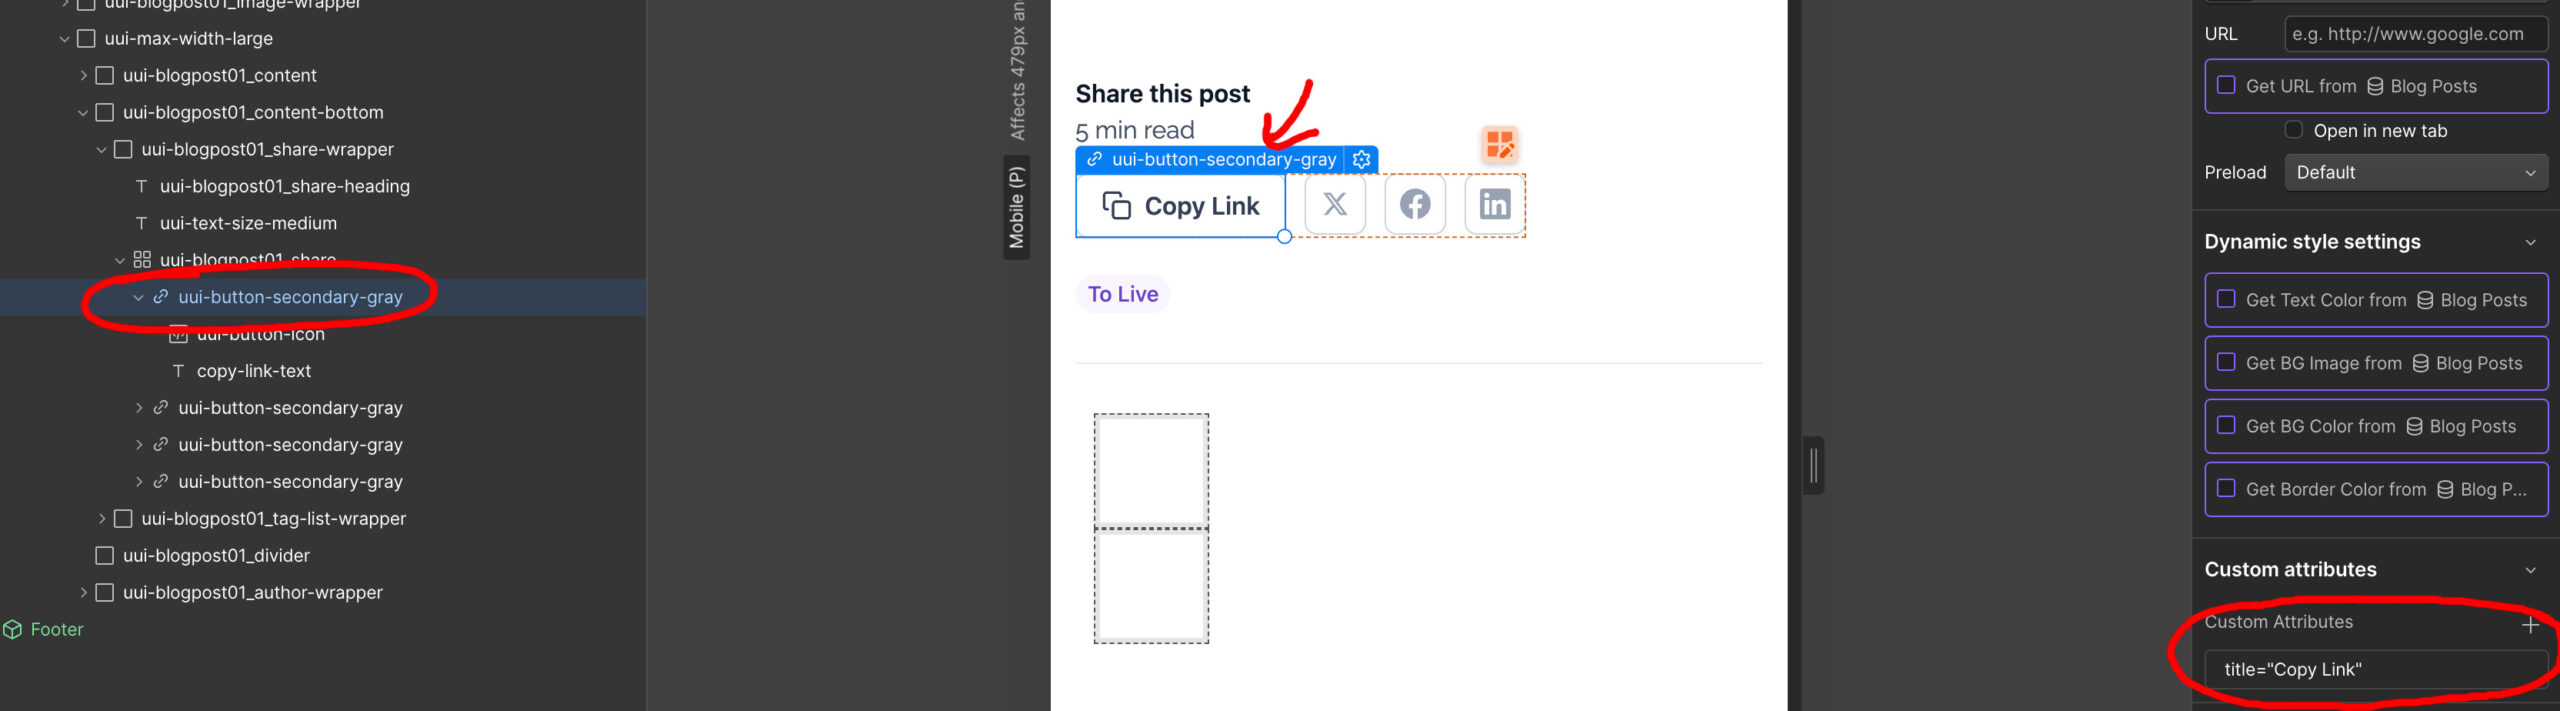
Step 1: Structure the Button in Webflow
Inside your button, separate the icon and the text.

Example structure:
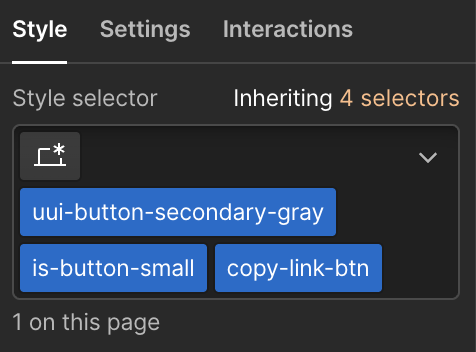
Button (include the class: copy-link-btn)
   Icon
   Text Block (include the class: copy-link-text)
       Copy Link
Why this matters:
If you change the entire button content with JavaScript, you can accidentally remove icons or reset interactions. Targeting only the text keeps everything stable.
Step 2: Add the Script
Place this code in:
Page Settings → Before </body>
or
An Embed element at the bottom of the page
<script>
document.addEventListener("DOMContentLoaded", function () {

  const buttons = document.querySelectorAll(".copy-link-btn");

  buttons.forEach(function(button) {

    const textEl = button.querySelector(".copy-link-text");
    if (!textEl) return;

    const originalText = textEl.textContent;

    button.addEventListener("click", function () {

      const url = window.location.href;

      navigator.clipboard.writeText(url).then(function () {

        textEl.textContent = "Copied!";

        setTimeout(function () {
          textEl.textContent = originalText;
        }, 2000);

      }).catch(function () {

        textEl.textContent = "Copy failed";
        setTimeout(function () {
          textEl.textContent = originalText;
        }, 2000);

      });

    });

  });

});
</script>
How the Script Works
Let’s break it down.
Waiting for the Page to Load
document.addEventListener("DOMContentLoaded", function () {
This ensures the script runs after Webflow finishes rendering the page.
Selecting All Copy Buttons
const buttons = document.querySelectorAll(".copy-link-btn");
This allows multiple copy buttons to work on the same page.
Finding the Text Element
const textEl = button.querySelector(".copy-link-text");
Instead of changing the whole button, we only update the text label.
This prevents:
- Icons from disappearing
- Layout shifting
- Interactions resetting
Copying the URL
const url = window.location.href;
navigator.clipboard.writeText(url);
This uses the modern Clipboard API to copy the current page URL.
Showing Feedback to the User
textEl.textContent = "Copied";
Then after 2 seconds:
setTimeout(function () {
  textEl.textContent = originalText;
}, 2000);
This gives clear feedback without permanently changing the UI.
Important Notes
1. Clipboard API Requires HTTPS
The Clipboard API works only on secure sites.
Published Webflow sites already use HTTPS, so this isn’t usually an issue.
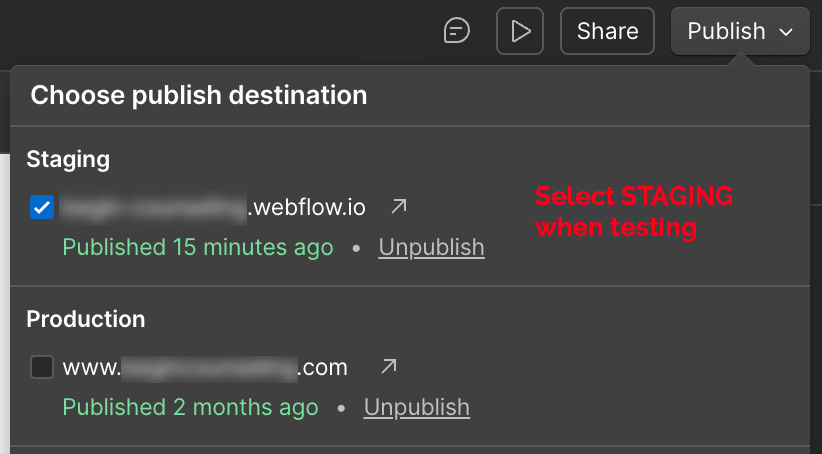
2. It May Not Work in Webflow Designer Preview
Always test copy-to-clipboard on a published site. Don’t forget that Webflow provides you a “staging” url for testing. You can publish to only that staging URL during development and then when ready for the public, you can publish to your live Production domain, too.
3. Multiple Buttons Are Supported
Because the script loops through all buttons, you can reuse this anywhere on your site.
Ideas for Optional Enhancements
I prefer that links include the Title attribute. You can add title’s for each link in the Attributes panel.
If you want to take this further, you can:
- Swap the icon to a checkmark when copied
- Show a tooltip instead of changing text
- Copy a custom URL (useful in CMS lists)
- Track clicks with analytics
When to Use a Copy Link Button
This works especially well for:
- Blog posts
- Event pages
- Promotions or referral links
- Documentation pages
Anywhere users might want to quickly share a page.
Final Thoughts
A small UX improvement like a copy link button can make sharing effortless and feel polished. The key is keeping the script lightweight and avoiding changes that interfere with Webflow’s structure.
Frequently Asked Questions
I was ultimately inspired by this Webflow video tutorial, but unlike the javascript provided in the video (shown below) which uses jquery, I ultimately used Vanilla JS. var $temp = $("
");
var $url = $(location).attr('href');
$('.link').on('click', function() {
$("body").append($temp);
$temp.val($url).select();
document.execCommand("copy");
$temp.remove();
$(".txt").text("URL copied!");
})
I wanted to use Finsweet’s Copy to Clipboard, but it proved to be pretty difficult to implement for Blog CMS template pages. Even when trying to use a Copy String option, to get the fully qualified URL for the blog post into the attribute field is tricky…everything just became more complicated than I thought it should be.
I found this video super helpful for a technique of using a collection to have a field show the URL/slug of your page. This could help if you’re still trying to go with a no code solution like Finsweet’s Copy to Clipboard.
This WebFlow forum post also details how to use a hidden embed field and the blog slug to implement Finsweet’s Copy to Clipboard, but it uses a hardcoded URL, which makes testing in staging and production a bit more difficult and opens up possible issues if directories every change.