
If you’ve ever wished Photoshop worked more like Illustrator—especially when managing multi-format campaigns—good news: it can. In this tutorial, I’ll walk you through using Photoshop artboards to organize assets, explore variations, and prepare designs for both print and web, all within a single document.
🎥 Prefer to watch? Check out the full video tutorial on YouTube.
Why Use Artboards in Photoshop?
Artboards let you:
- Organize multiple designs in one file
- Maintain consistency across formats (print, web, presentation)
- Iterate quickly on layout and visual ideas
- Visualize your full campaign at a glance
Step 1: Start with High Resolution for Flexibility
When working on a campaign, it’s common to reuse the same image or assets across different formats. Here’s how to future-proof your work if you’re starting with an image that you’ll use across a campaign.
- Open your base image in Photoshop.
- Go to Image > Image Size.
- Set your resolution to 300 DPI.
This ensures your design will be print-ready and still sharp for screen display (e.g., PowerPoint or web).
Step 2: Convert to Artboard Format
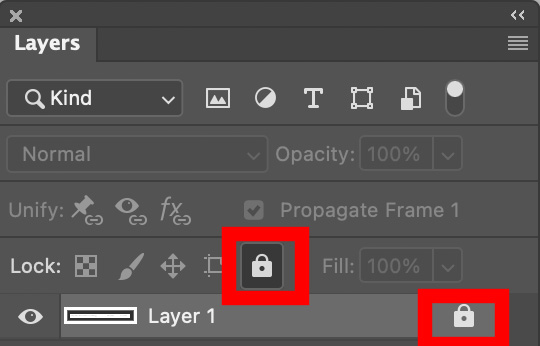
By default, Photoshop opens documents and images as a single canvas, but you can convert files to Artboard formats in multiple ways. First, go to your Layers Window.
- Unlock the background layer (click the lock on the right side of the Layer or select the layer and click the lock icon at the top of the Layers Window).
- Right-click the layer (or Control-click on Mac), then choose Artboard from Layers.
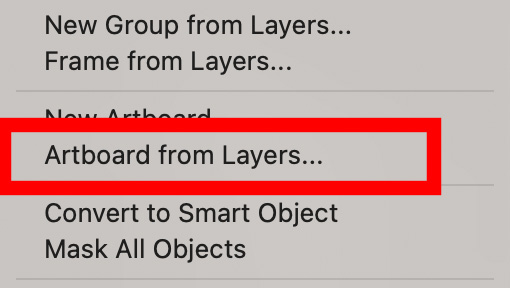
- Name your new Artboard—for example: “Photo” in the modal pop-up
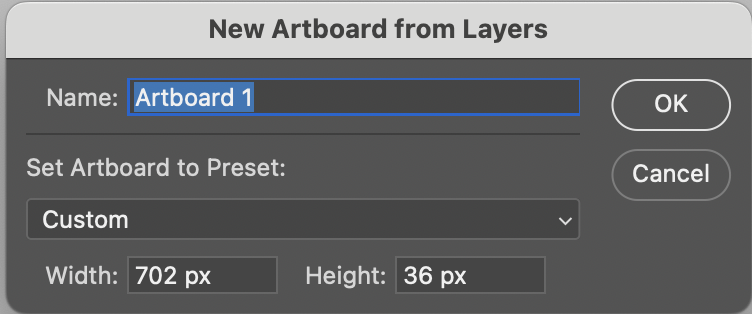
Now you’ve converted your standard Photoshop file into an artboard-enabled document.
Step 3: Add and Manage Artboards
Use the Artboard Tool (shortcut: Shift+V on Mac or find it under the Move Tool).
- With your first artboard selected, you’ll see plus signs on all sides. Click a plus sign to add a new, same-size artboard.
- Multiple artboards of the same size make it easy to try various design variations side by side.
You can:
- Delete artboards (Select Artboard > press Delete on keyboard)
- Draw custom-sized artboards by activating the Artboard tool, then click and drag on the background of your screen.
- Name artboards in the Layers Panel for clarity
Step 4: Set Custom Sizes (Print + Web)
You can work in inches for print and pixels for web.
For example:
- Print Artboard: 8.5 in x 11 in (Letter size)
- Web Ad Artboards:
- 728 x 90 px (Leaderboard)
- 300 x 600 px (Half Page)
Once drawn, go to the top toolbar to fine-tune dimensions. I recommend designing in the same ratio as the Web Ads, but in a much larger size. I find that this workflow and sizing make the design process easier!
Step 5: Rearranging & Organizing
- Use the Move Tool (shortcut: V, or Shift+V if you’re still in Artboard mode). Then drag by the artboard’s name to reposition it.
- Arrange horizontally or stack vertically for your preferred layout.
- You’re essentially building a visual dashboard for your campaign.
Step 6: Copying Assets Across Artboards
You can easily reuse and reposition assets:
- Hold Option (Mac) or Alt (Windows) while dragging a layer to copy it between artboards.
- Resize and adjust independently on each artboard.
- Drag layers inside the Layers panel as well. Each artboard acts like its own folder.
Bonus: Designing a Cohesive Campaign
This Artboard Campaign workflow lets you:
- Keep your branding consistent across sizes
- Compare multiple design directions at once
- Export each artboard individually (File > Export > Artboards to Files) and there’s even more ways to export smoothly from Photoshop shown in this video and PS Export Guide.
Wrap-Up
Photoshop’s Artboard feature is a powerful way to work in Photoshop more like Illustrator—ideal for marketers, designers, and content creators managing multi-size campaigns.
Want to see it in action?
📺 Watch the Full Video Tutorial on YouTube
When Multiple Artboards in Photoshop Aren’t the Best Option
While Photoshop’s multiple artboards feature can be a game-changer for managing multi-format campaigns, it’s important to consider your entire workflow, especially if you’re using InDesign downstream.
Currently, InDesign lacks the ability to directly link or place a single Photoshop artboard from a multi-artboard PSD file. Instead, it treats the entire PSD as one flat image, which complicates precise layout and asset management in your InDesign documents.
There’s a feature request on Adobe’s UserVoice for InDesign to support placing individual Photoshop artboards directly:
InDesign needs ability to link to single artboard of Photoshop document with many artboards
If your workflow involves handing off files to InDesign, it may be better to keep your Photoshop files separated or use other strategies, as relying heavily on multiple artboards can create bottlenecks.
Has your artboard background in Photoshop ever exactly matched your artwork, so that the edge of your project is hidden?
Yes, it’s rare, but it does happen – especially if you’re designing with a gray or black background.
Here is what happened to me: recently, I had my artboard background set to black. This meant that when I made a black canvas, I could no longer see the edge of my canvas. Yikes!
Here’s how to fix it:
Right-click on the area outside your artboard (Control-click on Mac if needed), then choose a new background color, like Light Gray or Custom Color. This adds contrast so you can clearly see your canvas edges again.
FAQs
You can see that an Artboard is selected when the Artboard Folder layer is selected/active (lighter gray) in the Layers Window (Panel). Also, the Artboard name on the canvas becomes bold when it is selected or active.
🔗 You Might Also Like:
- How I Use ChatGPT to Build JSON‑LD Schema Faster — Improve your SEO workflow by automating structured data.
- How to Stop YouTube Embeds from Showing Competitor Videos in WordPress — A must-read if you’re embedding tutorial videos like this one.
- My First Webflow Website: A Designer’s Honest Review — Curious how Photoshop skills translate to no-code tools? This post breaks it down.
💡 Ready to Level Up Your Design Workflow?
If you found this tutorial helpful, consider subscribing to this blog for more design tutorials, workflow tips, and real-world examples from a designer turned full-stack problem solver.
Or explore more tutorials on the Designer to Fullstack YouTube Channel.